PowerBook G3 Repair Marathon Report Out

Over the last weekend or so, I’ve been working on PowerBook G3s from the large lot of computers I’ve mentioned in a previous bLog article. This has been lots of fun, both a great learning experience about repairing this hardware, and after the repairs are complete an excellent opportunity to learn about using these systems, as I only used desktop Macintosh computers during this time period.

The largest number of systems that came in this lot were PowerBook G3s.  I have had this type of system on my short list for quite some time, but hadn’t got enough hands on experience with them to even know which one I’d like the best.

I started with the Wallstreet machines, the first of the G3 PowerBooks.  There were 10 of these systems...

It was quite a bit of work tearing them all down because they were in really rough shape, so a lot of them had to be separated from the top and bottom, and also I had to tear down and combine parts for one of the display panels.  Sometimes I had to combine parts from 3 or 4 different smashed systems to get back to one working machines, but like any challenge, it’s very gratifying to have gotten two working systems with Active Matrix screens...

These look pretty nice on the inside when they are open, but the display top covers are rough.  I'll be on the lookout for new ones.

I was also able to recover another two working Wallstreets with Passive Matrix screens...

It’s been interesting to install Mac OS on these machines (Mac OS 8.6), and see the differences between the Passive and Active Matrix screens.  I think the Passive Matrix screen on the 1400cs was superior to this G3 screen, but it may just be differences in the specific units that I have here (these backlights tend to shift colors after they get alot of hours on them.)

Moving ahead in time, there were 6 Lombard (Bronze Keyboard) G3s...

These were easier to work on, as they were in somewhat better shape.  There were only two display modules that had not been smashed, so I knew right away that I would only need to get two systems working, and here they are running side by side...

I installed Mac OS 9.1 on these after reading about a problem with the Sleep mode with earlier versions of the Mac OS.

Any last but certainly not least, the Pismos.  There were four Pismo machines...

These were in similar condition to the Lombards, much better than the Wallstreets.  But with only four machines, I was only hoping to get one "runner".  However, there were two functioning display modules in the lot, and so I was able to build two working machines, and here they are running side by side...

The display module on the right is significantly brighter and has better color than the one on the left, so I've swapped that display onto the machine that had Max Ram (1GB).  This was an almost unthinkable amount of RAM back in the day, and I've taken a page from Sean at Action Retro's book and ordered an IDE to SATA drive adapter to put some super fast flash storage in this machine.

But, to come back to which is my favorite, I do think the Wallstreets are pretty cool.  It was such an interesting and amazing time between 1998 and 2000 when the speed more than doubled.  I also have a soft spot for "last of" machines and the Pismo is the last portable with a SCSI port.  So I guess I still can't come back to which is my favorite.  I'll have to pick out the best one from each lot and spend more time trying to figure this out.

In the meantime, after repeating this process over and over again, I’ve developed a workflow for working with larger lots of machines like this.  I will share my experiences in case this could benefit others.  First, I'd read up about the model that I’m working with using both the official Apple Service Manuals and also looking through the iFixit tear downs.

Then, I’d go through and separate the display modules from the rest of the laptop, like this...
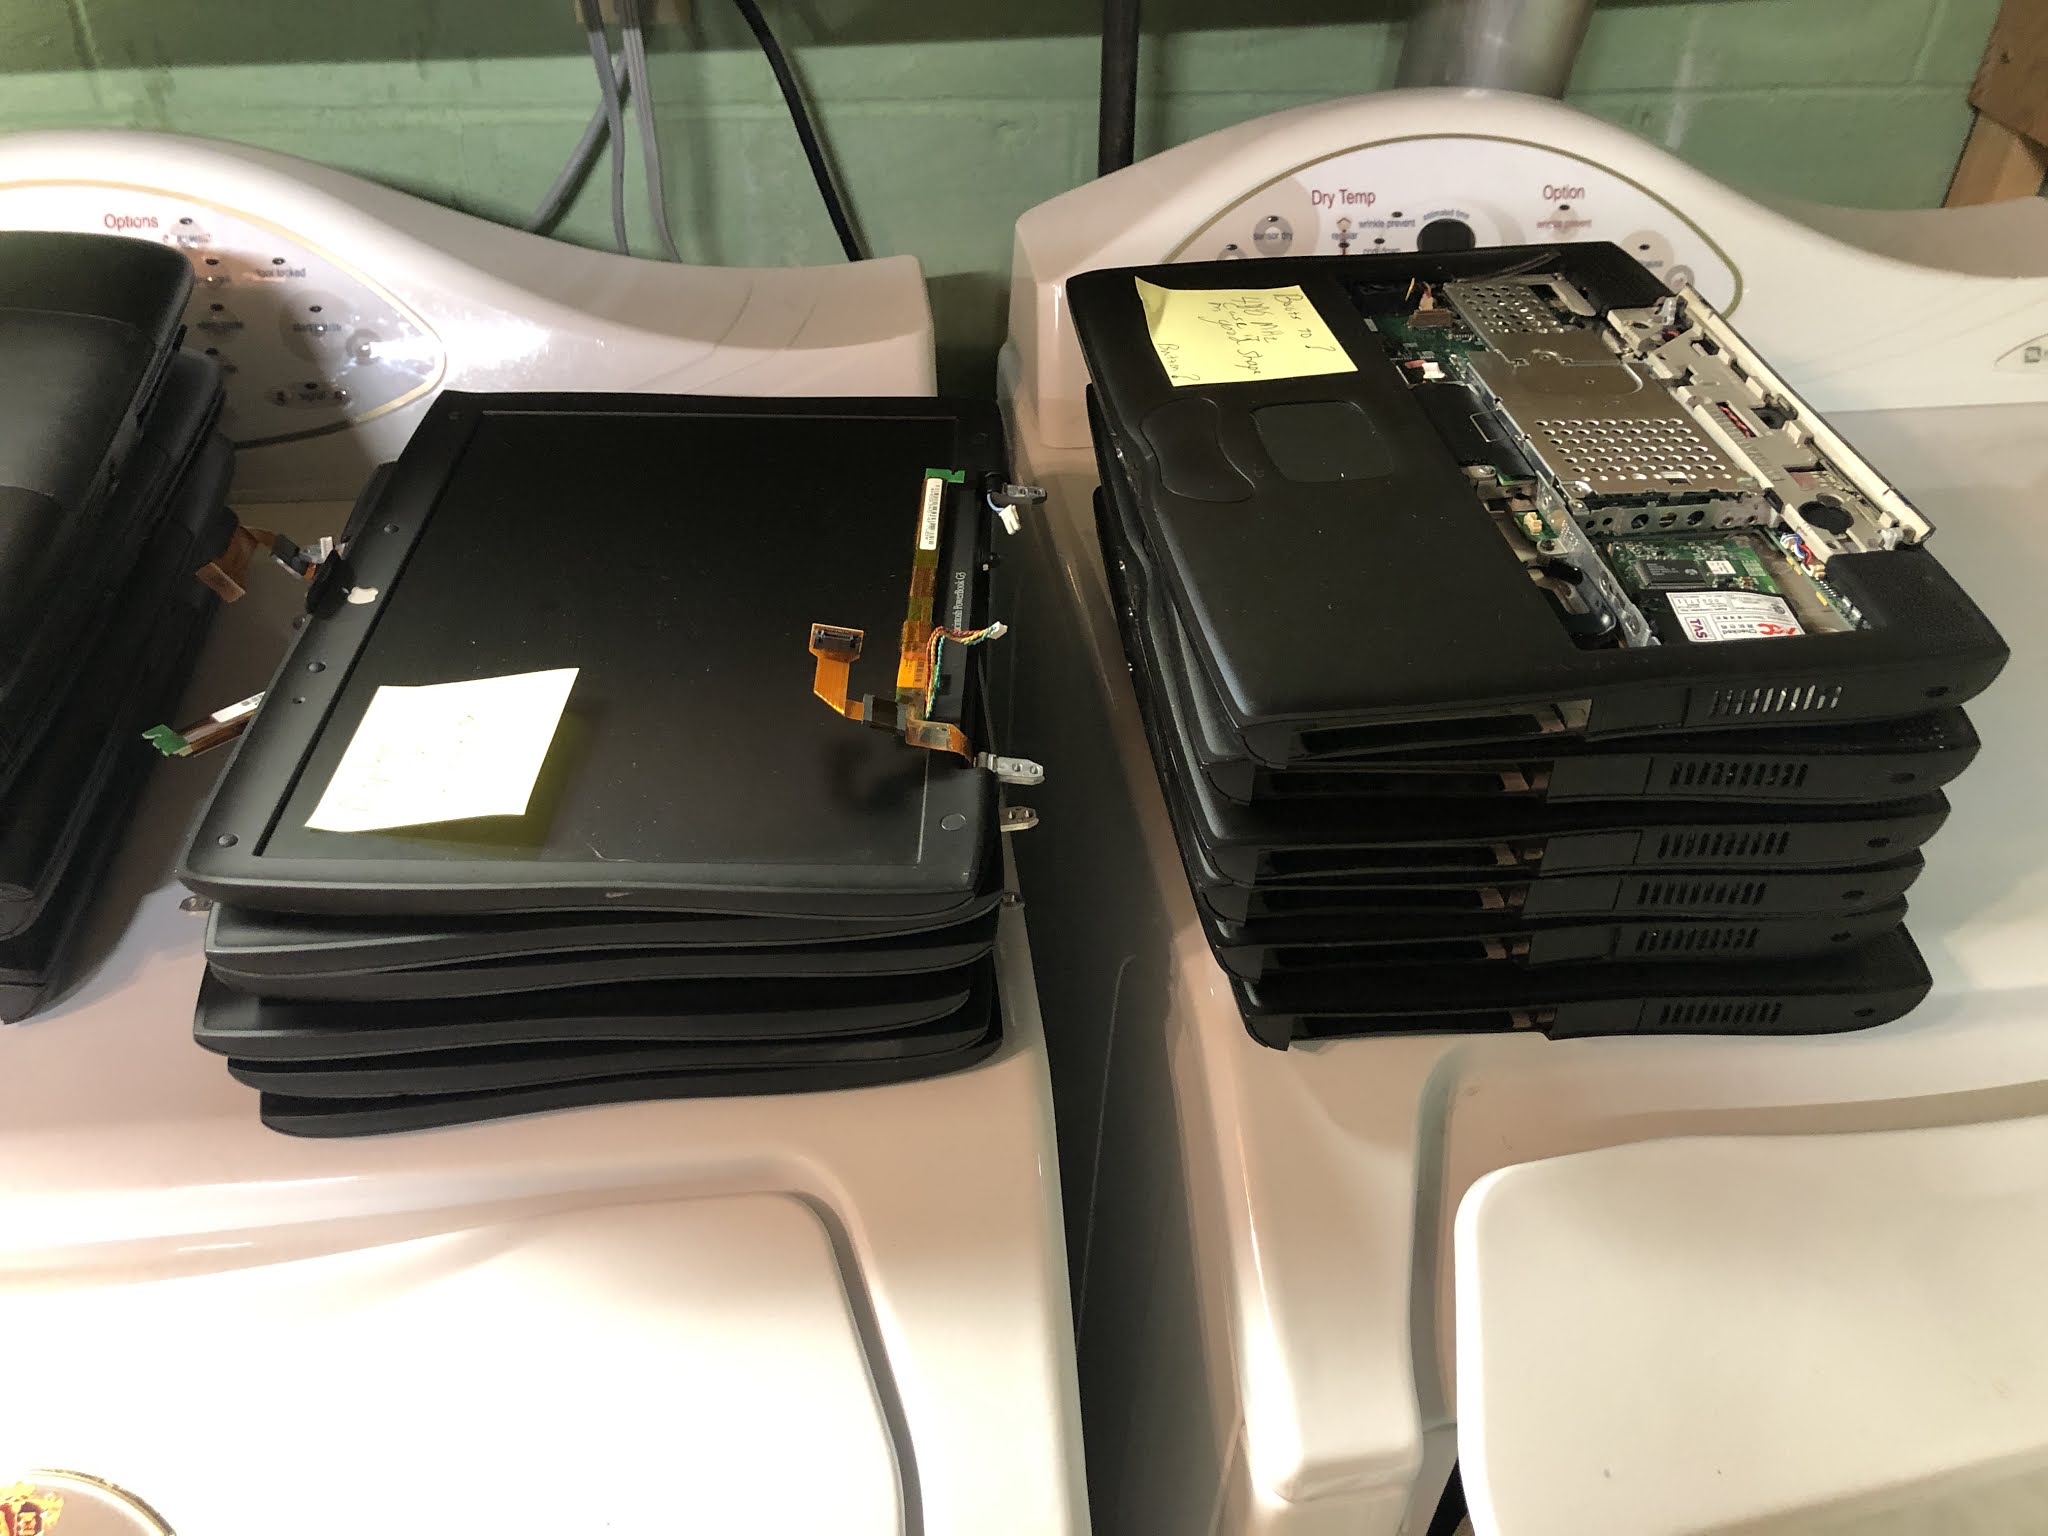
Once I'd identified one good screen and laptop pair, that could be used for troubleshooting through all the screens.

Once the screens were dispositioned, then I'd work on the bottom half.  If needed, several bottom units could be taken apart and combined together to get something that looked OK and was working.  

It’s useful during this process to understand just how little of the computer is required in order to get the Boot chime from a G3 Powerbook to check if progress is being made.  No display is required, no HDD is required and only minimal RAM, so you can test that the assembly is going OK without completely reassembling the computer.  The power board and sound card (if it is separate) are both required to get the Boot Chime.

I'll be using this system as I move into troubleshooting the Silver PowerBook G4s next.  The effort to recover these machines grows larger as the complexity (and number of fasteners) increases on the newer machines, so I am fortunate for the opportunity to start earlier in the PowerBook history and work towards the more recent machines.

PowerBook 3400c repair

Last weekend I worked on PowerBook 3400s from the large lot of computers I’ve mentioned in a previous bLog article. I’ve had one of these since last fall, I was fortunate to find it on Craigslist at a reasonable price, but that computer has been having display problems, the display gets brighter and dimmer at random.  I suspect that the backlight or inverter board  is failing so I was excited about getting some new screen components for this computer I already had.

There were three of these machines in the large lot of computers in April, and despite my initial skepticism I was able to get one running computer out of this lot.  This is a nice 3400c with the fastest 240 MHz processor.  I was super excited when I saw that one of these three machines was the 240 MHz machine, I’ve been interesting in the fastest machine in the line ever since watching Colin from This Does Not Compute’s episode about this machine.


There isn't much RAM in this machine, but since this is nicer than my Craigslist 3400c I’ll be moving the expansion RAM over too this machine and using this as my primary 3400c.  I have been using this machine as a Portable Bridge Machine for moving data around and making floppies since it has a lot of connectivity options, including a VST ZIP Drive for the expansion drive bay.

There is more hope for further repair on the Craigslist 3400c as well, since it’s likely that one or more of the backlight and inverter boards in the smashed screens are still working, but taking these display modules apart will be a tedious task, so that’s a project for another day.

PowerBook 1400s are Great!

I've been repairing my way through a huge pile of laptops I bought from my friend John @ Roadkill, Inc.  It's been alot of fun since I got to start in with the actual repairs.  I'm not just cleaning and organizing them anymore.

I've been moving up in age from oldest to youngest.  Last time, I blogged about the 5300s.  This next lot of computers I had was 1400 machines...


I brought 4 machines into this round of the project.  These, like the 5300s have been really great to work on.  I already have a 3400, a follow up machine to this machine, which I have worked on a bit.  These are from the pre iFixit era, there are not detailed tear-downs for these machines at that site, which I usually prefer over videos when I'm working a project like this, but having watched a few relevant YouTube videos, and with a bit of experience from the 3400, I started in.

I was able to get two machines running out of the four.  The first is a 1400cs with a passive matrix color screen...

This passive matrix screen is easier to use and has better viewing angles than many I've used.  It's still not great, but I think it's "best in class" for passive matrix.

By combining RAM modules from the various machines, I was able to bring this up to 52MB RAM.  It's IDE HDD was dead, so I replaced it with a larger drive from another machine.  As you can see, the speaker grill is missing, so I've got that on the wish list for later.

I purchased an HDI 30 Pin SCSI adapter on eBay so that I could use a ZIP drive with my old portable Macintosh computers.  It's fantastic to have access to Bootable SCSI Zip drives on everything from my PowerBook 145B up to the G3 PowerBooks that were the last to have SCSI Built in.  Taking a page from Adrian Black's book, I've setup a series of bootable ZIP disks with various versions of Mac OS on them...

I can take a non bootable system with a functioning HDD, boot off the Zip drive, format the HDD, and copy over a working system disk with very little effort.  Building this library has been a timesaver for this project and will be a great tool to have going forward.  This is especially important for the 1400s and earlier machines, because these laptops don't come with an Internal CD-ROM option.

But, back to the 1400s.  The second running system I got was a 1400c, with an Active Matrix screen...

This machine has the faster 133 Mhz processor and 56 MB RAM, the original HDD still works, so it's only a 750 MB drive, but more than enough for my purposes.

I put Mac OS 8.1 on both of these machines, and they run great.  They really are a significant step up from the 5300 in terms of quality, it was noticeable in doing the repairs.  They just look and feel alot better than the 5300, even after just a few hours of use doing Mac OS installs.  I'm quite pleased to have these in the collection and I plan to clean them up a bit more as they still have some of the scuffs and scratches on the outside of the case.

These are the first of the PowerBooks that I have which use the larger 9mm Barrel Jack Power Supply.  These 24V power supplies were used up through the Clamshell G3 iBooks, so these 1400 machines could be powered using the early Yo-Yo power adapters.  Although the 1400 originally shipped with a lower capacity Power Supply, the M4896 Power Supply is the correct color, and a bit more flexible since it provides 45 Watts.  I was able to get a couple of these from a friend of mine that volunteers at Free Geek Twin Cities, so I'm a bit closer to the goal of having one Power Supply for every working computer.  These are becoming more and more expensive on Fleabay, so I may have to resort to a hack like this.  Stay tuned, I've already started on the Wallstreet G3s, and after I get the Pismos up on the workbench then I'll have a better handle on how many power supplies I need to find.

Is the PowerBook 5300 the worst Macintosh Laptop of All Time?

 As I've mentioned in a previous post, I got a large number of laptops from a friend in April.  I've been slowly working through the stack, sorting, categorizing and organizing.

There are several types of PowerBooks that I've never seen or worked on before, including PowerBook 500 series and PowerBook 190 and 5300 series machines.  I didn't even have a Power Adapter for the 190 / 5300 series machines, so although there were 9 total machines in the lot, I could not do power on testing.  I was able to find an original Power Adapter on eBay for a reasonable price, and so I purchased it knowing that having the ability to work on and test the machines (even one at a time) would justify the expense.  Also, I was hoping to reverse engineer it a bit to see how to make a cheaper power adapter from parts since these are of a type and vintage that's getting harder to find.

When the power supply arrived, I started doing intake on these machines.  It was exciting to go through all the machines and see how many would start and what kind of condition they were in.  To make a long story short I was able to get 3 working PowerBook 5300s and one working PowerBook 190 out of this lot.  There are also several more functional screens and some housing parts, but not enough parts to build another working computer.

It's been fun to work with these machines.  I find that the "last of" machines are often as interesting as the "first of".  In this case the PowerBook 190 is the last of the 68K Macintosh PowerBooks, and the 5300 is the first PowerPC based PowerBook.  The 190 didn't have an active matrix LCD so that makes for a compromised experience, but I've quite enjoyed working on the 5300s as these are all Active Matrix screens.  I know the 5300 has a reputation for being the worst Macintosh Laptop computer ever released, but I really enjoyed working with them, perhaps because of my lowered expectations.

Perhaps one of my favorite things about these machines is how easy it is to service them.  These really were designed with service in mind, and it doesn't take that long to strip one down to parts.  For two of the four machines, I had to do a main logic board swap because the metal frames had been broken and it really didn't take that much time.

The PowerBook 190 / 5300 machines use a standard 24V supply with less than 2A draw.  They also use a small barrel jack which is center positive.  The barrel jack has a 3.8 mm OD, which appears to be a standard size but it's recessed into the body of the laptop in a hole that has only a 6.6 mm diameter. All of the field replaceable barrel jacks that I can find online have an 8 or 9 mm housing for the wires that will not fit inside the recessed hole on the Macintosh.  I have not been able to find an off the shelf connector that will work.  I looked through my stash of saved adapters and cut off adapter ends, and I found only one over-molded connector with the right jack dimensions, but I had to shave down the outside of the connector with a razor knife before it would fit in the recessed hole.  Let me know if you are aware of another work around, or a source of inexpensive 190/5300 compatible power adapters?

The next unresolved challenge is the battery compartment.  I certainly don't want to put used batteries back into the machine, but all of these machines have a gaping hole were the battery is supposed to go in.  One of the things that I like about the PowerBook 1xx series is that the battery door can be removed from the cells and replaced on the machine to create a finished look without batteries present in the machine.  This battery pack lacks that feature.  I did test the one 3400 series battery that I have and it fits in the case.  I think the best solution here would be to 3D scan the housing of that battery and 3D print an empty shell of this size to fit, just like the "Weight Saving Device" for later machines.  Unfortunately, I do not have access to a 3D scanner.  Any other ideas?  Let me know in the comments below, and in the meantime, it's off to the 68KMLA forums for me to do some reading!

I Bought More Than 100 Laptops

John from Roadkill Inc is someone that I’ve gotten to know over the last few months.  He lives here in the Minneapolis / St. Paul area and we share a love of Retro Computing.  See his YouTube channel here...  I've been doing repairs (and attempted repairs) for John in exchange for broken retro computers, at least one of which has already been featured on my bLog, the Orange Clamshell Trash to Treasure article.

John is downsizing his collection, and he offered various portions of his collection of low-grade machines in order to avoid having to move them.  He offered me a deal I couldn't refuse, thanks John!  I purchased 118 laptops, and used my minivan to move them...

If you've watched John's channel before, you'll know that these have all been recovered out of the eWaste stream at a recycler.  Some of the machines he gets are in good shape, but these are all C and D grade machines, so until I've had a chance to clean each one and try to power it up and evaluate, hauling them like this isn't going to cause significant additional damage.

Here's another picture setup in the garage at home...

In the foreground, we have G4 White and Translucent iBooks from the early 2000s, mostly 12” machines, but some 15” iBooks.  The Aluminum machines are 15" Powerbook G4s from the early 2000s.  These machines are about 20 years old, and have just started to regain popularity as these are the last machines that can run Mac OS 9.2 in the "Classic" environment on Mac OS 10.  To the right, there are a bunch of PowerBook G3s, and behind on the table saw are the grey and black 68k and early PowerPC PowerBooks.

For intake, I’m cleaning the outside of each computer using water and a microfiber cloth to get most of the dirt off so that they can be stacked without causing additional scratches and damage to one another.  Then, I’m powering each machine up and writing a post it note about what I observe.  This is just a condition check, there is no significant troubleshooting happening at this stage, just trying to figure out how many of these have signs of life, how many good screens there are, and if there are groups of machines that should be combined to make one good machine.

Just this intake process alone has proven to be several weekends worth of work, but I got my car back in the garage, so it’s going well!  I’ll provide some highlights from the oldest machine in the lot too the youngest...

The oldest classic Mac in the lot is a PowerBook 150.  I’ve already fixed up and rescued a PowerBook 145B from John that I built up out of two recycled machines.  The screen is a bit weak and flickers on my 145B, so I was hoping to use the screen from the 150 if it was not smashed, but unfortunately, they are not compatible. However, I still may be able to use some of the case plastics off the 150 to improve my 145B.

There are two generations of PowerBooks for which I have no power supply, and can’t do power up testing.  The PowerBook 500 series, and the PowerBook 190 / 5300 series.  The four 500 series machines that I have are incomplete and I won’t be able to make one functioning machine out of them.  Also, this series has a bit of an odd 4 pin plug, so I may take a pass on this repair and trade these parts machines to another collector.  The PowerBook 190/5300 series machines use a 24VDC barrel jack, I will have to sort through my saved power supply drawer and see if I have something that can work for this.

There were four 1400 machines, and I was pleased to see three 3400s as well.  The 1400s are a gap in my collection and I think I’ll be able to get one or two running machines out of this lot, as there are two working screens here.  The 3400s are not complete machines, none of the three had a keyboard, so I could not do power on testing.  I already have a 3400 I got off Craigslist last year. That computer has a screen that works, but is a bit flickery (it probably needs a recap) Maybe there will be a screen here that I can use and I’ll certainly keep a parts machine.  So there are a couple of projects in this group of machines.

The G3 PowerBooks use the same power supply as the Clamshell G3 that I have.  These machines are in rough shape but there are machines that boot and there are good screens in the lot.  I will have to combine parts from 3 or maybe even 4 machines in order to get one running computer, so this will be a lot of work!  I’m hopeful that I may be able to get 2 working Wallstreet machines and 2 working Pismo machines out of this lot.  At this time, I don’t have any of these black G3 machines in the collection, and this is one of my favorite eras of Retro so these are the machines I’ll probably work on first when I do get through intake and into the process of actually fixing them.

There are 39 iBooks ranging from the translucent to the solid white ones.  Although I did not bLog about it, I've already repaired five of these white iBooks from a previous lot from John and I enjoy working on this generation of machines. These are considerably more repairable than the current offerings from Apple, who have adopted an Anti-Repair stance.  While I'm on my soapbox, have you signed the Minnesota Right to Repair petition yet?

I have completed intake on these machines and as expected they are be in better shape.  Yield on these should be about 2/3s of the machines, but again these are recycled machines, so there are no museum pieces here.  I will likely keep some of these machines, but if you live in the area, keep an eye on Craigslist as I plan to sell some of these off to fund further adventures in Retro Computing.

There are 43 15” Aluminum PowerBooks.  These are the last of the PowerBooks, and the last PowerPC laptops that Apple made.  After completing intake on these, I’m hoping to get about 1/2 of these machines working (given enough time for repairs).  The biggest challenge with these is that dents in the top cover of the laptop can cause dark spots on the display even if the display isn’t smashed.  If anyone has any tricks for pulling dents out of Aluminum PowerBooks please let me know in the comments.

Well, as you can see, this purchase has left me with projects that should last a good long while.  I’ll keep updating the bLog about these repairs as I go along.  Thanks for reading, and please do let me know in the comments if you have you any good memories of these machines, or if you have any suggestions for me about how to do the repairs?

Compaq Deskpro XL 590 - Pentium Workhorse

I recently acquired two Compaq Deskpro XL 590 computers from Free Geek Twin Cities, the pair were labelled as a Project PC, and sold at an enticingly low price.  I was pretty excited to see this because I'd recently damaged my Epson Pentium 75 machine, which was a favorite in my Retro Computer collection, and one of the first that I'd acquired.

The Compaq PCs were in pretty rough shape, as you can see here...

This is an interesting system, it's got a processor on a slot but it's not a passive backplane computer.  There's quite a bit of logic on the mainboard, including; audio, SCSI, IDE, and Ethernet.  The CPU and RAM are on the processor slot, which is almost a full length card.  Modern Classic on YouTube recently did a series of vides on this hardware which you can find here, here, and here.  He started out with a 486 and upgraded to a Pentium 100.

My systems are a Pentium 90 with 16 MB of Built in RAM, these systems have two PCI cards slots, and the rest are EISA slots.  I've never had an EISA system before, so that was an interesting aspect of this build. My goal for this machine is to get Windows 95B running and have a boot menu configuration for DOS gaming or for starting up the Windows 95 GUI.

I had quite a few interesting challenges getting this computer going.  The first was the BIOS setup program.  The BIOS setup program for this computer shipped on Floppy Disks, and can be installed into a small partition on the hard drive, but as with most recycled computers, these machines shipped without a Hard Drive or any floppy disks or documentation.  So,  I started Googling around and used the Wayback machine to figure out what the last set of drivers for this board were.  Having this information was only the start of the struggle, since HP has turned off the FTP site where they had been hosting the old Compaq Softpaqs for many decades.  I asked for and received some good advice about locating these files on the Vintage Computer Forums.

One of my goals for the system is to use it as a Disk Imaging system with a Go-Tek floppy drive emulator with FlashFloppy firmware loaded on it.  I have a couple of these, one lives permanently in my pentium, and the other is a "floater" Go-Tek that's used for building and testing systems.  Using the Go-Tek, I was able to convert the odd Compaq Softpaq Executable files into the more useful IMG Disk Image file format.

I have collected up the drivers I needed to build a Windows 95B machine, and I will link the file here, this includes:
System Diagnostics SP16085
System Configuration Disk 1 - 4 SP6144
Firmware Update (Final 4/7/1997) SP3642
Matrox Millennium PCI Video Card Drivers for Windows95 SP2754
Onboard Ethernet Driver SP1649
Onboard SCSI Driver SP1664

Once I had the disks needed, it was time to start the build.  I wanted to use Compact Flash media for the Hard Disk Drive, but I had no end of problems with a couple of off brand devices that I tried, so for now I've defaulted back too a 6GB Quantum Fireball IDE drive that I had in the parts bin.  The System Configuration utility was able to recognize the drive and startup without error.  Once the System Configuration utility is able to start without error, if there's a blank drive it will offer to install the System Configuration into a partition on the Hard Drive, which I did for convenience.  At that point you can Fdisk the rest of the drive and setup your partition for Windows 95.  This part of the install was normal and painless.

I've moved all the goodies from my Epson computer over to this one.  I've added 128MB RAM, a 52X CD-ROM, a Go-Tek, a newer ISA SoundBlaster 16, a 3Com 3C905C Fast Ethernet card, and a Parallel port Zip drive to use for "Sneakernet".  The case cleaned up pretty good, although it did have some paint missing on the corners...


I'm quite happy with how this machine has turned out.  I still have quite a bit of tweaking left to do to get all my DOS games back up and running, but that is a big part of the fun.  It's great to have a running Pentium class machine back in the stable!

Here's the machine running Internet Explorer 4.0 and using the excellent new FrogFind.com search engine for Retro Computers from Sean at Action Retro...


Next, I need to get the Boot Configuration Menu going, I'll probably copy something from Phil's Computer Lab's MS-DOS Starter Pack.  Also, I've ordered some Industrial CF cards to try again too move the Hard Drive over to Solid State media, but in the meantime, this machine should be tons of fun.

My first CP/M Computer

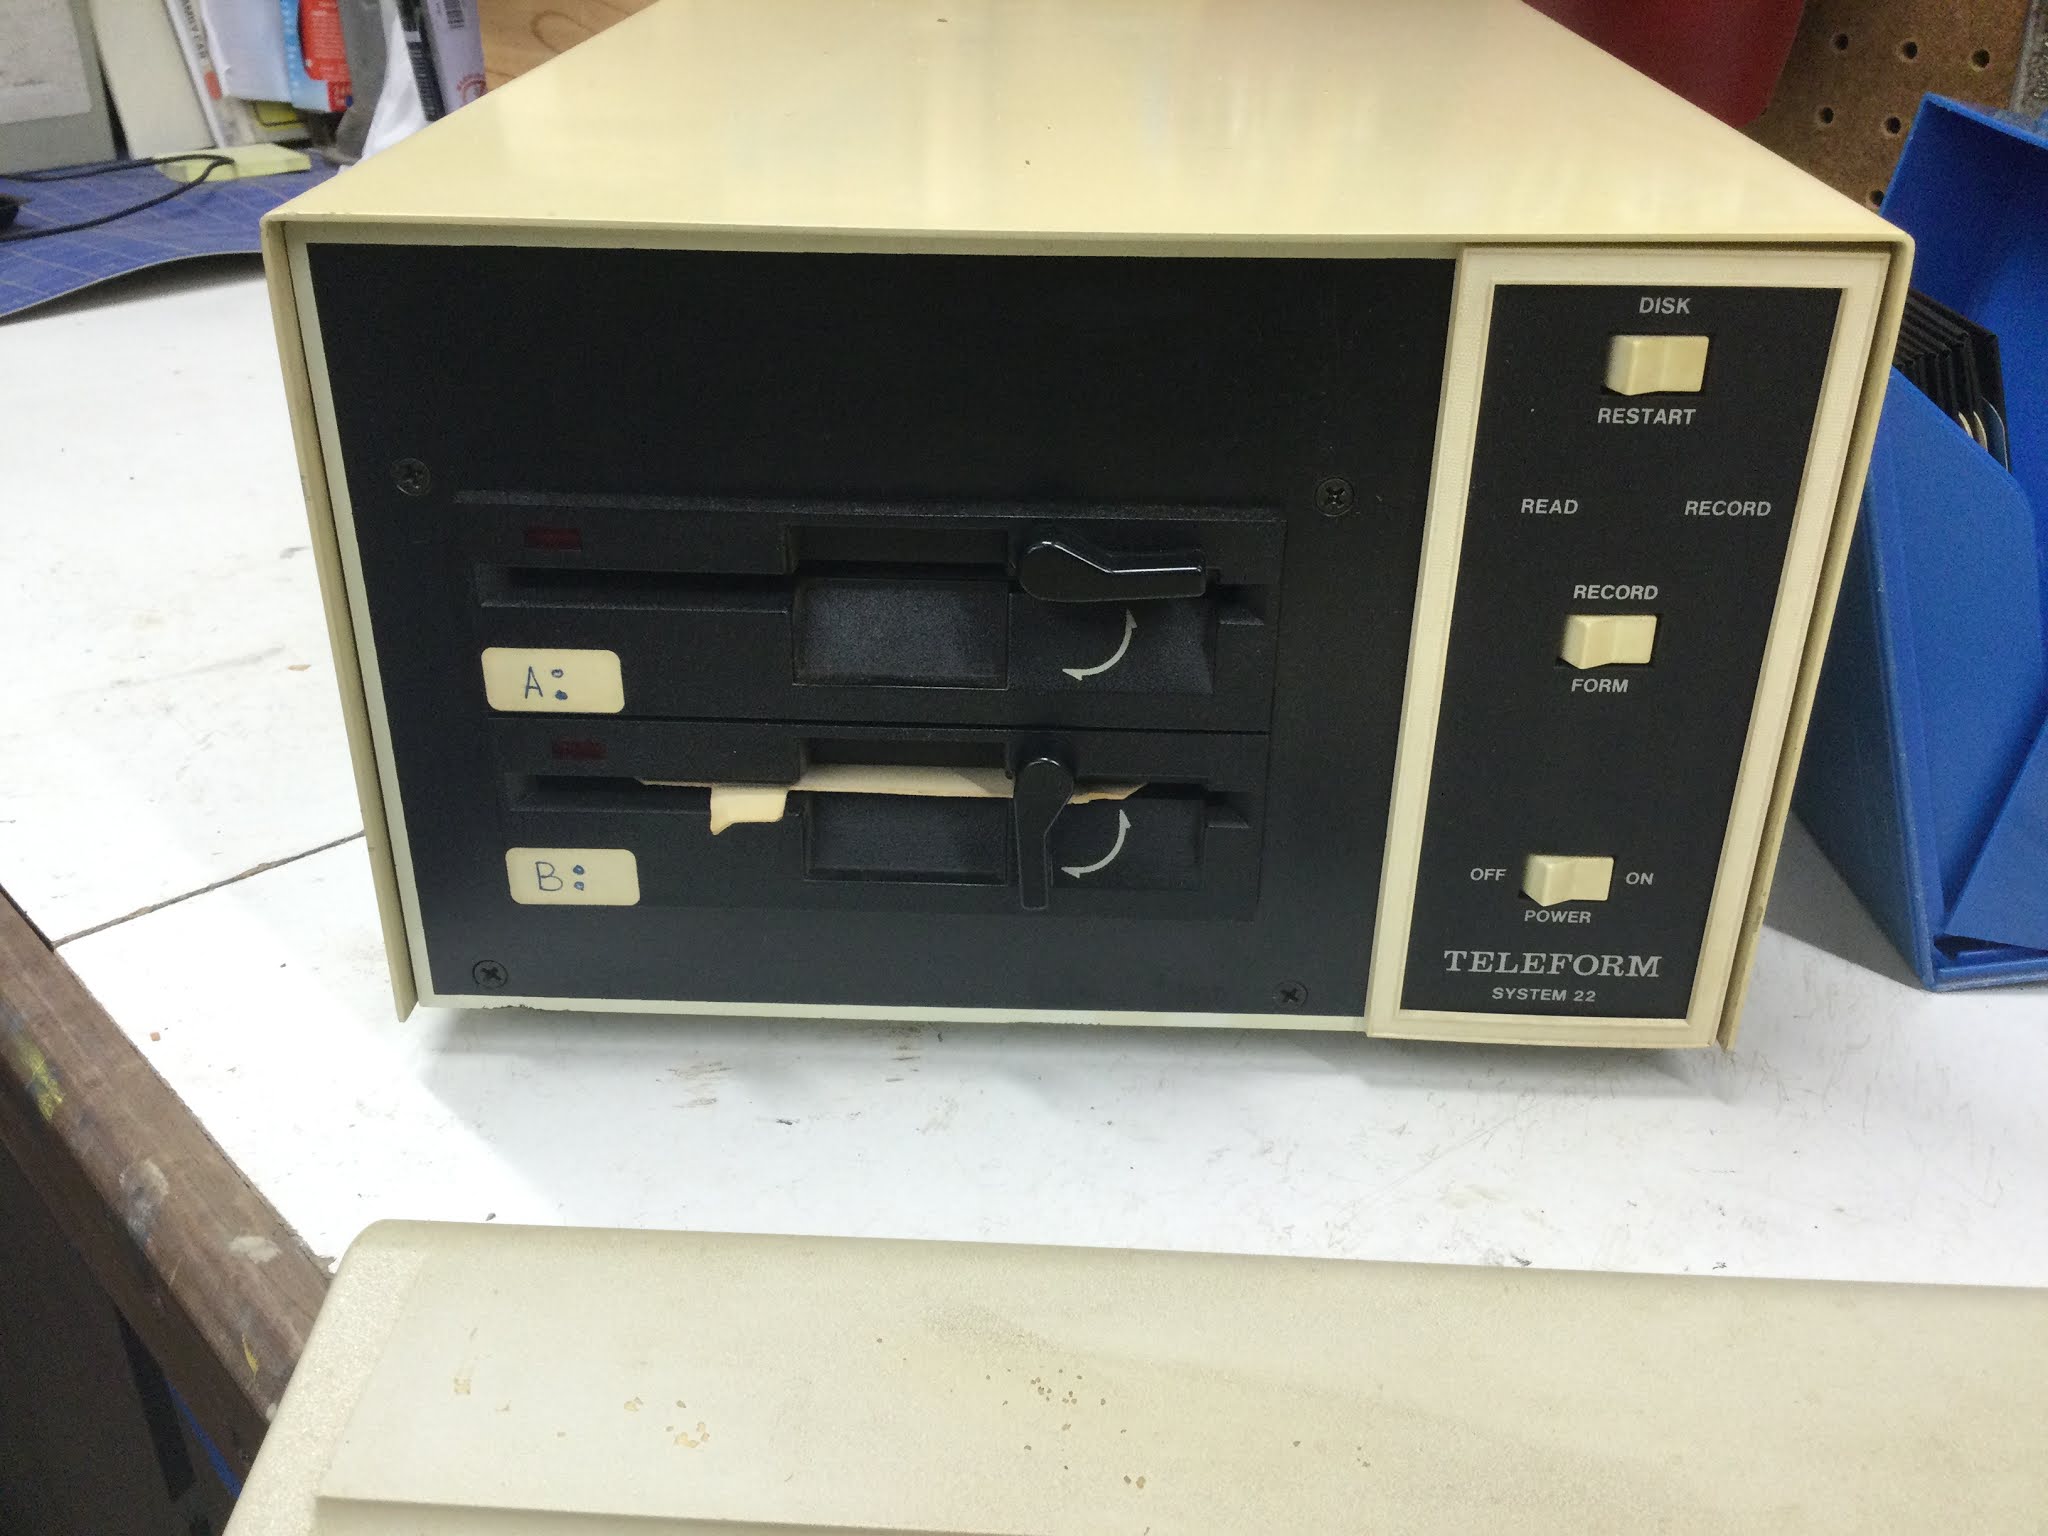
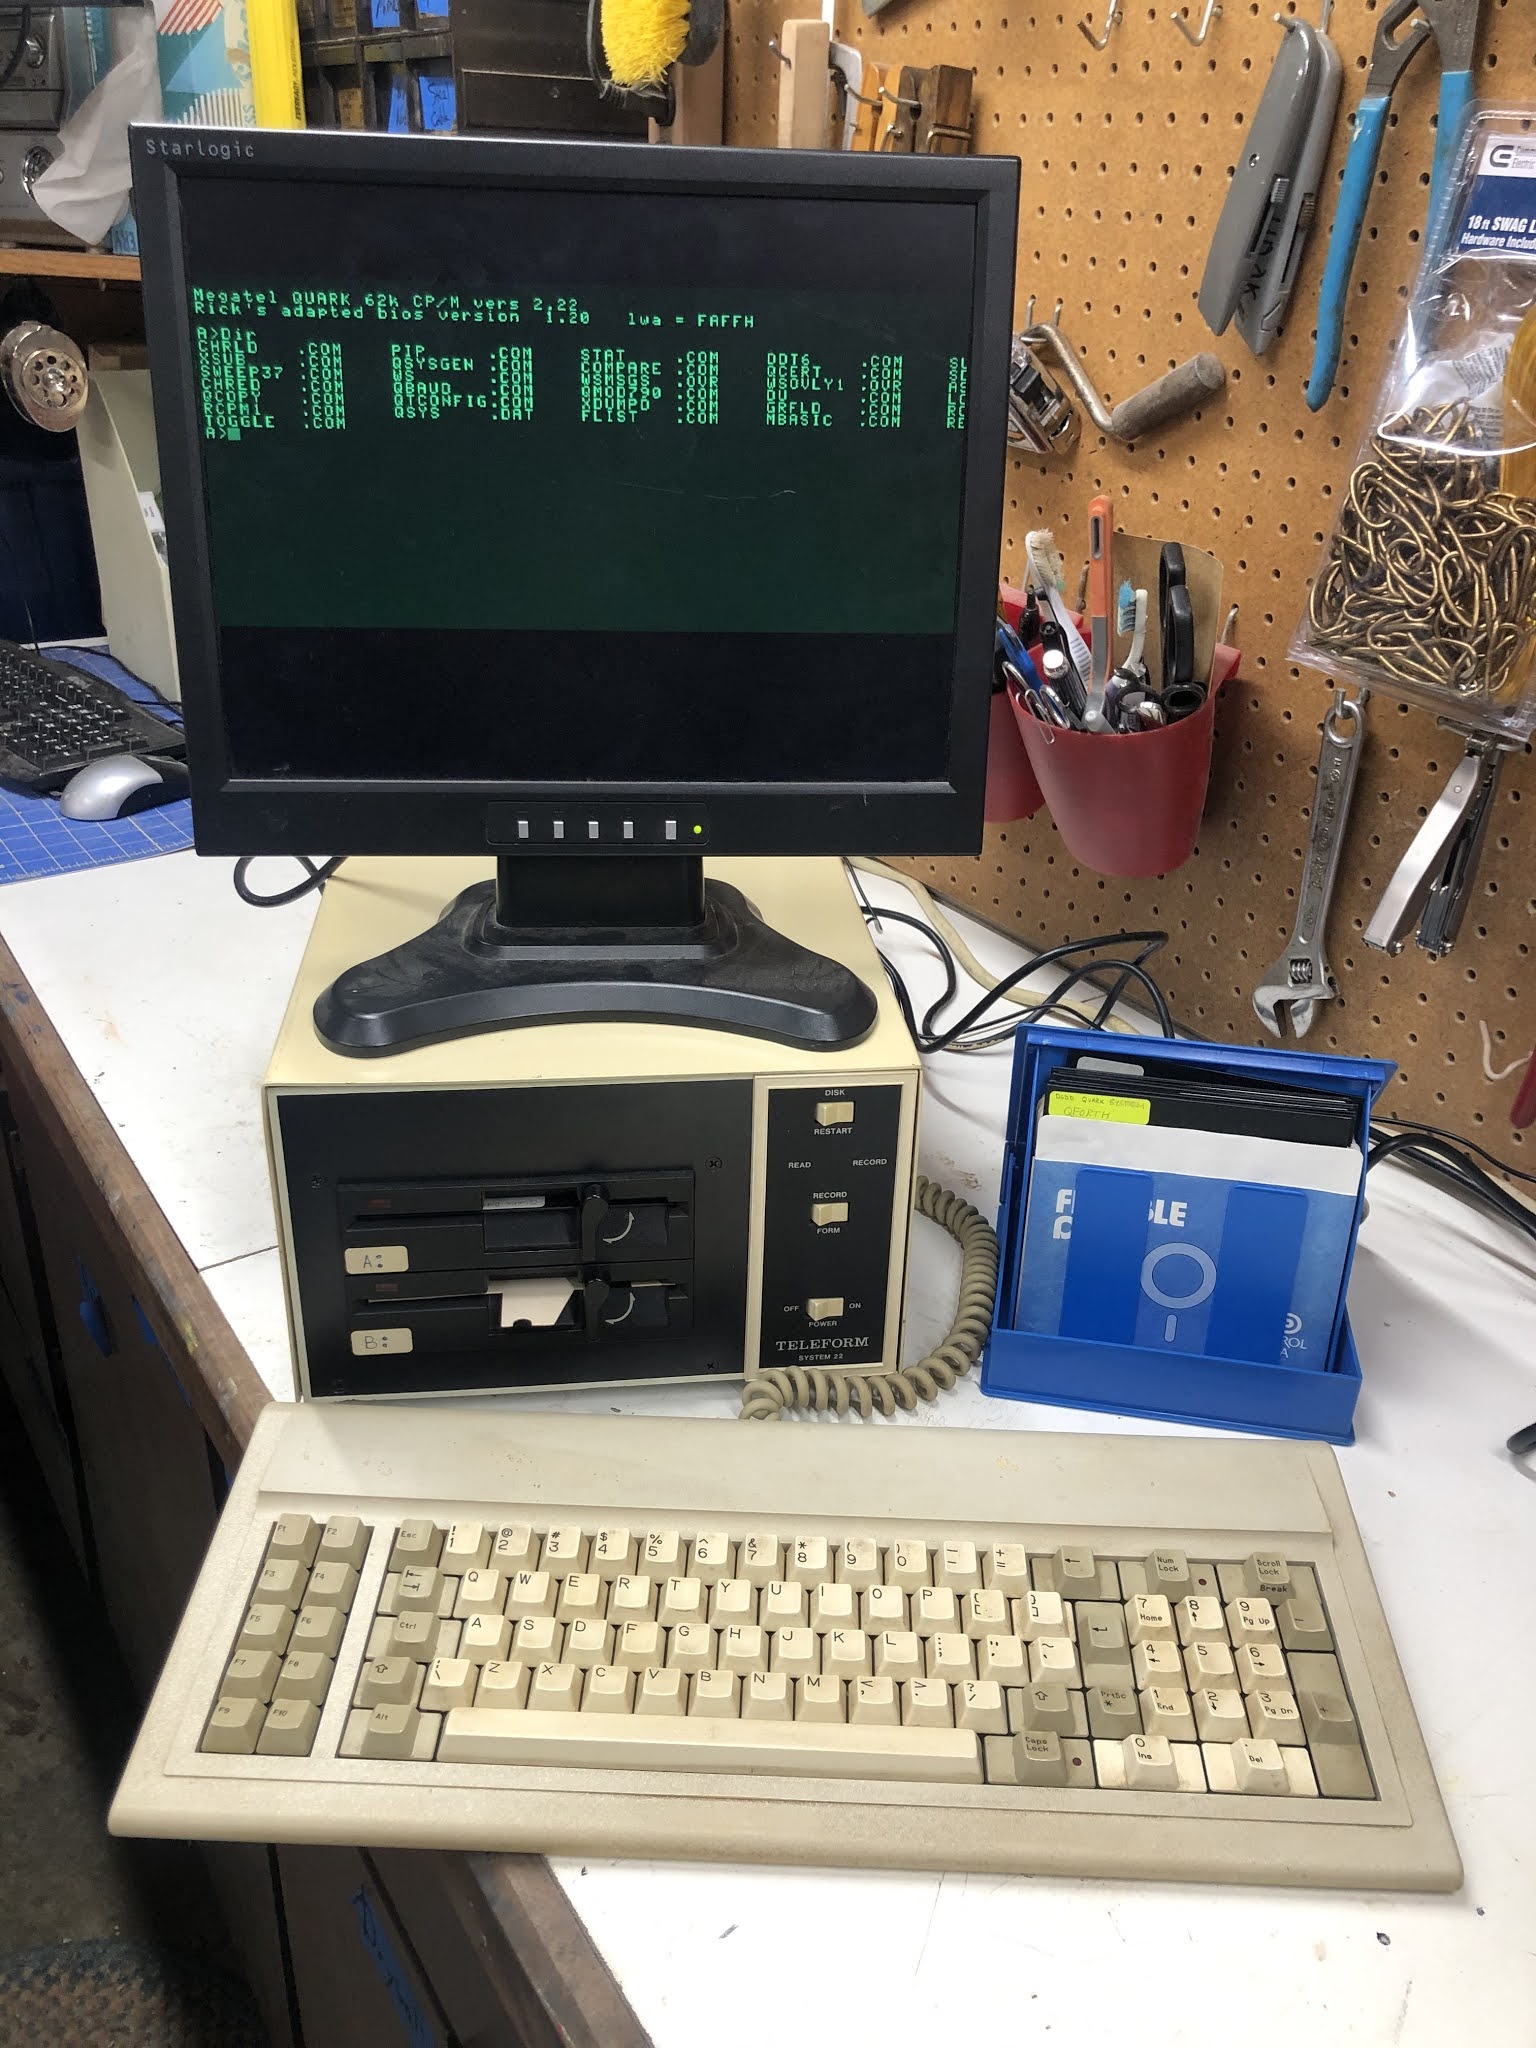
A few weeks ago an intriguing post popped up on Craigslist.  It was for a CP/M computer that someone here in the Minneapolis / St. Paul Metro area had built up from the board level in 1983.  I believe the builder re-used a piece of old test equipment as the Chassis, and perhaps the power supply that was in the Chassis as well, but the computer itself is a Megatel Quark 100 computer.  This was a Canadian firm.  The computer is a Z-80 based system with 128K of RAM (64K available to CP/M), and two Teac 360K floppy drives.  (I'm still not sure what the formatted capacity of the drives is, since I'm a CP/M newbie.)

At some point the previous owner had recycled the Monitor.  I don't have an MDA / Hercules compatible monitor in my collection, so I ordered and waited for an MCA2VGA to arrive from TexElec.

Once I got the video adapter and a 9 pin male to 9 pin male straight cable, I was able to fire the machine up and test it for the first time, it boots and runs well...


There appears to be an issue with the Horizontal Sync timing on the MCA2VGA adapter, as the last few columns of text on the right hand side are cropped.  Also the video is compressed vertically too about 1/2 of the height of the screen, so I'm not sure what's going on there.  The manuals for the Quark mention specific horizontal refresh timing, but I'll have to dig in on what the timings are supposed to be for MDA / Hercules in order to understand why this isn't working on MCE2VGA.  I'm also on the lookout for a period correct monitor.

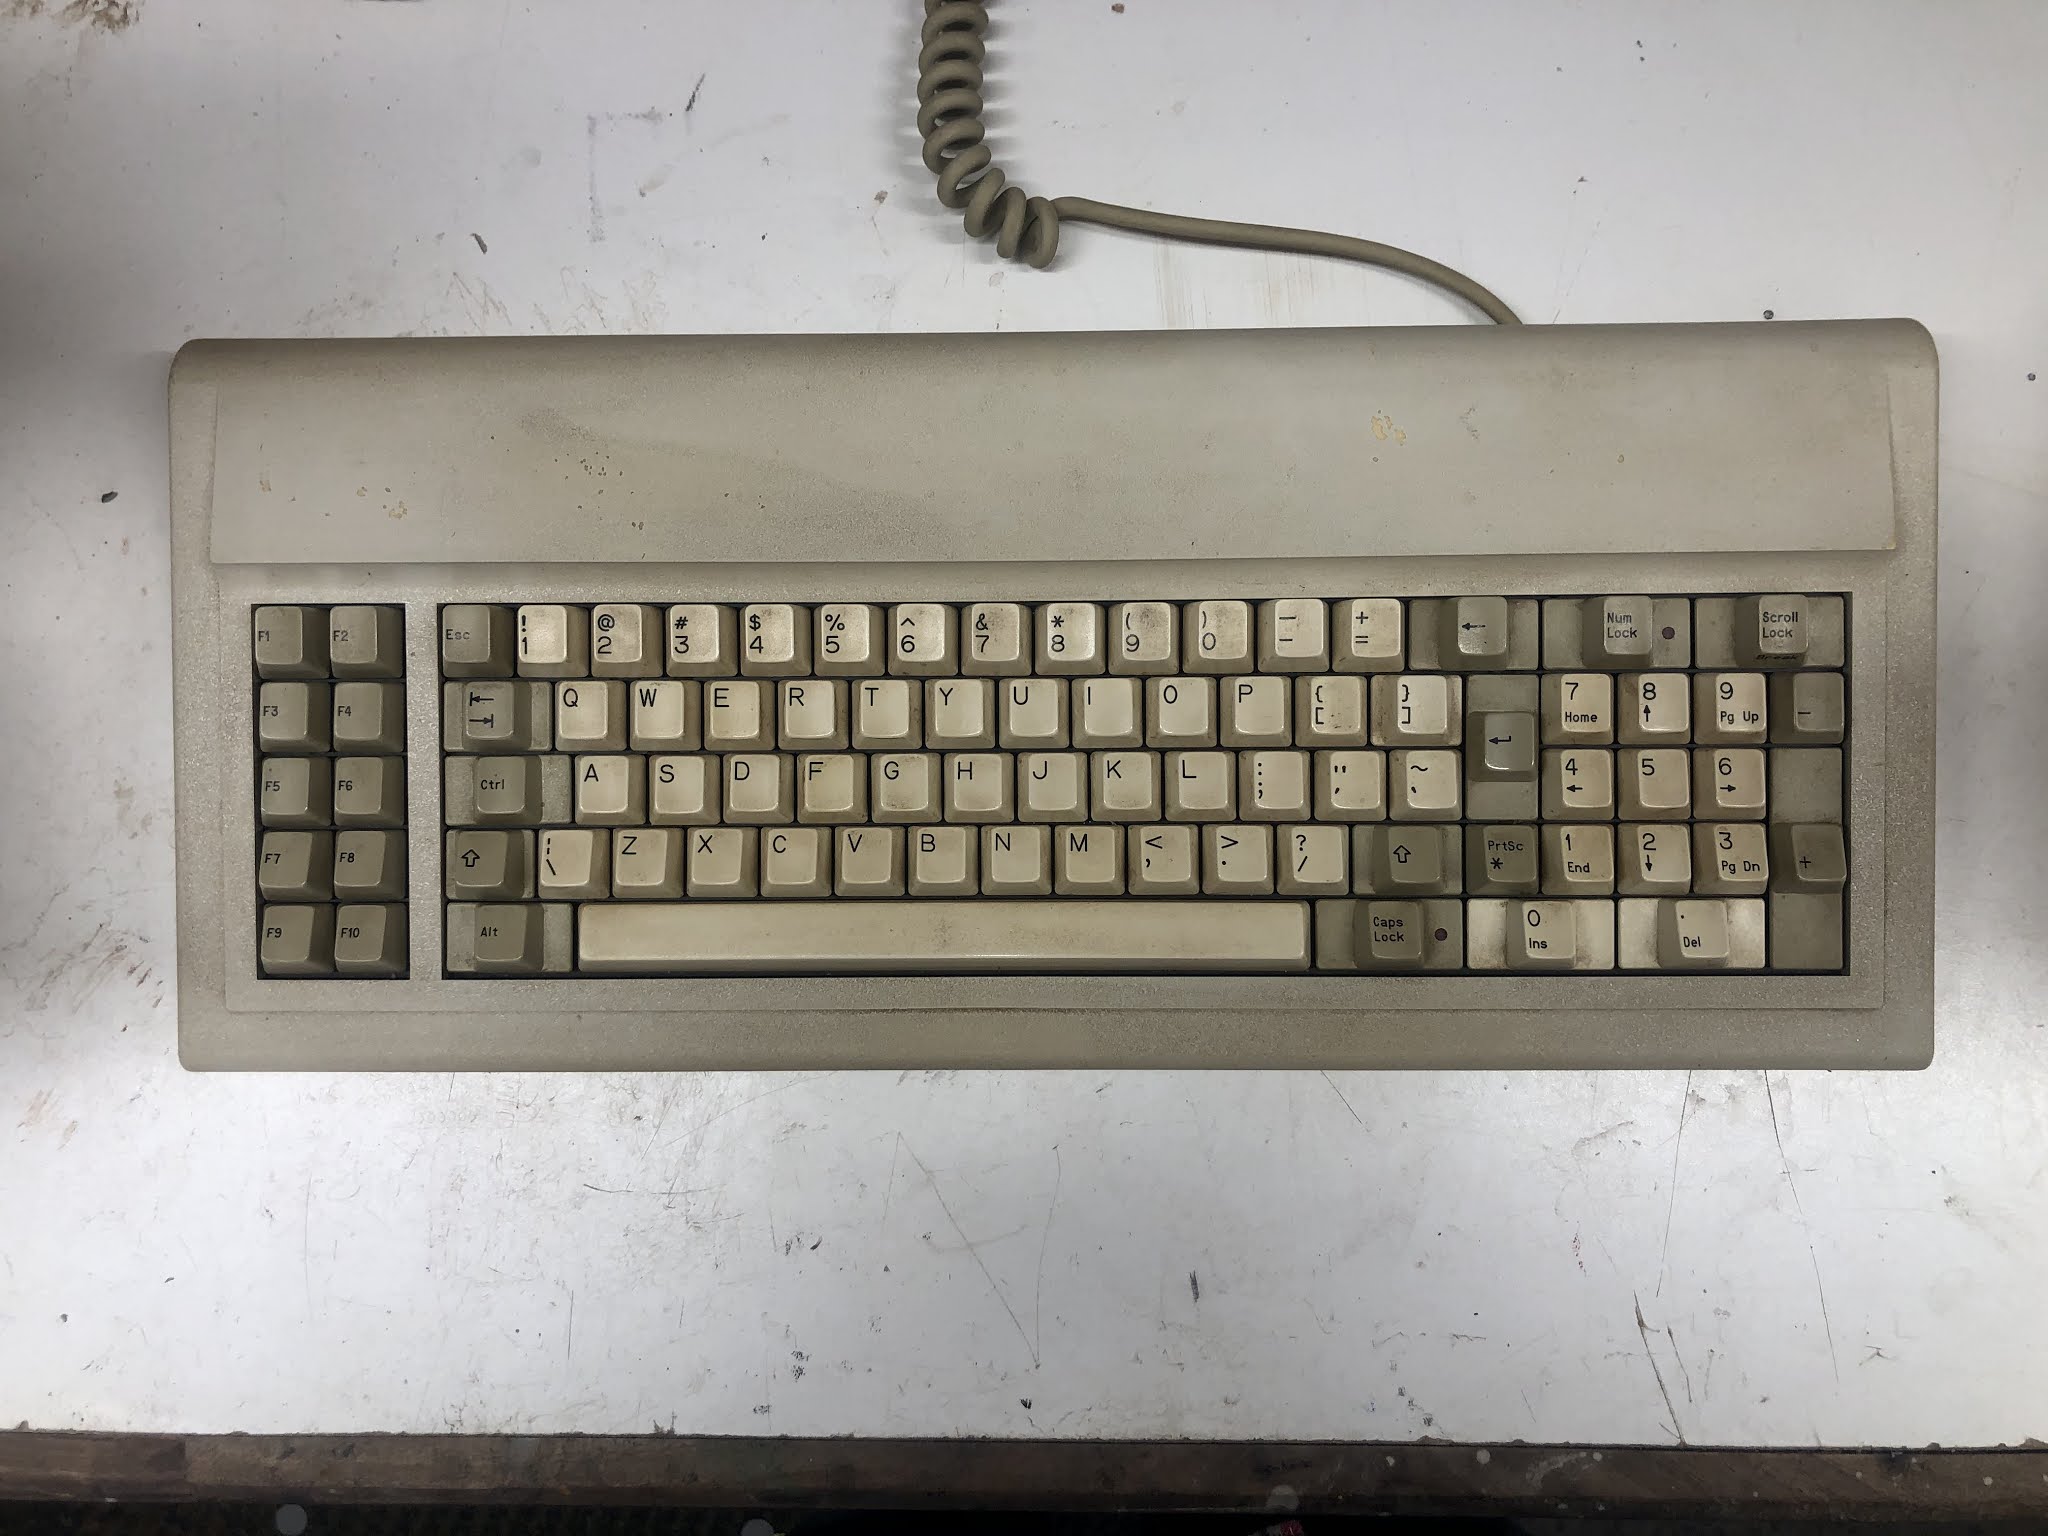
The next challenge was the Key Tronic foam and foil keyboard.  Several of the keys were not working...

I've restored a similar keyboard before on my Compaq Portable from the same year, and once again TexElec came to the rescue with their Foam and Foil replacement pads.  Waiting for the pads to come in gave me the opportunity to take the board completely apart and clean the housing and keycaps.  After replacing the pads and re-assembly, the board is working like new, although there's some wear and tear...

I'm quite happy with how this turned out given that the keyboard is over 35 years old!

The next challenge was that the builder of this system mentioned to me that the BIOS is on a Floppy Disk.  The computer won't boot at all without the customized, appropriate BIOS for the peripherals that are wired to this specific build of the Quark.  This left me with a nagging fear that as the floppy disks fail, I'd loose the use of this classic computer.  I'll write a separate bLog article about my new SuperCard Pro Disk Imaging setup, but too make a long story short, I was able to image and restore Bootable CP/M disks for this machine, and capture and archive all the disks that came with this system, so that is a relief.

That wraps up the story so far for my first CP/M computer.  It's working well enough that I can dive in and start learning about CP/M, the precursor operating system to DOS.  There's alot of good information online, and I'm planning to start with "The CP/M Handbook with MP/M" by Rodney Zaks.

On my To-Do list for this computer:
Find an appropriate monitor that can be adjusted to show all the text, or determine why MCE2VGA isn't displaying the image correctly.
Find a Go-Tek equivalent for 360K 5 1/4" drives so that I can replace one of the floppy drives with a solid state drive.

Please let me know if you have any suggestions for me about this computer, or any questions, Thanks!

My newest Apple, the Apple IIc

I've recently acquired a "new to me" Apple IIc.  A friend of mine who is also a retro computer enthusiast was keeping an eye out for me, and a friend of his was looking to keep their families Apple IIc out of the waste stream, so this was a win for everyone.

This lot included the computer, a carrying case, floppy disks, and manuals from the period.  I have a fascination with these manuals, and I'm currently about a 1/4 of the way through the Owners Manual shown on top of the computer here....


I didn't want to power the unit up till I'd done some preliminary checks and cleaning, so I started by testing the mouse on my 512K Mac, it is partly working, but there's something wrong with the Vertical encoder, as the mouse will go up but not down.  I spent an hour or two opening that up and trying to identify a problem, but I was not able to identify a broken connection, or dirt on the encoder wheels.  It's possible the IR LED or phototransistors are no longer working, and this is a repair that I have not yet been successful with on old mice that I've worked on.  Let me know in the comments below if you have any ideas or suggestions about resources for mouse repair.

I took the computer apart to check for condition, it all appears normal inside, not too dirty, although I did a through cleaning on the outside, and a bit of cleaning up of dust on the inside...

In addition to cleaning, I checked for leaking caps, and also took the drive cage off enough to clean the drive read / write head with rubbing alcohol.  I also checked the voltage of the external Power Supply at the plug, and it was reading good.

After putting it back together, the computer works as expected right away...


I checked the ROM version at the BASIC prompt, and it's ROM version 0, so SmartPort support is included (there's also a sticker showing a 3.5" floppy disk above the drive port on the back).  So, using FloppyEmu in SmartPort mode, Total Replay works, which is awesome!

Since I didn't get the matching 9" green screen with this computer, I paired it with an Apple IIe Composite Color Monitor, and built a little two sided stand for the monitor that still allows access to the floppy disk drive on the right side of the machine.

So, the Apple IIc takes its place in the collection both as an excellent gaming machine and as a disk imaging machine using FloppyEmu and the built in 5 1/4" floppy should I need to make disks for any of my other Apple IIs.

Remaining tasks for this computer include the mouse repair mentioned above, and repairing the Kraft KC3 joystick.  I'll try to buy another KC3 on eBay in order to harvest a potentiometer out of the stick too repair this one.  This stick was made for so long and in so many variants that not all the parts are interchangeable, so I'm trying to find ones with the right FCC ID hoping that the potentiometers will be interchangeable, as these are no longer being manufactured.

And finally, the case plastics have yellowed.  Perhaps when summer comes in Minnesota, I'll add this computer to the list of computer cases that need retrobright treatment.  The case did clean up pretty good, so I'm considering just leaving it as is.


Macintosh Portable - Power Supply Recap for M5136

 I've been working on a couple of Macintosh Portable repairs for a friend.  While doing this, I've been doing alot of reading on the forums, see this excellent compilation of threads on troubleshooting the Macintosh Portable on 68KMLA.

I've been fortunate enough to get the M5136 Power Adapter with my portable.  From my understanding, it's important to use this adapter and not a replacement because the power management circuit in the Macintosh Portable relies on the 1.5 Amp current limit that this power supply has, a replacement power supply with a higher current limit may work in the short term but can damage the Portable over the long term.

So, I had two challenges to getting the recap of this power adapter done, how to get into the case without dremelling or totally destroying the power adapter housing, and the second too get the capacitor values.

Getting inside was no problem using the technique demonstrated in this video.  The video shows the PowerBook 100 series adapter, but I can confirm that the Macintosh Portable is the same, and the technique works flawlessly.

The second challenge was getting the capacitor values off the board.  I'm not aware of another resource online for getting this information, please let me know in the comments if you have another resource.  In the meantime, I hope you find this guide helpful.