Showing posts with label Power Macintosh. Show all posts

Retro Computing at the Movies

Streaming and the wide availability of video on the Internet have made it easier than ever to find and watch material that was unavailable or just hard to find for many years. I a previous bLog article, I covered YouTube channels that are providing archival first person computer history videos.  But Hollywood entertainment is another culturally relavant source.  Here are several feature length Hollywood movies with connections to computing and computer history.

The films in this article fall into two categories.  The first set of films from before Y2K show peoples attitudes towards computing machines and their interactions with them.  The second group of films are more modern movies post Y2K which have historical computing as a theme of the movie.

Older Films (Pre Y2K)

Desk Set (1957) with Spencer Tracy and Katherine Hepburn was fun, I saw this film for the first time last year.  Two of the things that stood out to me were the uncertainties the workers had about how computer automation would affect their jobs and a repetition of the pattern where new automation solutions do not live up to the hype, at least in the short term.  An enjoyable film and one I'd recommend.

The films Twilight's Last Gleaming (1977) and Damnation Alley (1977)  both show inside of a Cold-War Atlas missile silo.  These were of interest to me since I'm a child of the cold war and the "What If" scenarios presented by these movies are definitely the main point.  But another thing caught my eye watching these films since these missile silos were controlled by a massive computer network called the SAGE Air Defense System (or its successor).  SAGE was designed and built during the cold war to try to prevent nuclear strikes from the USSR reaching the US.  If you are not familiar with the SAGE system, there's a fantastic talk from VCF 2025 that I'd recommend by Richard Thompson "The SAGE Air Defense System".  Richard points out in his talk that many of the SAGE control panels were saved and used a props in TV and film decades.  These appearance are cataloged on Mike Loewen's website here, and his catalog opens another whole world of media exploration in Film and TV shows.

What list of computer related films would be complete without a discussion of War Games (1983)?  This is the first film on my list that I remember watching at the time.  Back then I was more concerned about the threat of war but I was also interested in computers and computing.  Here's an interesting article about the tech used for making the film both on and off screen.  The main computer star of the show is the IMSAI 8080 computer, which has become quite expensive.  These pre-1977 machines didn't sell in the millions like an Apple II, but we can still have a similar experience with a modern replica kit built using a modern microcontroller.  I've got one of these kits on order, so stay tuned for a future bLog article on that topic.

Skipping ahead more than a decade, we have Hackers (1995).  I was in college at the time struggling to get an engineering degree and surrounded by computer geeks like me.  I didn't have a car in college and I didn't get out to the movies much which is just as well because we would not have found much to relate too in this film.  We weren't cool like the characters in the film.  It wasn't until studying the history of the Homebrew Computer Club and Hacker culture that I began to understand how computing was connected with the 60s counter culture on the West Coast.  This was not a significant part of my experience at a midwestern engineering school in the mid '90s.  However, rewatching the film recently was a fun opportunity for me to play the "Name that Computer" game.  Trying to figure out, is that an Apple PowerBook?  Is that a Toshiba Satellite or a Tecra? Which one?  I don't have a list from my last watch through.  Google search shows a detailed list, but I'm honestly not sure if you can tell just from shots in the film which computer is which, so I won't link that spoiler article here and let it ruin the fun of re-watching the film and playing "Name that Computer".

The only romantic comedy on todays list is You've got Mail (1998).  I recently rewatched the film as I was interested in seeing the portrayals of the early days of the Internet, but I'd forgotten (or never noticed when I was a kid) how problematic the Tom Hanks character's behavior (Joe) is.  But I watched the film so you don't have to.  Per the fantastic FAQ section on IMDB, Joe is using a "Desktop Replacment" IBM Thinkpad 770 and Kathleen is using an Apple Powerbook G3 250, the fastest of the Wallstreet machines.  I did enjoy the nostalgia remembering using the AOL free trial period and other dial up Internet experiences back in the day.

New Movies (Post Y2K)

The second category of films on this list is modern movie set back in time with computer themes.  When we look at modern films about the past sometimes we may learn more about our present attitudes than we do about the past, but these films are still interesting.

The next movie on my list is The Imitation Game (2014).  This is a film about Alan Turing and his team's work during WWII on code breaking.  I had my own doubts about the historical accuracy of this film after watching it.  One reviewer confirmed my suspicions says this is "... one of the most celebrated and most misleading historical movies ever".  I think most of us interested in computer history would be better off reading this article and skipping the film.

Silicon Cowboys (2016) was intriguing to me.  I've read and enjoyed Rod Canion's book "Open" about the founding of Compaq but I really didn't get into the TV Series "Halt and Catch Fire".  I remember one of the folks presenting about the history of Tandy computer saying "it was never that exciting" or something to that effect about that show.  But Silicon Cowboys is focused on what actually happened and that's still very exciting.

I've seeen The Social Network (2010) but it didn't make that big of an impression on me, so I'm not going to comment other than to say that I did watch it.  Hidden Figures (2016) is a feel-good movie where the underdogs overcome their challenges because of their patience and hard work.

What other films can you think of that have computing as a theme of the film?  Comment below or drop me an email, my address is in my blog Profile on the left side of the homepage.

My Personal Personal Computer History - 100th bLog Article

For my 100th bLog article, I thought I'd do something nostalgic and go back and outline my own history with personal computing.  When I started in the hobby 6 years ago I didn't know if it would be possible for me to collect the computers I'd previously owned but it has been possible, and I've written bLog articles about all but one machine, an omission which I will remedy in this article.

I started out with the VIC-20 that my Uncle gave me in the last 80s when he upgraded to the C64.  I've already written about my new VIC-20.  Since that article I've been able to get a Penultimate II Cartridge which has alot of fun games on it.  I've also found a good deal on a "PET Keys" VIC-20 and added that to the collection, so now I have a good running machine and a parts machine if needed.  When I was a kid I tinkered with the expansion port on my VIC-20 and ended up destroying the computer, at the time I didn't know how to repair computers so we were without a computer at home for a while, a gap in my Personal Computing resume.

Of course all throughout this time I used computers at school.  We had Apple II computers at school.  We had mostly Apple IIe but also a couple of IIgs machines.  I don't recall using a Mac during my High School years although there must have been a couple of them around in the early 90s.

After High School I moved to college at the Milwaukee School of Engineering.  When I first started school there I didn't have my own computer and was reliant on the computer labs.  At this point in time some of the programming courses were still being taught on DEC VAX hardware.  I think the school may have been running 11/780s.  One lab had VT220 terminals and another had 320s.  The school also had Macintosh labs and PC Labs for the students to use, but in my electrical engineering course we were encouraged to use PCs.  Shortly after I started school during my freshman year I got a Slimline Gateway 2000 486 PC, that would have been in 1993.  It was my first new computer.

After college I moved to Minneapolis for work.  I continued to use the 486 until 1999 when I got an Apple Power Macintosh G3 Blue and White.  I was starting to get into shooting and editing Digital Video as a hobby at that time and the G3 was a necessary tool for that hobby.  I paired the Mac with a 17" Sony Trinitron CRT, it was a great setup, although I do recall how painful it was to use the Puck Mouse.  I ended up buying an accessory to change the shape of the Puck Mouse and make it more ergonomic.

That machine worked well for quite a few years, I think we used it up till 2004 or 2005.  At that point we purchased a Power Mac G5.  This was the last of the Apple professional computers I purchased new.  I have re-acquired a 2005 dual processor G5 for my collection. This is a computer I have not blogged about before, so here's a picture of the setup...


We used the G5 till 2009 when I bought our first Intel Mac Mini. Since then we've used a string of Mac Mini machines, up to and including an M4 Mac Mini I bought earlier this year.  These are great value for money but I not nearly as interesting.

Thanks for following along with my bLog!  The retro community is a really amazing group of people and I hope I can give back just a little bit here on the bLog by sharing about my experiences restoring computers regardless if they are nostalgic like the machines listed above or projects built to learn about the history of technology.

What about you?  Let me know about your personal computing history in the comments below, or find my email address in my profile.  Did you have any of the same computers?  What are your "grail computers" for your collection and why?

Vintage Computer Festival Midwest 2023 Recap

I've just returned from Vintage Computer Festival Midwest 2023.  I had a great time during my first year as an exhibitor.  The thing I enjoyed most were seeing so many people enjoying the computers I brought along...

Many types of people enjoyed the computers, from those who have never gotten to work on a NeXT machine because they were too young to those who had used the Apple Power Mac G3 w/ the 21" Studio Display back in the day.  It was so much fun hearing about peoples memories with these computers,  answering questions, or hearing small parts of many many different stories.  It was a really great time.

I was also able to connect with some of my favorite YouTubers, purchasing a boxed game from David Murray (the 8-bit guy), meeting Adrian Black for the first time, and even recording a YouTube Short for RetroTech Chris, in addition to hanging out with Steve from Mac84 and Ron from Ron's Computer Videos who I had met 2 years ago at VCF Midwest for the first time.

Also, I was able to purge several project machines that I'd lost interested in onto the "Free Pile".  Hopefully my failures can become part of a successful repair or refurbishment for another collector.  One of my friends, Matt, had a table right next to the free pile and he gave me a couple of items off the pile that he had recovered.  The crowds were so large that the good stuff came and left the free pile pretty quickly!

One goal I had set for myself was to buy only parts and pieces for projects that I already had pending.  I didn't want to leave VCF with a bunch of new projects and I was able to accomplish that goal!  I found many parts and pieces that I was looking for, mostly on Sunday.  I waited till about 11AM on Sunday to make offers.  With only a few hours left in the show many of the vendors were happy to make deals.  I have 4 or 5 projects now that I can complete with parts that I found at the show, including hard to find parts like: a DEC keyboard w/ a PS/2 port, a SUN CRT, and a New Old Stock Floppy Drive.

In summary I had a wonderful time at VCF Midwest 2023.  There were some growing pains that go along with the number of people at the show but my overall impression was quite positive and I hope to return as an exhibitor next year with a completely different set of computers to show and to share.

Preparing for VCF Midwest 2023 - September 9 and 10

I'm heading back to VCF Midwest this year and I couldn't be more excited about it.  I consider the year of the pandemic (2020) as my first VCF because I eagerly watched all the sessions (the event was online only that year).  The following year (2021) I attended for the first time in person.  I was able to pickup a NeXTstation during that show and meet so many interesting people including regular collectors like myself and a few YouTubers like Clint from LGR and David Murray, The 8-Bit Guy.  I missed last year (2022) but ended up buying several machines before the show from a local friend who has been downsizing his collection.

This year I decided that I'd like to try to exhibit.  I was inspired by a couple of different sources.  The first was a history book that presents computer history as a series of computing stories.  This book made an impression on me this year and left me thinking about the importance of teaching computer history to the next generation.  Last year Bill Degnan gave an interesting talk about how to build a Vintage Computer Museum at VCF Midwest.  I found his idea of building exhibits one at a time and looking for opportunities to display them pretty interesting and so this year I'm taking advantage of the opportunity at VCF Midwest to bring this exhibit...

The title of my exhibit this year is "Engineering Workstations of the 1990's".  This was a time when I was going to school and early in my career.  I really wanted one of these specialized machines, but never had anything other than a PC.

Three Computers

The first computer I'll be displaying is the NeXT NextStation from 1990 I've already mentioned.  It's had a bit of preventative maintenance since its last appearance at VCF in 2021, and it works great.  Come and check out some of the applications I've installed and maybe even surf the web a bit with frogfind.com.

The next computer I'll be showing is the Digital Equipment AlphaServer 300 from 1996.  This machine is running Windows NT 4.0, an OS that I experimented with back in the day (on PC hardware) but never used at work.  As I have learned about the history of Windows NT and its chief architecture David Cutler I've wondered if the DEC Alpha may have been the primary development target for Windows NT.  There isn't very much software for the machine, but you can come and try out what I've been able to install so far at VCF.  Perhaps we'll find some other applications to install during the show.

Finally, the last computer is an Apple Power Macintosh G3 Blue and White from 1999 that I have recently upgraded.  The G3 B&W is a machine that I had at home back in the day and shows an amazing progression during the 90s from the expensive and rare NeXTstation to the much more affordable G3, becoming so affordable that it could be purchased as a home computer.  Come and check out all the different OSes I have installed on this machine, including Rhapsody.

There is an interesting "what if" scenario about a pivotal event in computer history that ties these machines together but I will save that story for the show.  Stop by my table if you are there!  I'll be in the "Big Iron" room, table D33.

Power Macintosh G3 Blue and White from 1999

A couple of years back a friend sold me a Power Macintosh G3 Blue and White from 1999.  I owned this machine back in the day.  It was my first computer that I bought coming out of College.  I had been a PC user all throughout college and I switched because my employer at the time had me using Macintosh and I had gotten used to them and was enjoying Digital Video as a hobby at the time, where Apple had a significant ease of use advantage over the PCs of the time.

But back to the present day.  As soon as I got this G3 B&W I put a HDD drive in it and installed Mac OS 8.5, the first version of software that would have shipped with this machine.  I played with the machine a bit but then put it away.  In the meantime I'd been able to collect the period correct keyboard and the horrible puck mouse to go with this machine.

A recent acquisition from a garage cleanup that I did with my friend John Bumstead gave me reason to get this machine out again, the matching Apple Studio Display 21" monitor...

I don't know that I'd ever seen one of these displays in real life, and if I did it would have been very briefly.  When I owned a G3 I had it paired with a 17" Flat Sony Trinitron CRT.  That CRT had an amazing image, but it was in a boring beige case.  This CRT is also a Trinitron, and it's an absolute beast to move because of how heavy it is.

Several recent YouTube videos have been instrumental in giving me the knowledge to get the G3 working better.   I'd had trouble getting flash storage options working with this computer and wondered why till I watched a video where Sean from Action Retro talked about getting Rhapsody running on the G3 B&W.  In this video Sean explains that the original G3 B&W machine had a buggy IDE controller chip.  I checked the part numbers on my board and sure enough this is one of the machines with the buggy IDE chip.  That being said, Sean tried and struggled with SCSI on the machine, too, so that left me with an open mind about SCSI vs. IDE on this machine.

Mr. Lurch has strongly recommended the StarTech SATA to IDE bridge for Power Macintosh machines as a reliable solution for getting flash storage into vintage computers.  I had purchased one to keep on hand which I paired with a low cost SATA SSD from Free Geek Twin Cities.  This gave me a working IDE flash storage solution for this machine for about $40 total in parts, but that was only the beginning of the fun.

Sean @ Action Retro has a video investigating all the early versions of Mac OS to see how the UI had evolved over the years.  He did this online in a browser, but as we all know doing this in hardware is more fun.  The Power Mac G3 B&W supports every OS from 8.5 to 10.4 as well as Rhaposdy versions so there is alot of scope for interesting OS explorations on this one machine.

After a great deal of experimentation with an IDE HDD, with the SATA SSD explained above, and with a SCSI HDD I was able to get the folowing OSes all installed from CD media and booting on the machine:

MacOS 8.5

MacOS 9.1

MacOS Server X (Rhapsody)

MacOS X (10.0)

MacOS X (10.2)

MacOS X (10.4)

It's been alot of fun getting this machine configured and having a look at MacOS Rhapsody for the first time.  This OS shows alot more of the elements of the OpenStep operating system from NeXT as it slowly morphed into the MacOS X that Mac users are still using today.

I hope that this machine will be part of my exhibit at VCF Midwest this year, but more to come on that topic in the very near future as VCF Midwest is only a couple of weeks away on Sept. 9&10, 2023.  If you are in Chicagoland for that event come by my booth and say Hello!

I Can't Be-leive it!

I've been wanting to run BeOS for quite some time.  I've made numerous attempts over the last couple of years ever since learning that my Power Macintosh 8600 is on the hardware compatibility list for this OS, but I've always had it lock up on boot up, or very shortly after during the install process.

I could not resolve my issue(s), I didn't know if it was due to a hardware problem with my Power Mac's Logic Board, an incompatibility with the upgraded ATI Rage video card I had in there or some other problem.  Also, I had some concerns about the stability of the machine, I'd even done a recap on the main logic board.  So, the project remained on the back burner for quite some time.

But I recently got re-inspired because Sean from Action Retro was willing to go to great lengths to get BeOS running on his TAM (and show the failures along the way).  Sean has used various disk imaging hacks before to get software onto his computers.  Because of limitations of SCSI2SD, I'd been trying to run the install process of BeOS and this was what kept on locking up on my computer.  I decided to make a couple of hardware changes.  First, I went back to the built in Video on the motherboard, I wanted to eliminate any potential incompatibility with the ATI video card.

Watching one video alone was not be enough information to get going, but Sean pointed to a rollicking good thread about running BeOS on the TAM on Tinker Different.  This thread contains a helpful link onto Macintosh Garden that has BeOS disk images that are useable with compatible machines, bypassing the install process.  All one needs to do is copy them onto a modern SCSI to SD solution and give BeOS a try!  In order to enable using these pre-made disk images, it was time to upgrade my SCSI2SD solution.  As amazing as that tech was when I installed it in 2018, solutions like BlueSCSI and ZuluSCSI are much easier to work with on projects like this.

One other cosmetic improvement that I have been wanting to make is to move the SD card slot around to the back of the machine and replace the front cover on the machine (which of course I've kept) so I took this opportunity to make this change as well.

Of course I didn't want to loose access to the MacOS disk images I've built up over the last years.  Another interesting post on TinkerDifferent lead me to this amazing tool called Disk Jockey.  This software runs on the modern computer and allows the analysis of disk images.  I was easily able to create a disc image of the Mac Volume on the SCSI2SD card(s) and then convert them to full drive images for the modern SCSI solutions so the PowerMac can still boot the first and last versions of Mac OS (7.5.5 and 9.1) was well as BeOS.  I've stored these each on a separate SD card for easy of swapping.

It's really great to finally have a BeOS system, and I'm quite happy with how it looks...

I've really been enjoying tinkering with it.  The history of Apple's negotiations with both Be and with NeXT for their "next generation" version of MacOS are now the stuff of computer history legends.  I consider myself lucky to be able to go back and see the best of what both OSes had to offer at the time.

My (Current) Favorite Retro Computers

It's been a while since I took a picture of my basement shelf where I store my most frequently used Retro / Vintage Computers.  The ones that are out and get used are my de facto "favorite" retro computers, and there's been a fair amount of change on the wire rack since my last update.  I thought I'd outline which computers are out, and why:

From Top to Bottom, Left to Right, on the file cabinet is the NeXTstation Mono Slab (1990).  This is one of my newer acquisitions from Vintage Computer Festival Midwest 2021.  I've still got alot to learn about this machine, and I also have some hardware on order for the machine so I'll be leaving it out for a while.

Next is an original Compaq Portable I (1983).  This was a "project" machine from Free Geek Twin Cities and my first XT class machine.  As one of my first Retro computer "rescues", I really enjoyed the process of getting it working again.  I also really like the design of it and I've used it for disk imaging and a few games that look really cool on the Green Screen. (it has a really long persistence phosphor.)

Next to that in the top right corner is the original non-backlit Macintosh Portable (1989).  Yes, the screen is on, this just shows how you need the lighting just right to see the screen.  I'm fortunate to have one of these that is working as many of them have problems.  Mine has a few dead lines on the screen, but I'll just keep enjoying this while I can. It's probably just a matter of time till the screen dies.  This computer is out on display because I enjoy the fact that it's so different than the laptops of today, a design idea that failed.

On the middle row at the left we have an un-enhanced Apple IIe computer (1983).  I was able to buy this computer monitor and disk drive as a set from a retired school teacher who had bought it new.  It needed quite a bit of repair but since completing those repairs it's been super reliable and super fun.  Total Replay anyone?

To the right of that I have a Power Macintosh 8600 / 200 (1997).  This is a "Bridge Machine" that I have blogged about before.  The main reason this machine is still on the wire rack is utility.  It's easy for me to move files off and on this machine from my modern machine and I have three SD cards setup for Mac OS 7.5.5, 8.6, and 9.1, so it can run the first version that is supported by the hardware all the way up to the last version.  The latest upgrades for this machine include a new Logic board and Processor Card (Still 200 MHz), additional RAM, (288 MB Total), and an ATI Rage 129 video card from 1999.  This machine is running better than it's ever run before.

On the bottom row at the left we have a Macintosh 512K (1984).  Like so many of these machines it started out life as an original Mac 128K but got upgraded fairly early in life.  It has been continuously upgraded to keep it going since then.  It's possible that the only original thing on it is the chassis but I feel very fortunate to have this machine and I enjoy playing some of the classic games and booting Mac OS 1.  It's an absolutely iconic design, and the only system in the display that boots and runs exclusively from floppies.

Last but not least on the wire rack in the bottom right corner is my latest PC Build.  This is a PCI based 486 DX2-80 (1995).  I built this with parts and pieces from a friend and other items I had around.  This is both a Retro Gaming rig with a Sound Blaster in it and a Disk Imaging machine with a 5 1/4" 360 K Floppy drive.  It works great so far, but I just built it, so I'll need to keep it out where I can power it up and keep using it to work out any kinks in the build.

Honorable mention, I also have a Tandy Model 102 (1983) slab top machine that I keep out on display in a different part of my office.  I really appreciate the unique design of this machine.  Another form factor that really didn't last into the modern computer era.  I've recently got a flash based storage solution for this machine, so I'm looking forward to digging in more on this machine, including loading some of the BASIC games onto the machine.

I have more machines but they are all stored in a much less convenient location.  Some of those machines are plugged in and can be run, too, but they get significantly less use than these ones that are out.

PowerBook G3 Repair Marathon Report Out

Over the last weekend or so, I’ve been working on PowerBook G3s from the large lot of computers I’ve mentioned in a previous bLog article. This has been lots of fun, both a great learning experience about repairing this hardware, and after the repairs are complete an excellent opportunity to learn about using these systems, as I only used desktop Macintosh computers during this time period.

The largest number of systems that came in this lot were PowerBook G3s.  I have had this type of system on my short list for quite some time, but hadn’t got enough hands on experience with them to even know which one I’d like the best.

I started with the Wallstreet machines, the first of the G3 PowerBooks.  There were 10 of these systems...

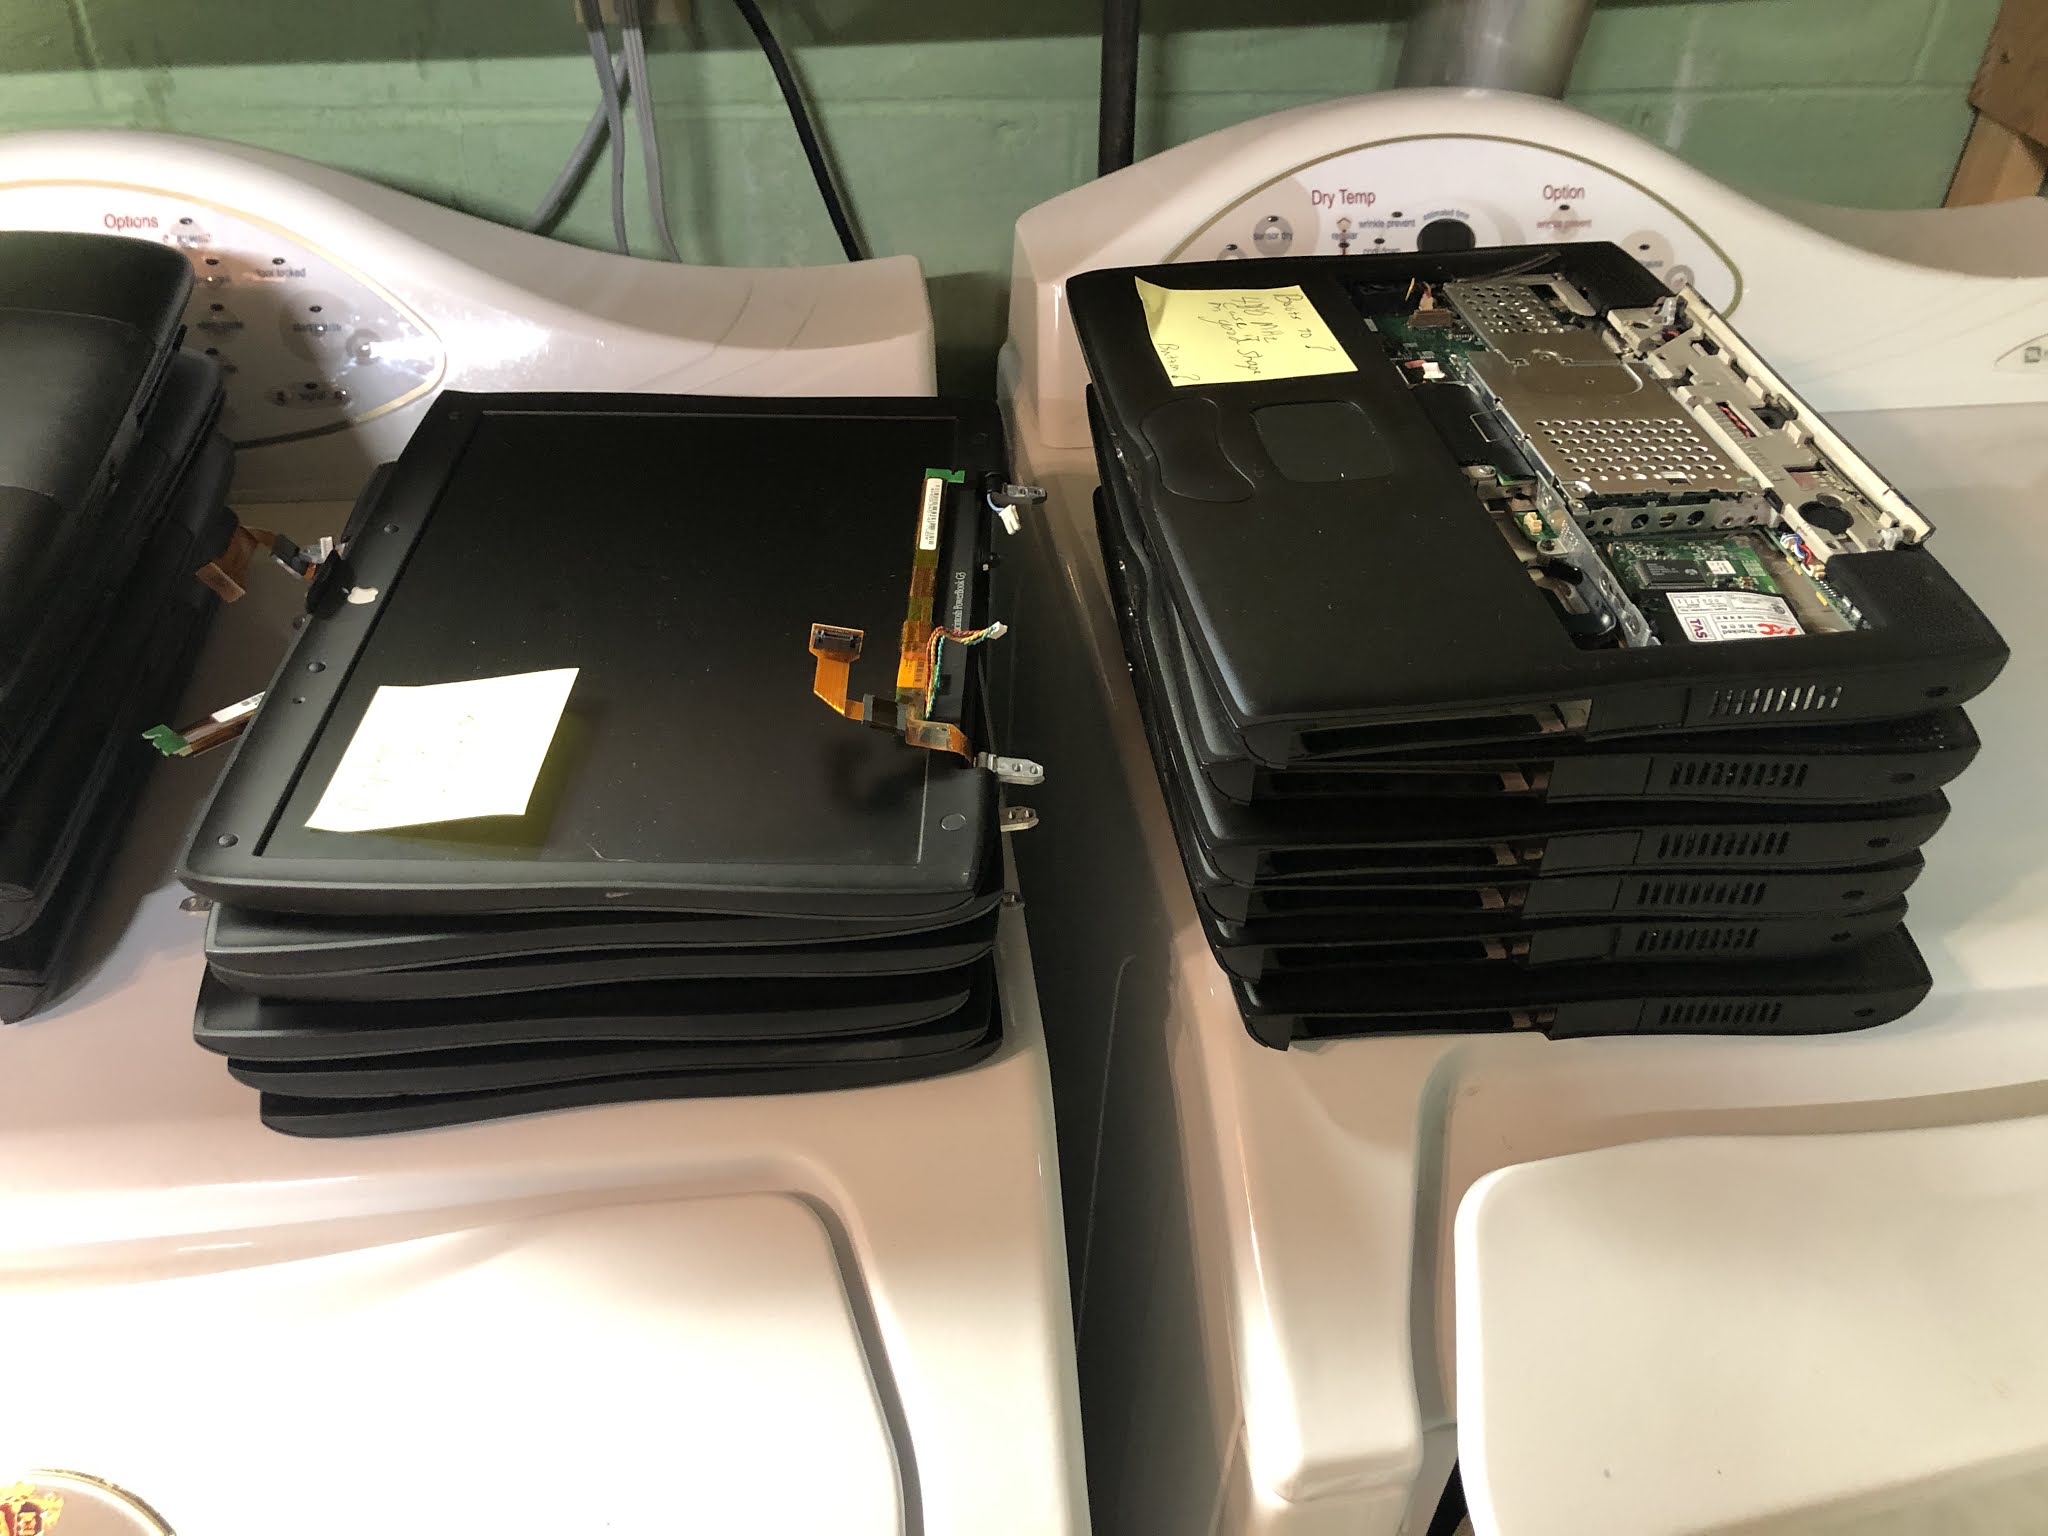
It was quite a bit of work tearing them all down because they were in really rough shape, so a lot of them had to be separated from the top and bottom, and also I had to tear down and combine parts for one of the display panels.  Sometimes I had to combine parts from 3 or 4 different smashed systems to get back to one working machines, but like any challenge, it’s very gratifying to have gotten two working systems with Active Matrix screens...

These look pretty nice on the inside when they are open, but the display top covers are rough.  I'll be on the lookout for new ones.

I was also able to recover another two working Wallstreets with Passive Matrix screens...

It’s been interesting to install Mac OS on these machines (Mac OS 8.6), and see the differences between the Passive and Active Matrix screens.  I think the Passive Matrix screen on the 1400cs was superior to this G3 screen, but it may just be differences in the specific units that I have here (these backlights tend to shift colors after they get alot of hours on them.)

Moving ahead in time, there were 6 Lombard (Bronze Keyboard) G3s...

These were easier to work on, as they were in somewhat better shape.  There were only two display modules that had not been smashed, so I knew right away that I would only need to get two systems working, and here they are running side by side...

I installed Mac OS 9.1 on these after reading about a problem with the Sleep mode with earlier versions of the Mac OS.

Any last but certainly not least, the Pismos.  There were four Pismo machines...

These were in similar condition to the Lombards, much better than the Wallstreets.  But with only four machines, I was only hoping to get one "runner".  However, there were two functioning display modules in the lot, and so I was able to build two working machines, and here they are running side by side...

The display module on the right is significantly brighter and has better color than the one on the left, so I've swapped that display onto the machine that had Max Ram (1GB).  This was an almost unthinkable amount of RAM back in the day, and I've taken a page from Sean at Action Retro's book and ordered an IDE to SATA drive adapter to put some super fast flash storage in this machine.

But, to come back to which is my favorite, I do think the Wallstreets are pretty cool.  It was such an interesting and amazing time between 1998 and 2000 when the speed more than doubled.  I also have a soft spot for "last of" machines and the Pismo is the last portable with a SCSI port.  So I guess I still can't come back to which is my favorite.  I'll have to pick out the best one from each lot and spend more time trying to figure this out.

In the meantime, after repeating this process over and over again, I’ve developed a workflow for working with larger lots of machines like this.  I will share my experiences in case this could benefit others.  First, I'd read up about the model that I’m working with using both the official Apple Service Manuals and also looking through the iFixit tear downs.

Then, I’d go through and separate the display modules from the rest of the laptop, like this...

Once I'd identified one good screen and laptop pair, that could be used for troubleshooting through all the screens.

Once the screens were dispositioned, then I'd work on the bottom half.  If needed, several bottom units could be taken apart and combined together to get something that looked OK and was working.  

It’s useful during this process to understand just how little of the computer is required in order to get the Boot chime from a G3 Powerbook to check if progress is being made.  No display is required, no HDD is required and only minimal RAM, so you can test that the assembly is going OK without completely reassembling the computer.  The power board and sound card (if it is separate) are both required to get the Boot Chime.

I'll be using this system as I move into troubleshooting the Silver PowerBook G4s next.  The effort to recover these machines grows larger as the complexity (and number of fasteners) increases on the newer machines, so I am fortunate for the opportunity to start earlier in the PowerBook history and work towards the more recent machines.

PowerBook 3400c repair

Last weekend I worked on PowerBook 3400s from the large lot of computers I’ve mentioned in a previous bLog article. I’ve had one of these since last fall, I was fortunate to find it on Craigslist at a reasonable price, but that computer has been having display problems, the display gets brighter and dimmer at random.  I suspect that the backlight or inverter board  is failing so I was excited about getting some new screen components for this computer I already had.

There were three of these machines in the large lot of computers in April, and despite my initial skepticism I was able to get one running computer out of this lot.  This is a nice 3400c with the fastest 240 MHz processor.  I was super excited when I saw that one of these three machines was the 240 MHz machine, I’ve been interesting in the fastest machine in the line ever since watching Colin from This Does Not Compute’s episode about this machine.


There isn't much RAM in this machine, but since this is nicer than my Craigslist 3400c I’ll be moving the expansion RAM over too this machine and using this as my primary 3400c.  I have been using this machine as a Portable Bridge Machine for moving data around and making floppies since it has a lot of connectivity options, including a VST ZIP Drive for the expansion drive bay.

There is more hope for further repair on the Craigslist 3400c as well, since it’s likely that one or more of the backlight and inverter boards in the smashed screens are still working, but taking these display modules apart will be a tedious task, so that’s a project for another day.

PowerBook 1400s are Great!

I've been repairing my way through a huge pile of laptops I bought from my friend John @ Roadkill, Inc.  It's been alot of fun since I got to start in with the actual repairs.  I'm not just cleaning and organizing them anymore.

I've been moving up in age from oldest to youngest.  Last time, I blogged about the 5300s.  This next lot of computers I had was 1400 machines...


I brought 4 machines into this round of the project.  These, like the 5300s have been really great to work on.  I already have a 3400, a follow up machine to this machine, which I have worked on a bit.  These are from the pre iFixit era, there are not detailed tear-downs for these machines at that site, which I usually prefer over videos when I'm working a project like this, but having watched a few relevant YouTube videos, and with a bit of experience from the 3400, I started in.

I was able to get two machines running out of the four.  The first is a 1400cs with a passive matrix color screen...

This passive matrix screen is easier to use and has better viewing angles than many I've used.  It's still not great, but I think it's "best in class" for passive matrix.

By combining RAM modules from the various machines, I was able to bring this up to 52MB RAM.  It's IDE HDD was dead, so I replaced it with a larger drive from another machine.  As you can see, the speaker grill is missing, so I've got that on the wish list for later.

I purchased an HDI 30 Pin SCSI adapter on eBay so that I could use a ZIP drive with my old portable Macintosh computers.  It's fantastic to have access to Bootable SCSI Zip drives on everything from my PowerBook 145B up to the G3 PowerBooks that were the last to have SCSI Built in.  Taking a page from Adrian Black's book, I've setup a series of bootable ZIP disks with various versions of Mac OS on them...

I can take a non bootable system with a functioning HDD, boot off the Zip drive, format the HDD, and copy over a working system disk with very little effort.  Building this library has been a timesaver for this project and will be a great tool to have going forward.  This is especially important for the 1400s and earlier machines, because these laptops don't come with an Internal CD-ROM option.

But, back to the 1400s.  The second running system I got was a 1400c, with an Active Matrix screen...

This machine has the faster 133 Mhz processor and 56 MB RAM, the original HDD still works, so it's only a 750 MB drive, but more than enough for my purposes.

I put Mac OS 8.1 on both of these machines, and they run great.  They really are a significant step up from the 5300 in terms of quality, it was noticeable in doing the repairs.  They just look and feel alot better than the 5300, even after just a few hours of use doing Mac OS installs.  I'm quite pleased to have these in the collection and I plan to clean them up a bit more as they still have some of the scuffs and scratches on the outside of the case.

These are the first of the PowerBooks that I have which use the larger 9mm Barrel Jack Power Supply.  These 24V power supplies were used up through the Clamshell G3 iBooks, so these 1400 machines could be powered using the early Yo-Yo power adapters.  Although the 1400 originally shipped with a lower capacity Power Supply, the M4896 Power Supply is the correct color, and a bit more flexible since it provides 45 Watts.  I was able to get a couple of these from a friend of mine that volunteers at Free Geek Twin Cities, so I'm a bit closer to the goal of having one Power Supply for every working computer.  These are becoming more and more expensive on Fleabay, so I may have to resort to a hack like this.  Stay tuned, I've already started on the Wallstreet G3s, and after I get the Pismos up on the workbench then I'll have a better handle on how many power supplies I need to find.

Is the PowerBook 5300 the worst Macintosh Laptop of All Time?

 As I've mentioned in a previous post, I got a large number of laptops from a friend in April.  I've been slowly working through the stack, sorting, categorizing and organizing.

There are several types of PowerBooks that I've never seen or worked on before, including PowerBook 500 series and PowerBook 190 and 5300 series machines.  I didn't even have a Power Adapter for the 190 / 5300 series machines, so although there were 9 total machines in the lot, I could not do power on testing.  I was able to find an original Power Adapter on eBay for a reasonable price, and so I purchased it knowing that having the ability to work on and test the machines (even one at a time) would justify the expense.  Also, I was hoping to reverse engineer it a bit to see how to make a cheaper power adapter from parts since these are of a type and vintage that's getting harder to find.

When the power supply arrived, I started doing intake on these machines.  It was exciting to go through all the machines and see how many would start and what kind of condition they were in.  To make a long story short I was able to get 3 working PowerBook 5300s and one working PowerBook 190 out of this lot.  There are also several more functional screens and some housing parts, but not enough parts to build another working computer.

It's been fun to work with these machines.  I find that the "last of" machines are often as interesting as the "first of".  In this case the PowerBook 190 is the last of the 68K Macintosh PowerBooks, and the 5300 is the first PowerPC based PowerBook.  The 190 didn't have an active matrix LCD so that makes for a compromised experience, but I've quite enjoyed working on the 5300s as these are all Active Matrix screens.  I know the 5300 has a reputation for being the worst Macintosh Laptop computer ever released, but I really enjoyed working with them, perhaps because of my lowered expectations.

Perhaps one of my favorite things about these machines is how easy it is to service them.  These really were designed with service in mind, and it doesn't take that long to strip one down to parts.  For two of the four machines, I had to do a main logic board swap because the metal frames had been broken and it really didn't take that much time.

The PowerBook 190 / 5300 machines use a standard 24V supply with less than 2A draw.  They also use a small barrel jack which is center positive.  The barrel jack has a 3.8 mm OD, which appears to be a standard size but it's recessed into the body of the laptop in a hole that has only a 6.6 mm diameter. All of the field replaceable barrel jacks that I can find online have an 8 or 9 mm housing for the wires that will not fit inside the recessed hole on the Macintosh.  I have not been able to find an off the shelf connector that will work.  I looked through my stash of saved adapters and cut off adapter ends, and I found only one over-molded connector with the right jack dimensions, but I had to shave down the outside of the connector with a razor knife before it would fit in the recessed hole.  Let me know if you are aware of another work around, or a source of inexpensive 190/5300 compatible power adapters?

The next unresolved challenge is the battery compartment.  I certainly don't want to put used batteries back into the machine, but all of these machines have a gaping hole were the battery is supposed to go in.  One of the things that I like about the PowerBook 1xx series is that the battery door can be removed from the cells and replaced on the machine to create a finished look without batteries present in the machine.  This battery pack lacks that feature.  I did test the one 3400 series battery that I have and it fits in the case.  I think the best solution here would be to 3D scan the housing of that battery and 3D print an empty shell of this size to fit, just like the "Weight Saving Device" for later machines.  Unfortunately, I do not have access to a 3D scanner.  Any other ideas?  Let me know in the comments below, and in the meantime, it's off to the 68KMLA forums for me to do some reading!

iBook Clamshell Trash to Treasure

My latest project is an orange Clamshell iBook restoration.  I was very fortunate to get two of these from a friend who pulled them from a recycler here in Minnesota.

I've been looking for one of these for a while, but so far had only the "Yo-Yo" power supply and the system restore CDs.  Unfortunately, when I went to do power-on testing, I discovered that the plug on the power supply was damaged and un-usable.  Another retro-computer friend was able to hook me up with a replacement power supply, and then the testing could begin.  I did bit of preliminary cleaning just so I could handle the machines, labelled the machines A and B, and began the triage...


System A booted up the first time.  The system was crashing on boot, but when extensions were disabled (holding down the shift key on boot), it booted and ran normally.

I tried booting the restore CD off the CD-ROM, which normally does take a very very long time, but this boot was hanging, too.  The screen was intact, and I did a careful inspection of the case plastics.

System B has a smashed screen, but the backlight still lit, and based on the Bong and the Hard Drive sounds, I did think it was booting up all the way.  I also did a careful inspection of these case plastics.

The machines were so dirty that there was dirt inside, and being that the plastics are translucent, I thought that the only real chance we'd have to get one decent looking machine was to tear down the machines to the point where the electronics were free from the case parts so I could wash the case parts with soapy water in the sink.  iFixIt has some great teardowns for the Clamshell that get you almost all the way there, with logic board removed and the bottom case completely empty.  There are also instructions about removing the front bezel from the screen, but not removing the display module from the top case, so I'll outline that here in case anyone else is looking to do this moving forward:

Removing the Display Module from the iBook Clamshell Top Case:

Step 1:  Remove the Top Case from the Bottom Case using the iFixIt procedure here.

Step 2:  Remove the Bezel from the Top Case using the iFixIt procedure here.

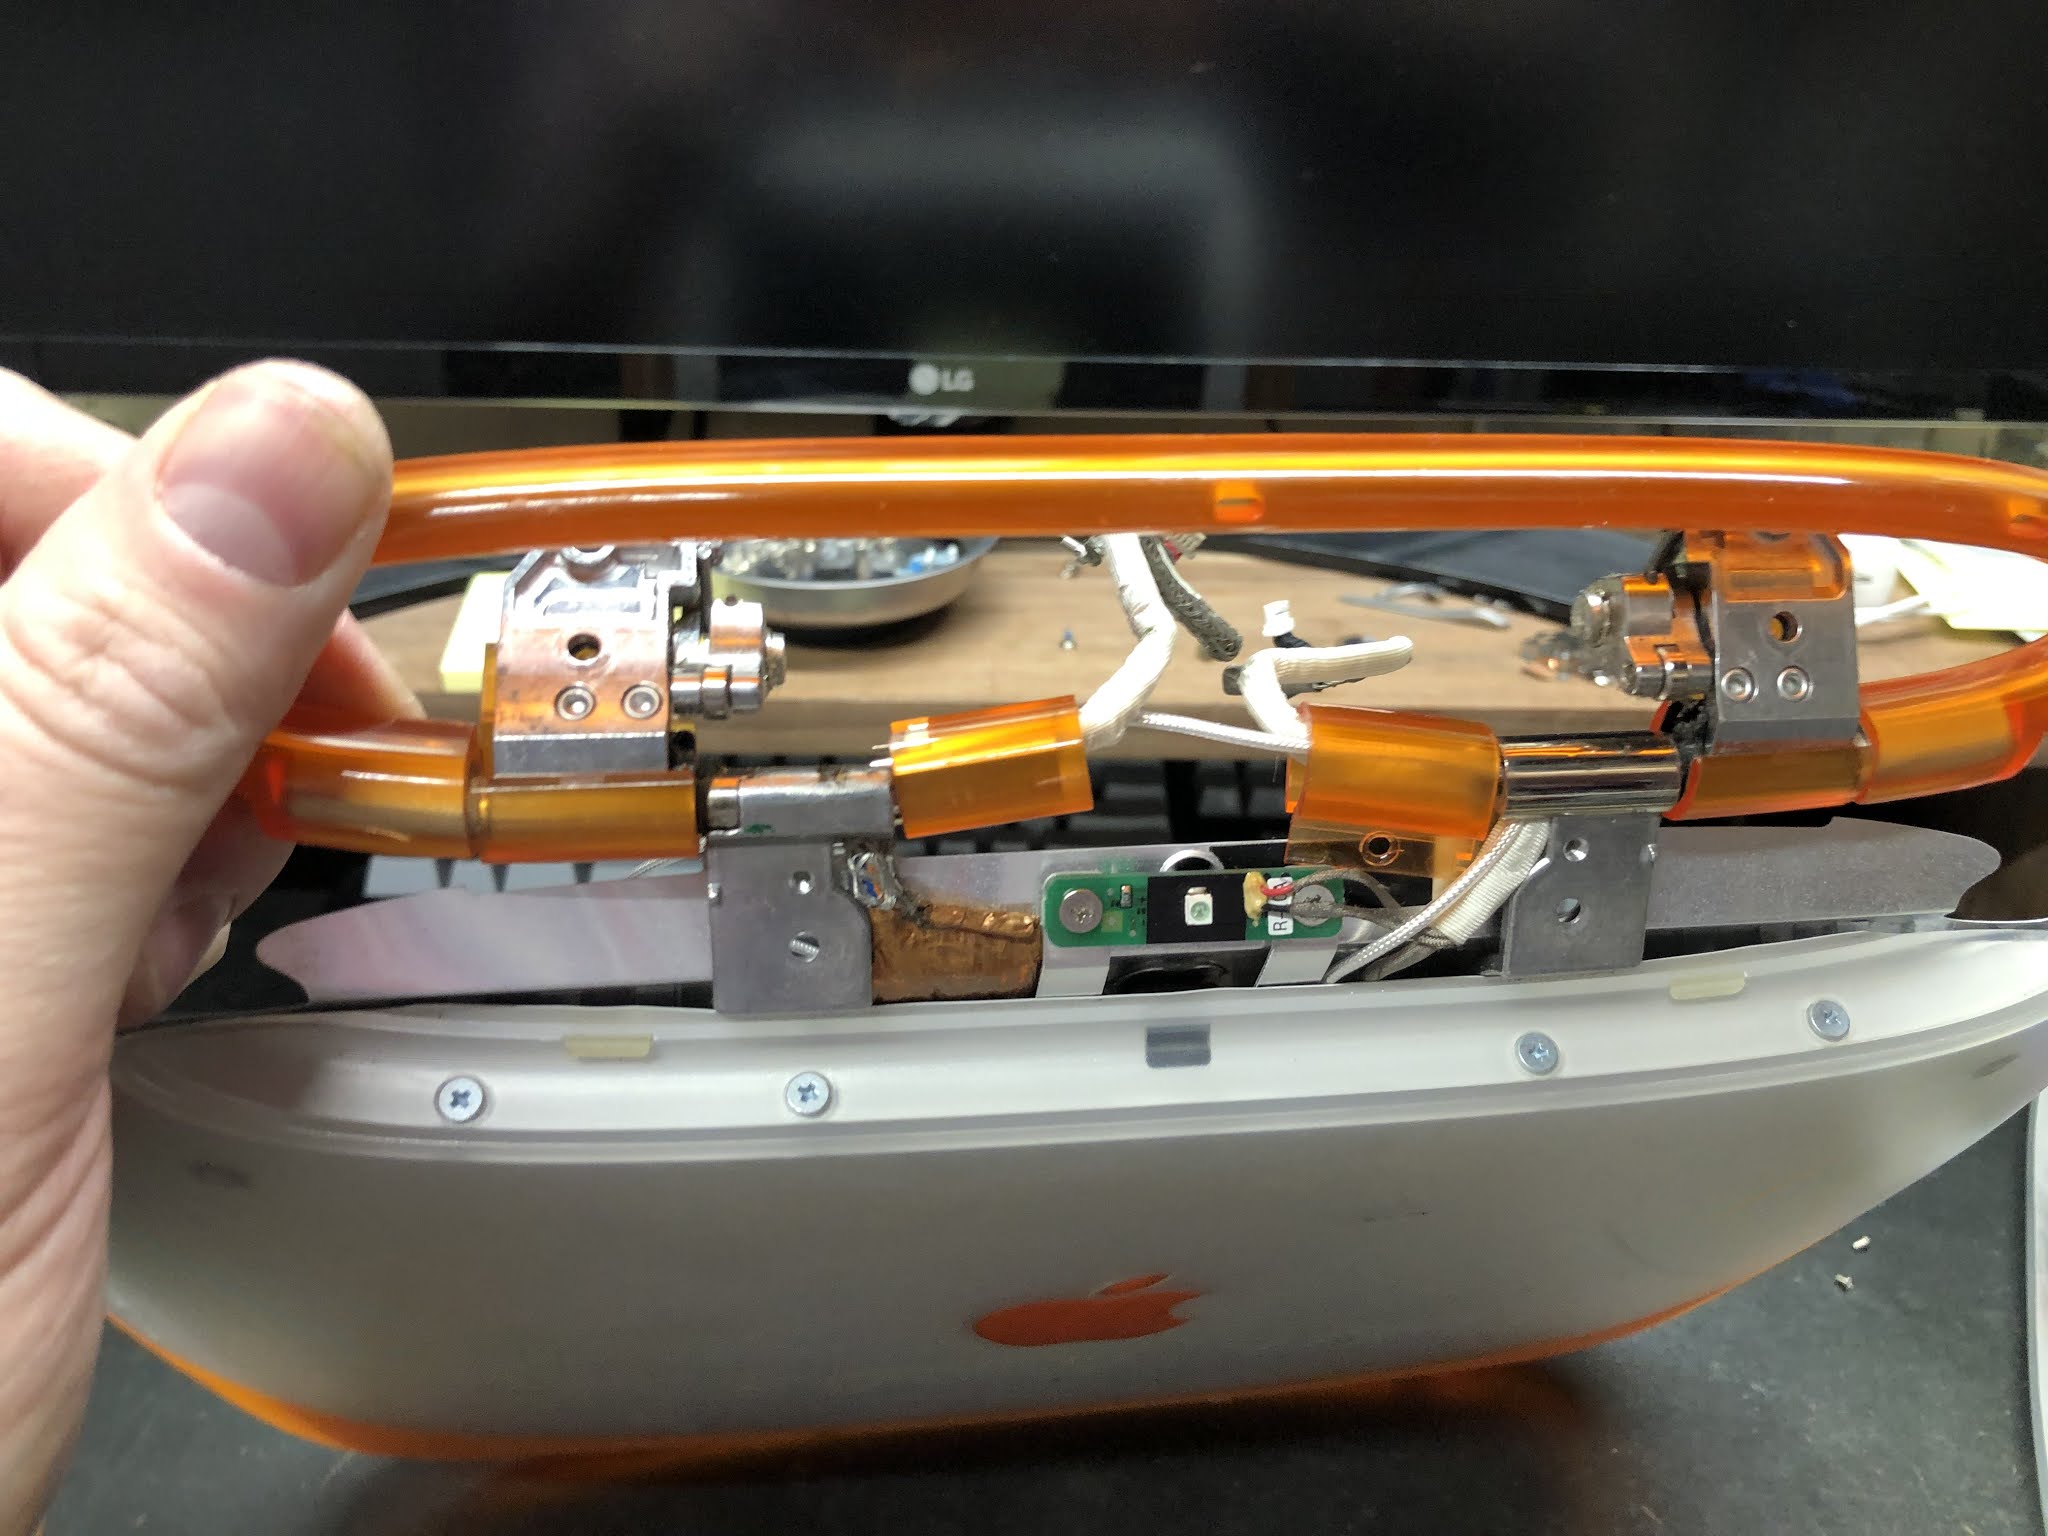
Step 3:  Remove the bottom trim plate from inside of the carry handle (two Torx T8 Screws)


Step 4:  Remove four Phillips screws from the back of the display module under the carry handle


Step 5:  Remove four Phillips screws from under the metal sheet at the top of the display module.


Carefully de-route the two antennas on the left and right side.
The display panel should be loose and can be pulled downward to free it from the top retaining tabs.

Assembly is the reverse, but note that it's tricky to get all four tabs at the top of the display module underneath the tabs in the housing.  If you don't do this the bezel won't seat correctly in the top case.

Cleaning:

During the inspection, I had discovered that some parts of one case were in better condition than others, so I decided to take both computers completely apart and wash all of the parts before deciding which ones looked the best for re-assembly.  The only case part that could not be immerse for cleaning is the case bottom top half because the trackpad is attached by heat stakes and cannot be easily removed and reattached, so I carefully cleaned this part taking care to avoid the trackpad.

Reassembly:

The good computer ended up being a mish mash of parts from Machine A and B.  As I was rebuilding it, I installed an SD to IDE Adapter to replace the HDD with a 16GB Micro SD card.  Since the machine had only a 6GB HDD, this ended up being an upgrade.  The machine has no cooling fan, so the HDD was the only moving part, and now that we have no moving parts the machine should be that much more reliable.

I'm very pleased with how the completed machine looks...


None of the machines in my collection is a museum piece, but I actually prefer it this way since I don't have to feel bad about using the machines, and more importantly letting other people use them too and experience was computing was like in 1999 / 2000.


Everything works on this machine.  I've loaded it up with software and games, and I've got a 512MB RAM SIM on order to max it out.  At that point I may load Mac OS 10.3 or 10.4, but it's only a 300 MHz machine, so I'm not sure if I'll do that or not.

One thing that I've enjoyed setting up on a couple of old machines now is the ProtoWeb project, using these instructions from RetroTech Chris.  Because Macs should be able to browse the web like it's 1995, too.  Thanks for the tip, Chris!

How to open a Power Macintosh 61XX Series Case Without Breaking It

 Opening a Power Macintosh 6100 is dangerous.  These machines are of such an age that the plastic tabs on the back of the case break off frequently.  Sadly, I've just broken two more this weekend.

That being said, I was successful at opening to cover on one of these computers without breaking the tabs, I was so excited.

In hindsight, I really wish I'd have used my heat gun to soften the tabs a bit before trying to open the case, but I did come up with another hack that I thought might be worth sharing.  (Or maybe I saw this somewhere else and I'm just not remembering where.)

If you do manage to get the case open, you'll see a couple of hooks that face backwards at the back...


One hook just over the power supply, and one over the Expansion Bay.  A quick few minute with the Dremel and you can zip those right off, as shown below...

The cover is now loose, but gravity will hold the cover down, or whatever you put on top, and there's no longer any danger of breaking the tabs on the cover.

Moving Data using a "Rosetta Stone" Macintosh

As you may have read in my previous article, I have a Power Macintosh 8600 / 200 that is a "Rosetta Stone"  Mac, which I will refer to as a Bridge Mac in this article.  For background about this machine, please refer to the article "My Adventures with Classic Macintosh Hardware - Part 1".

As we left things in that article, the Mac was booting OS 9.1, the last major supported version of Mac OS that will run on that hardware.  Since then, I've discovered through some more careful reading that if I were to get System 7 running, I would have access to more of the original 400K mac floppy disks in the collection.  This was the beginning of my quest to install System 7 on the 8600 / 200.

Being that the computer already has a SCSI2SD adapter, it's quite inexpensive to swap system drives.  Finding a System 7 installer CD that was compatible with the 8600 was more of a challenge.  I tried several disk images before I found one that the computer would boot from.  In the end, the Apple approved System Installation disk for the 8600 and 9600 for Mac OS version 7.6.1 was found here...

The next challenge came because with the SCSI to SD adapter, you cannot easily power off the machine, pull the SD card, and write files to it with the modern Macintosh.  With the SCSI2SD we must find another drive that can be installed in the Mac while it is running either System 7 or Mac OS 9.  I was extremely fortunate because this Mac already has a Zip Drive.

I was able to get a USB Zip drive for my modern mac from my local Free Geek store in Minneapolis, one of my favorite stores!  Once all the hardware was here and in place, I was hoping that I could move files from System 7 directly to my modern Mac in one jump, but the Modern Mac OS (10.14 Mojave) has read only access to "Standard HFS" disks.  So this single jump method will work for migrating files from old too new, but not the other direction.

The more modern HFS Plus file system drives are read write in the Modern Mac, but they seem to work better if you use the old machine to format the drives, then verify access on the modern mac.

There is some information on the Internet about "Puddle Jumping", but it took me some time to realize how to do this.  Although it seems obvious now, I'll cookbook this in a bit more detail in case it will help others.  Here's what I did do to get files transferred From the Modern Mac OS X (Mojave 10.14) machine back to the Bridge Mac running System 7.

Setup Procedure:
  1. Start the Bridge Mac in Mac OS 9
  2. Format one of the Zip Disks Standard HFS
  3. Create these folders on that Zip Disk
    System 7 -> Mac OS 9
    System 7 <- Mac OS 9
    System 7 -> Mac OS X
  4. Format another Zip Disk as HFS Plus
  5. Created two folders on this Zip Disk:
    Mac OS 9 -> Mac OS X
    Mac OS 9 <- Mac OS X
  6. On the Bridge Mac HDD (Mac OS 9 System), create folders to store these files since only one Zip Drive will be plugged in at a time:
    System 7 <- Mac OS X
    Mac OS 9 <- Mac OS X
    Mac OS 9 -> Mac OS X
  7. Insert the HFS Plus Disk in the Zip drive attached to the Modern Mac
  8. Verify write access to the HFS Plus disk

Now we have the tools in place, we can begin moving files from new too old (the more challenging direction).
  1. Prepare all the file data on the Modern Mac computer.
  2. Insert the HFS Plus disk into the Zip drive on the Modern Mac
  3. Copy the files from the Modern Mac to the folder "Mac OS 9 <- Mac OS X"
  4. Eject the Zip Drive from the Modern Mac
  5. Start the Bridge Mac using the system drive for OS 9
  6. Insert the HFS Plus Zip Drive into the Bridge Mac
  7. Copy the files from the Zip folder "Mac OS 9 <- Mac OS X" to the HDD "System 7 <- Mac OS X".
  8. Eject the HFS Plus Zip Drive and Insert the HFS Standard Zip Drive.
  9. Copy the files from the HDD Folder "System 7 <- Mac OS X" to the folder on the Zip drive called "System 7 <- Mac OS 9"
  10. Shutdown the Classic Mac
  11. Swap the system drive from OS 9 to System 7 and Restart
  12. Move the files from the HFS Standard Drive folder called "System 7 <- Mac OS 9" to the appropriate folders on the System 7 HDD and enjoy access!

I hope these instructions may be of use.  Please leave a comment below if you have suggestions to improve this article, or if you want to share your experiences moving data back and forth off Retro Mac hardware.

Update:

If you only need to use the Bridge Mac to copy data from HFS Standard disks to HFS Plus disks, use Mac OS 8.x. This version allows read and write access to both disk types and can save some hassle.


My Adventures with Classic Macintosh Hardware - Part 1

I've really enjoyed the content on YouTube for Retro Computing.  It's fun to reminisce about the computer hardware I used to use, and I've been especially enjoying content from:
8-Bit Guy
Retro Man Cave
LGR
Cameron Gray

These guys have inspired me to go back and do a bit of retro computing of my own.  Here's a story about one of my recent adventures in retro computing.

I've had an ongoing challenge that has made me want to get  an old Macintosh computer back up and running, my wife's collection of Macintosh 3.5" floppy disks contain data spanning from the late 80s into the early 90s, including all her files from her college years.  We had an old PowerBook computer, but it was stolen some years and with it I lost the ability to access these 400k and 800k floppy disks.

Chapter 1:  Rosetta Stone Mac

Some time ago, as I was reading up on this topic, I found this page on the Internet, Working with Macintosh Floppy Disks in the New Millennium.  This article was incredibly helpful, listing in general all the ways that I could go about retrieving the data from these disks.  At first, I was most interested in the KryoFlux disk controller because I'm really impressed by the engineering effort, and I like the idea of being able to use new hardware to access old software, but it seemed alot of money to pay for a one-use hardware design.  I found the idea of a "Rosetta Stone" Mac quite intriguing.  I had forgotten that before Apple's Super Drive that could burn both CDs and DVDs, they had the original Super Drive that could read both PC and Mac floppies, and these Macs had those floppies.  I didn't know that much about this era of Macintosh, because although I was an Apple II user in  High School, and a Mac user after college, during my college years I didn't spent much time with Apple computers.  I did some research on the Internet, and the Rosetta Stone Mac seem to be making a bit of a recovery in terms of their value, with some systems going on eBay in the $200 to $300 price range (2018).  So, I also put this idea on the "back burner" and waited.

Recently, I discovered a new store in Minneapolis about a mile and a half from my house called "Free Geek".  Although this is a non-profit organization I believe it is a franchise because I've seen YouTubers visiting stores of the same name in other cites.  On one of my first visits, I saw a couple of examples of the last of the Beige Macintosh computers sitting on a back shelf.  These had been gone over by the technicians, and had Mac OS 9 installed on them, the last of the Classic Mac OS'es.  I didn't put two and two together until my second visit, when I remembered that I had a "Rosetta Stone" Macintosh on my wish list.  I was able to pick up a working Power Macintosh 8600/200 for just $85.  This computer was a PCI based architecture, with SCSI hard drives, but it also had a Firewire and USB card installed, along with 10 Base T Ethernet, so I had alot of options for getting data on and off of the computer.

Once I got the computer at home, I did have some trouble getting it to boot reliably.  Apparently there is a shortage of these SCSI hard drives, and the 2GB Quantum drive was beginning to show it's age.  After opening the case and reseating the SCSI connectors and RAM, I was able to get the device to boot and recover all the data off the floppy disks that were readable.  It looks like we lost about 1/3 of the disks completely, and a couple of files were corrupted on the other disks, but I think this is too be expected after so many years.  Mission Accomplished!

Chapter 2:  SCSI2SD

I just couldn't put the computer back into storage knowing that the hard drive was on its last leg, so I started reading up on methods for replacing SCSI hard drives on these classic computers.  It turns out that there's a modern day hardware engineering solution for this problem, SCSI2SD, which allows the user to replace a failing SCSI hard drive with a modern MicroSD memory card of significantly greater capacity.  I learned about how other vintage apple users had been able to use this device, and so I ordered one for myself.

Getting this to work was a bit of a chore, and I won't bore you with the details of all the rabbit trails I went down, but I will detail the route that worked for me in hope that it will help someone else out.  Before I start into the detail, I should provide some background about the modern computer tools I used to get this going.  First, a computer with a CD Burner is required to get the Mac OS Boot Disk made.  I also found it critical to use the USB 3.5" Floppy Disk drive that I'd had in storage for some years attached to my modern computer.  Although my modern computer is a Hackintosh, I believe that a PC or Linux box would be equally useful for these setup tasks.

I initially tried to get the SCSI2SD and dying Quantum SCSI drive working at the same time, but I was not able to make that happen.  I think we were just in time and the HDD is now completely non-functional, but I'll leave it inside the Mac just in case it can be repaired in future.

The first goal for the SCSI2SD computer was to get the unit working as a boot drive.  The configuration utility allows setting the SCSI parameters, and I found a good deal of useful information on the web.  Here's instructions on how to configure SCSI2SD to emulate the original 40MB drive used in the earliest Macs.  Unfortunately, that won't help us because 40MB isn't enough space for Mac OS 9.  I ended up setting up Two 2GB partitions on the SD card I had (that consumes 2 SCSI IDs).

MacOS 9.1 is the latest version that will run on the 8600 hardware, according to the link above from EveryMac.com.  Apple made that software a free download, but they no longer host the files, which you can find hosted here.  I downloaded and burned this CD to disk.  The disk boots, but this is where we hit another snag...

The default Apple Hard Disk utilities on the Mac OS Boot CD for formatting drives will not format Non-Apple drives to use as a System Boot Disk.  I wish there was a way for me to read back the SCSI parameters for my sometimes working drive and enter those parameters into the SCSI2HD software.  If that was possible, then the default Apple HD utility would work but after much web searching on the topic, I was not able to figure that out and gave up.  If you know the SCSI parameters for a 2GB Apple branded hard drive, please leave a comment below, or alternately, if you know of a software utility that would allow me to extract that information from my drive, please also put that in the comments.  Once I shifted away from that technique, I was left looking for a 3rd party utility that could be used to format the hard drive during a boot from a Mac OS System Disk.  On this web page, I found mention of this utility, LIDO, and a download link to the Macintosh Repository.   This Utility fits on a Floppy Disk, so the OS install procedure must be modified a bit.

Boot from the Mac OS 9.1 Install CD.  Instead of using the default Mac OS Hard Disk Utility, insert the floppy disk with LIDO on it, and run LIDO instead.  Use LIDO to initialize the drive, then go back to the Mac OS Install program, and it should pick back up from there, format the drive, and set it up as bootable.  The installer did pop up a warning about the version of the Hard Disk Driver being out of date, but that has not affected the system's ability to boot or run from the drive.

That was it!  After that, the system boots and runs.

Chapter 3: Finishing Touches and Moving Forward

The last things I wanted to do before putting the Mac away was get a good hardware mounting system worked out.  The SCSI2SD web page pointed out this 3D printed bracket that someone designed.  Since I do not have a 3D printer, I ordered that here.  Unfortunately, I was not able to find this in the Beige color that matches the outside of the Mac, but I'll keep all the faceplates.  There's no spare 3.5" drive bay available, so I found a low-cost off the shelf 5.25" to 3.5" drive bay adapter at my local Micro Center and superglued these two black plastic parts together.  With the SCSI2SD bolted down to the 3D printed bracket, and with the 5.25" adapter bolted into the tower we can now access the USB programming port and the MicroSD card slot from the front of the machine without opening the case.

For another $10 or $20 dollars, I found an external Firewire CF Card Reader.  This is how I move updates, games, and large files back and forth from the Classic Mac, although I should also investigate some Ethernet networking, as I believe that can be made to work as well.


Steve's Power Macintosh 8600 / 200

The drives shown on the front from top to bottom are:
3.5" Super Drive Floppy Disk
CD-ROM Drive
100MB Zip Drive
SCSI2SD Drive