Pentium Socket 5 Build - Rounding out 2022 with a PC

As 2022 comes to a close I've completed one more PC build for the year.  This one is nostalgic for me, as the target year is 1994, which is around the time that I got my first PC.  Also, this machine replaces one of my first Retro PCs that I purchased back in 2019 an Epson Pentium 75MHz that was a Socket 5 Machine.  I damaged that machine while I was trying to perform a processor upgrade to bring it up to a 100 MHz chip, a sad episode which I regret quite a bit.

I just finished a Custom Socket 7 build which I'm very pleased with.  I think that these custom builds will be easier to experiment with and also easier to maintain in the long run, so although I do have one other Socket 5 machine, I have been on the lookout for another Custom Build.  Free Geek Twin Cities was selling this custom build at a really good price and I jumped on buying the machine.

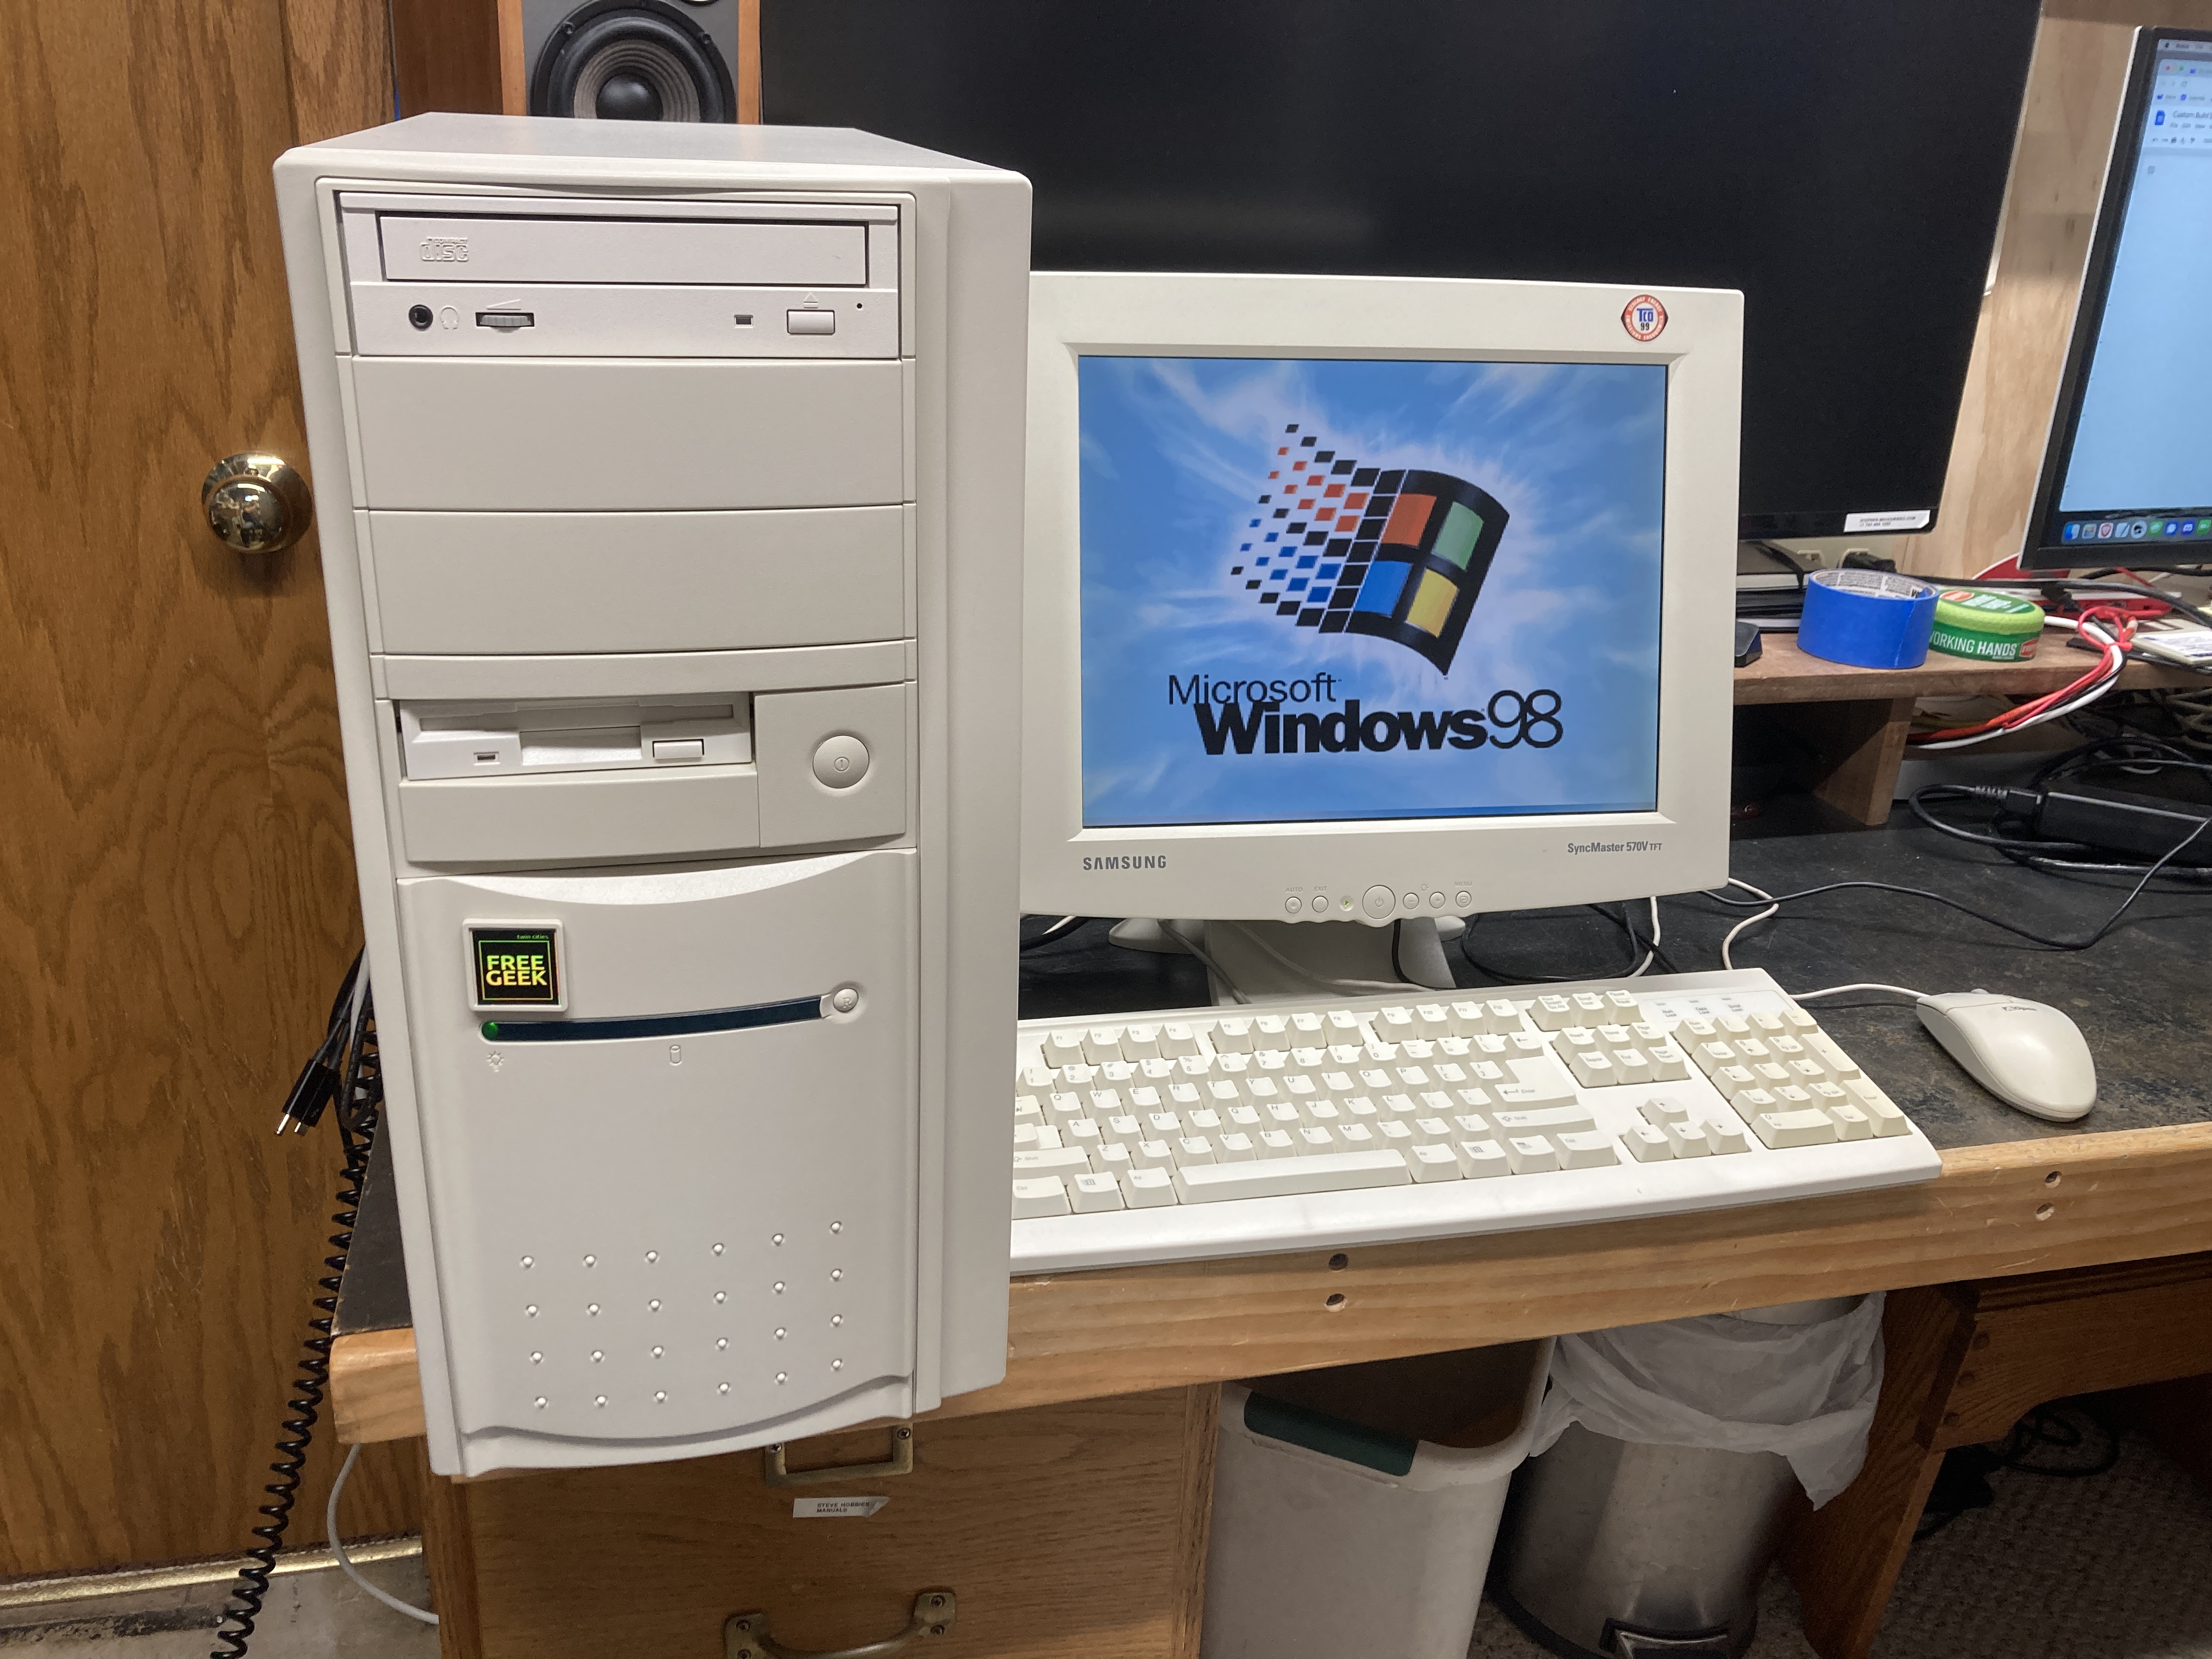
The case on this one has yellowed a bit...

But overall I'm quite pleased with the appearance.  This build is based on an Asus Motherboard, PCI/I-P54SP4.  The machine was working as I got it from Free Geek but readers will know I'm not one to leave well enough alone.  According to Free Geek the Dallas clock chip was dead, so I de-soldered that and added a socket for the replacement clock battery, and I also lubricated the CPU fan which was running a bit rough.

Vogons has a nice scan of the manual for this board.  After alot of trial and error, I was able to upgrade the RAM a bit (As configured, it accepts only double sided FPM RAM SIMMs).  I have 48 MB RAM in the machine, but as it's a Windows 95 machine and will normally be running in DOS mode anyway I don't think this will be a problem.

I upgraded the old proprietary 1x CD-ROM to an IDE CD-ROM that will read CD-Rs, this is a nice "quality of life" improvement for the machine.  I also added an IDE ZIP drive which makes it much easier to move files onto the machine.

The machine is still sporting a 1GB Hard Disk drive, although I may replace that with a CF card to IDE adaptor pretty soon.  It's running Windows 95 and it has both an ISA 3COM Network Card and a Sound Blaster 16 (The less desirable CT2940) that work well in both DOS and Windows 95.

The final upgrade on this machine was to CAREFULLY install the Pentium 100 processor that I'd originally bought for the Epson machine.  It's working well and give this motherboard is maximum speed Intel processor.  Since the machine has a Front Panel MHz display and I couldn't find any documentation, I had to do some experimentation to set the display to 99 MHz, as this one doesn't have a third digit.  It's a cool look, and my only PC with the front panel MHz display!

So, perhaps this completes my the last Retro computer project for 2022.  Overall it's been a great year in Retro and I'm looking forward to the challenges and learning that will come in 2023!

Sometimes They Come Easy - Socket 7 Pentium Build

Lately I've had several projects in my backlog that keep stalling out due to broken parts on the original machine, broken accessories, or broken replacement parts.  I've been wanting to complete projects for an original Mac 128K, a Sun Ultra 5 Workstation, and an Amiga 500 among others but these projects are on hold for parts.

So, in the meantime I was looking for something fun, easy, and low cost.  Once again, Free Geek Twin Cities has come to the rescue!  One of the gaps in my collection has been a nice Socket 7 Pentium.  I've had this on my wish list for some time, but watching Phil from Phil's Computer Lab go over his "daily driver" retro gaming PC really got me thinking about this again.

So, a couple of weekends ago I was in Free Geek and purchased a New Old Stock AT tower case that came from a computer store that had recently closed in our area.  The case was still in the box and it was immaculate.  It was an AT / ATX convertible case, and I had to do a bit of drilling and Dremelling to get an AT Power Supply fastened down inside the case.  I also had to drill out the power button and cut it a bit shorter, but I was able to get an AT power supply in the case and it looks really nice.

The Motherboard, CPU, and Memory came from a Socket 7 Build at Free Geek that had sat for a couple of weeks. Perhaps it didn't sell because the case wasn't perfect but since I was swapping the case anyway I didn't care about that.  The mainboard is an Asus P/I-P55T2P4.  I found a nice generic looking CD drive and I had to replace the Floppy Drive on it because that wasn't working well.

The other upgrade per Phil's video was to put an upgraded video card into the machine with a Digital Interface.  I don't have an Nvidia card (with the hardware scaling that Phil mentions), but I do have an ATI Radeon PCI graphics card with both VGA and DVI outputs on it.

For now, I've paired the computer with a Samsung SyncMaster Beige LCD panel that also came from Free Geek...

I've installed Windows 98 and all the Windows drivers on this machine, but I've also loaded DOS drivers and DOS games as well.  It's a build I'm very happy with and certainly allowed me to "scratch the itch" of completing a build with minimal pain and effort.

Now back to that Amiga 500...

The Commodore VIC-20, My First Computer

The Commodore VIC-20 is a special computer for me as it was the first computer we ever had in our home.  My Uncle Frank gave me his old computer in the '80s.  At that time, I had shown some interest in electronics, but it was generous and a bit of a risk on his part because I hadn't really demonstrated any affinity for computers.

Anyway, one Summer Uncle Frank brought a huge box of stuff, including the computer, tape drive, game cartridges, printer, and tons of software on Cassette.  Of course the Commodore manuals were also there along with some other computer books about learning how to program.  This was back in the day when our computer learning came mostly from books so having these was a huge benefit.

I think my Grandma gave us an old Color TV set that she had in her bedroom to use as a monitor for the computer since my folks didn't want me to take over the main TV set in the living room with the machine. I'm sure they realized that I'd be wanting to use the computer during Prime Time, and they were right.  I read the books cover to cover and did several of the "Type In" programs, although I was fortunate to have so much software saved on tape.  There was a large library of material there, and I'm not sure I even ever got through it all.  I experimented with Basic, with Poke and Peek commands and I learned about manipulating sounds and the colors on the screen.  I never got far enough in to learn Assembly language, and I wouldn't get into that until College days, but it was a wonderful experience and I have found memories of using the VIC-20.

I wish I'd have saved the machine, or at least taken pictures of it.  I do not think that any pictures of the setup survived.   I believe that I ended up damaging the machine by trying to wire an electronics experiment onto an edge connector on the back.  After I'd damaged it, making repairs of the unit was beyond my skill at the time and so that was the end of my Commodore involvement in the 80s.

Fast forward to the present day, as my readers will know I've been learning alot about fixing Retro computers from the 8-Bit era.  There's a ton of documentation and how-to repair videos on the Internet.  When I want to wire up an experiment to a computer, I use a Raspberry Pi (Which I can easily afford to loose).  So, it was safe once again for me to buy and use my first ever computer, the Commodore VIC-20.

Thanks to my friend Matt for selling me a Commodore VIC-20 out of his collection.  This is a nice early example.  It has an external 9 VAC adapter and a linear power supply inside the case.  It's got the old badge style, but not the PET style keyboard.  From the price tag on the box it looks like the original owners bought this machine for $99 at Target in 1981.  I also got a matching VIC-1541 drive, and an assortment of Cartridges.  Here's a picture of the setup when I was still testing out in my garage...

Since the pictures, I've gotten a Datasette from my friend John, a Joystick from Free Geek Twin Cities and I have the entire thing paired up with a large Sony Trinitron Flat Square CRT Television.  Of course it goes without saying that I never remember the VIC-20 looking so good.

"Avengers", the Space Invaders clone for the system has become my favorite cartridge.  The VIC-20 is an amazing computer and I'm so glad to have one in the collection.

Documentary / Storytelling Videos and Primary Source Videos on the Web in the 2020's

For me a large part of the appeal of the Retro and Vintage Computing hobby is learning about how to the machines work and how they would have been used.  These aspects of retro computing are best experienced hands-on.  But I'm also super interested in the historical context and the teams that built them both because these are amazing stories, and because those who cannot remember the past are condemned to repeat it.

One of the things I'm realizing is that for the documentary / storytelling YouTube creators (channels like the 8-Bit Guy, LGR, RMC Retro, 65ScribeTech Time Traveller and Nostalgia Nerd) they spend alot of time searching through archival material and viewing old photos and video.  Hats off to them for bringing awareness and attention back to these machines and the stories of the teams who created them.

During the VCF Midwest 2022 YouTube Panel Discussion one of the questions was about how much more effort it takes for the creators to make this type of content.  It is a very time consuming activity with some videos taking weeks of effort.  I would like to say that my own interest in Retro Computing has a great deal to do with these stories and I would like to salute these creators for their hard work.

There is another class of channels and websites that are dedicated to presenting primary source material in its original form.  There is more and more historical footage being uploaded to YouTube and other platforms like Archive.org.   For the retro computer enthusiast there is an overwhelming amount of original source material out on the web.  Here's a quick overview of some of these sources that I've been enjoying recently:

"The Computer Chronicles" and special events like recordings of MacWorld events are only a search away either at Archive.org or YouTube.com.

The Computer History Museum has been uploading a ton of oral history interviews from their archives.  

Both the Vintage Computer Federation and VCF Midwest have been uploading the talks from their events.  Sometimes these talks are given by primary sources, the people who were there when the machines were created and many of them are quite good storytellers.

The Computer History Archives Project has also been uploading a great deal of interesting historical footage.  

Dave's Garage is interesting for Microsoft users because for some of the topics that he discusses he's a primary source (and he's also very transparent about when he was "in the room" and when he wasn't).  

The Centre for Computing History has also published some good video interviews of historical importance, and is a good source for many of the parallel developments that happened in Britain in the early days of computing.

Here's a fun screenshot from one of these historical movies, Bill Gates in the computer lab at Microsoft.


In the background from Left to Right we see an IBM PC 5150, a Compaq Portable I, and a Macintosh Plus, so this must have been 1986 or later.

What are your favorite sources of primary material on the web?  Please leave a comment or send me an email if you have other sources that I should have included here.  Thanks!

A New History of Modern Computing - An Important Book for Fans of Computing

I've read and very much enjoyed the book "A New History of Modern Computing" by Thomas Haigh and Paul E. Ceruzzi.  I've completed the book and I thought I should post a review and let readers know what they could expect from the book.  The contents of the book is copyrighted and is not one of the books that MIT press publishes online, but the price is reasonable.  A free sample is available on Kindle.

In addition to reading the free sample, you can get a bit more of the flavor of the book by reading the paper "Finding a Story for the History of Computing".  This idea of having a story to tell, or even better multiple stories to tell is quite compelling.  The book unfolds as a series of developments from the various users points of view, scientific computing, business computing, home computing, etc, as well as the more typical stories of the people who designed the machines and the chronology of developments.

The early parts of this book filled in many knowledge gaps for me, not just isolated facts but also connections between the history of the concepts and their current use.  As an example, the fact that pipelining and hardware parallelism were originally features of mainframes before they "trickled down" to workstation computers and PCs.  Of course it makes sense but because I had no exposure too mainframes, and little too workstations, I did not know this.  For me, the earlier parts of the book were both interesting and informative.

Once the books's history moves into the Home Computer and Personal Computer revolution, nostalgia will kick in, depending on your age, that may happen at different points in the timeline, but there is good coverage from a wide range of developments.  There are a couple of nostalgic games that one naturally plays when reading the book, answering these questions:

The first computer mentioned in the book that you ever used:
Apple II, Page 181.

The first programming language that you ever used:
Microsoft BASIC, Page 171

The first computer in the book that you had at home:
Commodore VIC-20, Page 196

And of course the lists of computers that you've every owned or worked on.  If you are a computer collector, then of course you'll be interested in reading about the computers that you currently have in your collection.

But as the book moves into modern times the tone of the book shifts.  Or perhaps it's just my response to the nature of the stories.  The book explains well the rise of the smartphone and AI, the idea that software is everywhere and that it is a universal solvent that dissolves everything (for example, the iPhone replacing: alarm clocks, maps, land line telephones, mail, TV, etc, etc),  This point of view is quite interesting.  As an example, when I look back at videos and lectures from as recent as 2014, I notice that the dominance of Intel is still assumed, but I'm writing this bLog article on an ARM powered Apple M1 machine, the fastest computer I've ever owned.  Apple has made three hardware architecture changes in the lifespan of the Macintosh and this last one has been by far the least painful, almost un-noticeable, and again this is arguably because of how good of a job Apple has done on the software emulation layer that's used to bridge the gap between old software and this new hardware.

I believe that the paradigm that the authors suggest is a very helpful one as we consider the future of computing.  It challenges us to try to decide what is the best kind of life that we can live, and how computing fits into that life given its ubiquity.  I came to the end of the book with more serious questions than answers, but perhaps this is fitting for those of us who work in the tech world and have a disproportionate impact and a therefore a responsibility to our fellow human beings.  

Technology is not inherently good or evil.  These are tools that we as individual human beings wield.  To the extent that we each understand how to use these tools we bear the responsibility to use them well.  My kids will tell you that they get sick of hearing this, but Uncle Ben (Or Aunt May, depending on your age) was right when he/she told Peter Parker that with great power comes great responsibility.

If you want a book that will make you think, I recommend "A New History of Modern Computing".

Digital Equipment Corporation - AlphaServer 300 4/266

This year I missed VCF Midwest in Chicago.  I had a really great time last year and I was disappointed to miss out.  One of the retro collectors I know from Free Geek Twin Cities was willing to set aside several of the machines that he was planning to sell there.  You'll be hearing more about these computers on my bLog as I work my way down the stack.  The first in the series is a Digital Equipment Corporation Alpha Server 300 4/266.  This line was released in 1995 and this particular machine dates from 1996 or 1997.  It's one of the lower end from the Alpha Server line, but given the desktop form factor it should perform nicely as a workstation.

I've always wanted a RISC Windows NT machine ever since they were new.  When I bought this machine I was thinking that it may have been limited to run VMS or True64 Unix, but I was willing to purchase it anyway because VMS is also quite nostalgic for me, as that was the OS that was running on our VAX cluster back in my college days at MSOE.

As usual I started my intake process with some cleaning and inspection.  I was surprised when I opened the case and found a Matrox Millennium II PCI card and a Sound Blaster 32 ISA Sound Card in the machine, I didn't know that these were supported.  The machine was really clean inside.  I was happy to find an enterprise grade SCSI HDD (hopefully less likely to die soon) and fully populated RAM slots (which ended up being 256MB of RAM).  The HDD had a sticker on it indicating that the drive had been wiped at Free Geek at some point.  The machine also needed a new clock battery, but this machine uses a standard CR2032 so that was an easy fix.  After that the machine was clean and there were no loose parts and connections, so it was ready for a first boot.  

The machine booted for me, and just as I had been told it was coming up to a prompt:
>>>>
After some reading I learned that this is the Alpha's ROM prompt. 

I started googling around and reading about this machine.  As you may know Alpha was a short lived platform and it was sold off (killed) after Compaq acquired DEC.  The main software architect of Windows NT, Dave Cutler, was previously a Digital employee who was a member of the Vax / VMS software team.  I think there's a pretty convincing argument to be made that Alpha was the primary target platform for Windows NT during it's early development at Microsoft with x86 being a runner up.  It's interesting to think about how things might have turned out differently if Digital would have been able to reinvent itself.

But back to this machine.  One of the first items I encountered was this document, a procedure for installing Windows NT.  I was anxious to try it out since I didn't know if this would work or not.  I found a Windows NT 4.0 disk image on WinWorld and got to work.  In hindsight, if you are doing this, you will want to also download the full ISO CD version of Service Pack 6.  It has additional files that are not available in the self extracting EXE version of the last Service Pack and it's helpful when looking for drivers to be able to have both the entire Windows NT installer and the entire uncompressed SP6 on the local hard drive.

I struggled getting a driver installed for the Matrox Millennium graphics card.  After reading a bit on the forums, I planed another trip to Free Geek.  My contact at Free Geek set me up with an S3 video card from 1995.  I was concerned that this was not "specialized' hardware, but in hindsight this machine does not require specialized hardware, as it came right up at boot time.  Windows NT Plug and Play recognized the S3 video card on boot and I had 256 colors for the first time since working on the machine!

Getting Audio working was also a bit of a pain with lots of trial and error, but I think having both the NT installer files and the SP6 files on the hard drive would have avoided most of the difficulty.  The key enabler for getting this card to work was that ISA cards don't have Plug and Play out of the box.  On the NT install CD ROM Extras there is an installer for ISA PnP. After installing this and restarting the machine the ISA sound card is found at startup.  I ended up having to move the card to the bottom ISA slot and to manually assign resources (Default Resources 0000) too the card, but after a couple of restarts the sound card is working in Windows NT!

So, in hindsight, I think the trick is to use only hardware that is on the Windows NT 4.0 Hardware Compatibility List.  I had trouble finding a readable version of this document on the web, so I'm including a link here to an Archive.  Perhaps it's good that I didn't find this doucment till later as the AlphaServer 300 is not on the HCL.  Still, after many hours of runtime the machine is stable and running well with zero hangs or bluescreens.

I'm quite pleased with how this machine turned out paired with a large CRT monitor.  Being that these machines were so expensive at the time and were often used for art or engineering they were often paired with larger CRTs...

The entire appeal of these machines at the time was that they were faster than the x86 machines of the time.  How much faster is I suppose a matter of debate but loading this up with period correct software like MS Office, VB 6.0, Visual C++ 4.0, and other tools, it does seem quite a bit faster than Pentium PCs of the era, although I'm sure a good part of that is the benefit of a fast wide SCSI bus vs. IDE.

Commodore PET - An Iconic Classic

 I've recently completed a restoration that took quite a long time and has ended up being one of my most extensive restorations, a Commodore PET 4016 from 1980.  This machine came from a trusted seller here in the Minneapolis St. Paul area from whom I have gotten several machines over the years, including the Apple II Plus machine that I've already covered on the bLog.

The PET machine was much cleaner than the Apple II, but both machines were in a non-working state when I bought them.  As is usual for this type of restoration, step one was to take the machine all apart and clean it.  In this case, I didn't take the monitor apart because it was cleaner and at least from the bottom appeared to be intact, but I removed the monitor from the base of the machine, removed the mainboard and power supply, and throughly washed and cleaned both the bottom housing and the mainboard.  On inspection the mainboard showed alot of corrosion.  There is corrosion at the top of the IC legs where they enter the DIP packages. If the package seals are broken, those chips will likely be bad.

This machine started life in a local Junior High and had some identifying marks on the side which I was happy to keep, but the students had picked at the front label.  It was all tatty and so I removed it during the cleaning process in order to throughly clean the case.  Fortunately, replacement labels are available.

After cleaning and reassembly the next step was to test the Power Supply.  I found these helpful troubleshooting steps on the Forums.  The Power Supply voltages check out but I was not able to get signs of life from the board.  Based on the markings on the board, this is not a "Universal PET" logic board, it appears to be an earlier design.  I was not able to find a schematic for this machine.  Because of my own lack of familiarity with the PET and not being able to find the Schematic I have put further troubleshooting of this logic board on hold.  I'm keeping the board here, and I hope to come back to it at some point.

In the meantime, I learned about a replacement Motherboard, The Future was 8 Bit 40/80D for the PET from the 8-Bit Guys's video on the topic.  I was hesitant to purchase such an expensive part, but there were a couple of factors that helped push me in that direction.  First, the PET is a very large computer.  I will only be able to have one in the collection and it's hard to pick between the 40 and 80 column versions of the machine (which have some pretty significant software incompatiabilities).  The 40/80D is DIP switch configurable, so you don't have to decide, it's two computers in one.  I also knew that I would not have room for the massive external floppy disk drives, I prefer having a way to load disk images from solid state media.  The SD2PET is a great option for that, but would cost over $100 delivered in the US, so between getting a known good replacement logic board, DIP switch changes between 40 and 80 column mode and the SD2PET built in, I decided to bite the bullet on this replacement logic board.

The 40/80D board fit quite well inside the PET case.  It's about 1/3 of the size of the original board, but mounts at the back to the connectors fit out the back side.  My Commodore PET 4016 didn't provide access to the User Port on the back or the second cassette interface on the side, but there were knock outs built into the case that I was able to remove in order to gain access to these critical areas.  The UserPort is helpful because several PET games are available now that work with a Joystick Interface on the UserPort.  The side panel where the second cassette used to enter is important because the SD card comes out there along with a couple of buttons, one for Reset and the other to bring up the DOS used for navigating the SD card.  I ordered it from England and waited for it to arrive.

After in installing the 40/80 board, I was very pleased to find that the Monitor was working with zero repairs required!  Of course, as with many of these project only a few minutes later I discovered that not a single one of the keys on the keyboard worked.  I had already seen in an older 8-Bit guy video "Commodore PET Restoration" which shows exactly how to repair that, and the specialized metallic paint was in stock at Digi-Key.  Of course while the keyboard was apart I cleaned all the keycaps.  I temporarily lost one of the springs along the way, but was able to find replacements on eBay for only $10.  Of course just a few days after the springs arrived and I had a fully functional keyboard again, I did find that lost spring.

So, with a cleaned and repaired Keyboard, working Monitor, replacement Motherboard, and a cleaned and re-labelled case, the Commodore PET 4016 looks better than it has in years...

I've quite enjoyed poking around with the software provided by TFW8B, watching PET demos, playing Space Invaders and some other arcade classics and basically just looking at the machine.  I don't have any nostalgia for this machine as we didn't have any Commodore at my school, but being the second version of one of the first home computers it's an iconic machine and I'm extremely happy to have one in the collection.

Do you have memories of the Commodore PET?  If you are using a PET still, what are your favorite PET programs?  Let me know in the comments below or feel free to shoot me an email.  Thanks!

Bringing Back a Basement Cleanup PC - Advanced Logic Research Fast 286 from 1988

This summer we found a moving sale in our neighborhood.  There were a couple of Retro Tech items in the sale, including an Intellivision gaming console.  As usual I was wearing one of my retro technology T-Shirts and when I checked out a family member made a comment about their fathers retro tech collection, most of which was still in the basement and had not made it out into the garage yet.  I asked if I could have a look and was invited in for a closer look.

He had been working on selling some stuff on eBay, and he had some of the items priced with eBay prices, so I took a pass on most of these items.  I let them know that I was willing to repair broken computer and buy bits and pieces and I left with several items and a bunch of pictures.  I ended up going back a second time and left with a total of 4-5 boxes full of parts in unknown or untested condition including parts of a 286 PC, Several 5 1/4" Floppy Drives, a 13" Sony Trinitron SVGA display and an Amdek 310A display from around 1985.

The Amdek monitor has been something I'd been looking for for a while as it's a good pair for the Megatel Quark CP/M machine that I've covered previously on the bLog.  I'm really glad to have a nice, period correct and crisp monochrome monitor paired with that machine.  I'd been running it with a Composite Monitor most recently after having a struggle understanding the video output signal well enough to configure the RGB2HDMI to give a proper display, but that's a story for another day.

The 286 was a longer term project.  When I bought it I knew that the battery had leaked, so I was prepared for it to be a lost cause.  When I brought the machine home, I took the motherboard out cut the battery off and treated the board with Vinegar in the affected area to try to neutralize the battery acid on the board.  After the cleaning (with alcohol) I did try to power up the machine but there were no signs of life.  I put the machine away for several weeks.

A couple of weeks ago, a friend of mine got me an ISA / PCI card that displays the POST codes during the PC Boot process.  I used this on a couple of "lost cause" boards that I have gotten out of other PCs but I was unsuccessful with the other boards.  Then I remembered that this 286 was up on the shelf.  The Post card was quite useful in this case because the machine was running enough to return POST codes to the display on the card.  The codes were related to Memory.  This PC has 2 MB of RAM on board, but it's all in socketed DIP switches.  Given the error codes, I pulled all the RAM DIPS and inspected them, then moved them around.  I did not want to rule out the idea that there may have been some bad chips, but the error code didn't change, so that seemed to indicate that the RAM DIPS were not the issue.

This early 286 has alot of socketed DIPs, so I went ahead and pulled every other socketed DIP out as well and went through and reseated them.  Unfortunately, when I reinstalled them, I had one DIP w/ bent legs, but the POST code changed and I had gotten further along, so I was excited.  Once I got the final DIP installed correctly the machine completed booting.  Always an exciting moment!

But of course a working main board is just the first part of a build.  Although I had rescued many parts from the sale, including the main board, a case, and a 5 1/4" High Density Drive, I did not have most of the rest of the parts I needed to complete the build.  Free Geek Twin Cities came to rescue once again.  I was able to get a Power Supply, a Disk Controller Card, a Serial and Parallel IO Card, and a low cost Sound Blaster card.  I already had an ATI All-In-Wonder VGA / EGA / Hercules card in stock from another project, along with a 1.44MB floppy, and a cool old 200 MB IDE Hard Disk to complete the build.  I'm really happy with how the build turned out...


The logic board is labelled as a "Fast" 286, at 10MHz.  I know this is nowhere near where the 286 topped out for speed, but I do think it was fast for 1988 so I've made some attempt to keep the build period correct.  No Compact Flash drives, although I will not rule that out as a future upgrade.

I've already had a go with Wolfenstein 3D.  At this speed, you have to run it in a pretty small window to get acceptable performance, but it's good for Paku and many of course Planet X3 and many of the earlier DOS games.  I'm really happy to have a generic 286 in the stable along with a couple of more specialized machines like an HP Vectra 286/12 and the CTP 9000.

Kaypro - An Iconic (and Nostalgic) CP/M Machine

Kaypro computers have long been nostalgic for me.  My grandparents had a Kaypro and I remember thinking how impressive of a computer it was.  Very rugged and industrial compared with my VIC-20 connected to a color TV.  I was recently offered a Kaypro from a trusted seller whom I've done business with before and I was most happy to be the next owner of a Kaypro 2X from 1984.

The naming of the Kaypro model numbers is a bit odd, but if you are interested, this article explains the timeline quite well.  The 2X is one of the final machines, but they all looked quite similar to the rest of the line.  I think they may have used the same case dimensions through the entire run of models.  From the outside, the distinguishing characteristic of the later systems is the 1/2 height drives instead of full height.  

My repair story started with finding and reading the relevant sections of the technical manual from BitSavers.  The first problem to overcome was that the CRT display was not working.  You could see that the tube was working, but the display was rolling.  By figuring out which of the three CRTs (Toshiba) was inside, I was able to locate the adjustment Pots and get the display solid.

The next challenge was to get the Kaypro booting.  I didn't have any Kaypro media, but as readers will know I've got a SuperCard Pro flux disk imaging system.  I've recently figured out a new workflow for that which has allowed me to create bootable disk images for several different retro systems, including the DEC VT-180 Robin and now this Kaypro.  Here is that workflow at a high level:
    Find Appropriate Bootable Disk Images for the Target System
    Use HxCFloppyEmulatorSoftware from this page to convert Disk Images into Flux Image Files
    Use Flux Imaging Tool to write out Floppy Disks, in my case SuperCard Pro.

Once I had floppy disks I was ready to try booting the machine. Sadly the unique push-button floppy drives in the machine were not working. Neither drive would eject a disk.  In the short term I was able to find a working DS/DD 5 1/4" drive from my parts bin that worked with the Kaypro.  Jumpering this as Drive 0 I was able to see the machine boot into CP/M for the first time.

Next on the agenda for the Kaypro was a through cleaning.  This was a dusty and dirty machine, both inside and out, but like many of the 80s systems, it was quite easy to take apart all the way down to the board level, so I did this both for the computer and the keyboard.  I washed the housings with warm soapy water and set them aside to dry, then cleaned the circuit boards w/ Isopropyl Alcohol, including the power supply, the analog CRT board, and the logic board.  I also removed the keycaps and washed them, and spent some time cleaning up the switch deck of the keyboard.  I did not try remove any of the switches as all the keys appear to be working on this machine!  I wonder if the enclosure design keeps dust out of the keyboard?

Part of the cleanup process was to return to the two floppy drives.  These were unique mechanisms, Epson SD-521 drives.  Like so many times before, the forums have been quite helpful, and I got some good advice about the cleaning.  After cleaning and lubrication, one of the drives is working well (it was previously the B drive, so maybe had fewer hours on it?).  I was able to get the previous A drive ejecting again, but there is a problem with the drive motor which I was not able to easily troubleshoot, so I've set that aside for now.  

As I was troubleshooting, I made an interesting observation about just how small CP/M even when compared to DOS 3.  One of the floppy drives I was troubleshooting was having trouble w/ the head stepper motor but if I manually pushed the head back to Track Zero (on the outside of the disk), then when the computer would successfully boot into CP/M and even give the Directory listing (DIR).  Trying to load a program would lock up the computer since the heads were not able to move to the correct position.  So this is another drive that I've set aside for now.

The machine doesn't look perfect since the two drives are not an exact match, but I'd much rather have the second drive functional than have it look nice but not work correctly.  The final results for now are shown below...

I'm quite pleased with how it turned out.  The highlight so far as been playing a text based Pac Man clone called Catchum...

It's surprising how much fun a text based arcade game can be.  The Space Invaders clone, called Aliens also looks like it would be fun, but there's a problem with the keyboard mapping for that game, so it isn't working on the Kaypro 2X.

Do you have any memories of the Kaypro computer, or suggestions about software to run on it?  If so, please let me know in the comments below.

Assembling an Apple IIgs - Late 80s & Early 90s 16 Bit Retro Computer

In the fall of 2021, I heard from a fellow member of the Retro Computer community on the Free Geek Twin Cities Discord server that they were selling an Apple IIgs.  This machine had been on my Wish List for some time as it has some nostalgia for me.  The IIgs was the "new powerful" machine for me when I was in Junior High and High School, and I looked forward to using it when I was at school as an upgrade over the Apple IIe.  Also, GS/OS was the first Graphical User Interface that I personally used.

As I've become more familiar with the history of Apple II, I've learned that the IIgs was the most powerful Apple II machine and the “end of the line” for this iconic series of machines.  I was able to make a deal with the previous owner and I got the machine home and started to go over it.  The machine had been at a school and mostly just needed cleaning up.

When I first got the IIgs home I had only the base unit. not the correct monitor or keyboard, but since the machine had a Composite output I was able to connect an older Apple IIe Color Monitor that I already had.  This was the first Apple computer to use the ADB bus, and although I didn't have the unique keyboard, I was able to use a different ADB keyboard and mouse that I already had from a late 80s Macintosh.  With these plugged in along with floppy drives and a FloppyEmu that I already had I was able to get the machine booting and running, and to create floppy disks for the machine.

This machine was a Rev 0 machine (not the "Woz" signature edition).  I discovered that many collectors feel that ROM 1 machines had better compatibility than ROM 0, so I looked for a replacement ROM and was able to find this device.  It was a fairly inexpensive addition, easy to install and easily reversible should I decide to go back to ROM 0.

My IIgs included an original Memory Expansion board that was not fully populated with RAM DIPs.  I was able to source the correct RAM DIPs from Jameco and get that card fully populated, bringing the system total to 1.25MB, enough to load GS/OS.   I will point out that the period correct RAM DIPs were not cost effective, dollar for dollar I would have been better off getting a modern RAM upgrade for the IIgs to bring it to closer to it Maximum RAM capacity.

After working with the IIgs a while, I realized that I was really missing the look of the matching monitor and keyboard.  I put out some feelers with the Free Geek community, and was very pleased when a fellow retro computing enthusiast offered to sell me one of their keyboards along with a IIgs Monitor.  I finally had the "matched set"...

Although I know this is a somewhat common Apple II vs. others that I have collected I've really enjoyed this machine due the nostalgia factor that I have with it.  One the most important lessons of this build was being willing to go slow and accumulate the parts as they came.  As usual, the forums have been a great source of information with a community that is more than willing to offer advice and support.

I'm more skeptical than I was about the value of Retrobright since it's likely that computers will just end up yellowing again.  But in this situation the IIgs itself had stickers on it that I've removed and this has left the base un-evenly yellowed.  Also, the Monitor has hardly any yellowing and the Keyboard is the most yellow of all the items so I will be attempting to Retrobright most of this computer during our long days here in Minnesota this summer.

Other than that, this machine is complete.  I've got a flash based storage solution inside this machine, and I've found and loaded a bunch of games on this machine.  I'm especially interested in the 16-bit games from the late eighties and early nineties because I don't have a machine like the Amiga 500 or Atari ST.  Here's a great YouTube playlist that goes through many of these titles.

A New Addition to the Collection - DEC VT-180 Robin

Knowing of my interest in both Digital Equipment Corporation and CP/M Machines a friend recently offered to sell me his DEC VT-180 Computer, also known as the Robin.  I jumped at this chance and I consider myself very fortunate to be the next owner / caretaker of this survivor from 1982.

My system came with some but not all of the software that has been archived.  I was able to write out floppy disks from the images on BitSavers which are listed here. and I have converted these to the more universal IMD format (Dave Dunfield's Image Disk) and uploaded them to Archive.org.  Also, I used the KERMIT80 software which was included on one of the disks to send data over a serial link to create disks for ZORK 1, 2 & 3, as well as send three floppy disks full of Basic games.  I've uploaded disk images (In IMD format) for this "new" contribution to Archive.org if there are others that can use this.

As we all know, gaming is the "Killer App" for Retro Computers, so I've also tried finding a couple of other CP/M Games like Ladder and a text-based PacMan clone.  The only archives of these that I've found, do not appear to contain versions that will run on the DEC, although I do see one YouTube video showing these games, so I do think they are out there.  Please leave a comment below or reach out via email (address in my Profile) if you have disks you'd be willing to swap, send, or image?

The Robin has been a super interesting machine to learn about.  As many of the earlier personal computers, it has single sided double-density floppy drives, and to make up for that it supports up to four drives at a time.  The machine is hosted inside of a VT-100 terminal.  It has two serial ports, one "general purpose" that could be used for a Modem or terminal emulation, and a second to connect to a printer.  The system is not expandable beyond the ports on the back as there are no open card slots.  This machine is built like a tank, and each of the drive enclosures is also solid sheet steel and amazingly strong.

Perhaps in the future I will blog about a hands on comparison and contrast between the DEC Robin and the IBM PC, but for now I'm just going to bask in the warm glow of the VT-180 experience.  Perhaps it's finally time for me to play through Zork, that's something I never did finish back in the day?

The IBM Model 5150 Personal Computer

In 2021 I saw a tip from a friend on the Free Geek Twin Cities Discord, he pointed out what the seller was calling "one of the early IBM PCs".  I followed up with the seller and was able to acquire the PC without even knowing for sure which model number it was.  As it turns out, it was an original IBM 5150 that had been upgraded over the years.  I was able to roll back some of the upgrades, and install a "stealth" upgrade of my own, an XT-IDE interface to allow this machine to boot from a Compact Flash card.  

One of the downgrades I performed on the machine to get it back to the original look was to install full height 5 1/4" drives into it.  The original machines shipped with Single-Sided drives, but I'd found out about a Minnesota Computer History connection.  One of the companies making "mini" 5 1/4" drives was called Magnetic Peripherals.  Magnetic Peripherals drives were manufactured in Oklahoma City but were owned by the Minnesota firm Control Data in the early eighties.  I was able to borrow a drive out of a different computer, purchase a parts drive from eBay, and I got two additional magnetic peripherals drives off the free pile @ VCF Midwest in the Fall of 2021.  Between these four drives I was able to combine parts and get two working drives.

Here's a picture of the 5150 after I'd done some work on it to restore it...

I have very few memories of this computer from back in the day.  We didn't have this type of computer at school (We had Apple IIs at school), but one of my parents friends did and he let us play games on it when we visited.  I remember being frustrated when I accidentally exited the game we were playing and was confronted with my first DOS prompt.  I didn't know what to do and was surprised when turning the computer off and back on again only brought up another DOS prompt.

In the modern day, we know that the IBM PC was a huge success, and so much has already been written about that, but what can I add about the machine based on my own experiences in 2021 and 2022?

I can report from personal experience that the keyboard, the Model F, is truly amazing.  I still enjoy the buckling spring keyboard and use a Unicomp keyboard as my daily driver, but it's not the same, the vintage board is just so much heavier and has a much better feel and sound.  This is probably the high point of the machine. 

The documentation is also a high point.  This owner had kept all the floppy disks and manuals along with the machine.  The manuals are truly amazing, covering in detail how the machine works.  I understand that this was an intentional decision on IBM's part to copy the openness and expandability of the Apple II that had enabled so many third parties to create compatible hardware for the machine.  So interesting that this design decision, which was intentional and did work as planned also planted the seeds for IBM to loose control of the PC compatible market within less than 10 years.

The 4 color CGA graphics leave much to be desired, although I do find it interesting that out of all the Retro machines and games that I have, both PCs and Apple, my kids ask to go back to Alley Cat over and over again.  The game designers certainly did their best to make this an engaging experience with the 4 colors and PC speaker.

One other item of note I should cover is the overall build quality.  Very heavy sheet metal was used in everything from the base of the keyboard to the top cover of the case.   The build quality surpasses anything that we see in the modern computing era, and I expect these machines will outlive many modern devices.

In summary, I'm very glad to own one of these, certainly an important part of the history of computing and of the Personal Computer revolution.

Making Memories - Core64 Project

As readers of the bLob will know I'm interested in moving "back in time", learning about the history of computing before the Personal Computer revolution.  I've recently been reading the book "A New History of Modern Computing", it's a textbook but quite enjoyable.  It's written in an interesting way, instead of trying to follow all the development streams in chronological order they approach the development of computing from the different groups of users, scientists, data processing, personal use, etc.  I'm only about 1/3 of the way through, but I highly recommend this book.

One of the interesting things I was reading about was the development of memory technologies, specifically of core memory in the mid to late 1950's.  I first learned about core memory at my first job out of college.  Some of the older engineers had worked with the technology earlier in their careers.  I wish I'd recorded what they told me then, but if I recall correctly they had told me that there was a preference to continue to use core memory in military aircraft long after industry had abandoned it because it was nonvolatile.  If an aircraft crashed the core memory could be recovered, the state of memory could be recovered from the time that the computer stopped.  This was the original meaning of "core dump".  This data could be used in crash investigations.

But other that these conversations, I have never seen core memory in use or even had a solid grasp of the principles of operation.   When I learned of Andy Geppert's Core64 kit, I was intrigued.  This kit is great idea, as it gives the builder hands on experience of making a core memory.  In my experience nothing helps me understand an unfamiliar technology better than getting hands on with it.  Building 64 bits of core inspires tremendous respect for the men and women who made core memory.  For example, the PDP8-i had 4048 12 bit words of core (so 48,576 bits of core had to be woven, 759 times more than the Core64 kit!).

I got a great deal of enjoyment from the process of building the Core64 kit.  The documentation is excellent and by tackling a small amount of the weaving process over a few days I was able to complete the assembly that works well and looks really cool because of the interactive nature of Andy's design.

I'd recommend the kit to anyone looking to get a more intuitive grasp of how this technology works.  Here's my unit assembled and operating...

See the kit webpage here for instructions and ordering information if you'd like your own...
https://www.core64.io/

Do you have any connection with core memory technologies?  Let me know via email or in the comments if you ever used a Digital Equipment PDP-8i, or another computer with core.

Walkabout Computing - Hammerhead XRT Tablet

Over the last months I've been buying Retro tech from a gentleman in St. Paul that I met through a mutual friend.  He's been collecting for a long time and has some really interesting stuff.  I think the oldest machine I've gotten from him is an Apple IIe from 1983 but this article is about one of the newest things I've gotten, a rugged tablet computer from 2005 (a Hammerhead XRT from Walkabout Computing).

I'd never heard of this machine before he texted me an image of it and asked if I'd be interested.  I was able to find the Users Manual online, and I was intrigued.  The device is ultra-rugged for Military and other high availability applications, based on the asset tag it looks like this one was used in the airline industry.  When I got a look in person the screen was in good shape.  He didn't have the Power Adapter so I had to buy it without knowing if it would work or not but I've had good success with most of the items I've purchased from this seller so I took the risk.

On getting the unit home I used the Multimeter to probe the power pin and prove to myself that it was Center Positive, I sorted through my power supplies to try to find a 15 Volt unit, or at least a barrel jack of the right diameter.  I didn't find a 15 Volt supply with enough current but I did find the right barrel jack which allowed me to power the unit from a bench Power Supply.

The machine booted!  I was quite relieved, but it turns out that this early win soon gave way to frustration.  Taking the tablet apart I learned that the hard drive had been removed.  It uses a 2.5" 44 pin IDE Hard Drive and I have plenty of replacements so that was not problem, but I also could not figure out the hotkey to enter the BIOS.  Since this is a rugged computer, it's possible that they have this feature locked out, or it could be as simple as me not using a compatible USB Keyboard.  I was not able to find any additional technical detail online other than the Users Manual, some reviews, and a forum thread about running Linux on the tablet.

So, I was stuck with making due with whatever hardware the BIOS would recognize in its current configuration.  The machine does have a single USB port, and I was able to get the machine to boot off a USB Floppy Disk drive, and once or twice off a USB CD drive, but this was inconsistent.  I ordered a second USB 2.0 hub, thinking that I might have a compatibility issue between the BIOS and my USB hub where the machine can not discover CD drives behind the hub, but I have not tested that yet.

In the meantime, I tried to load the OS onto a Hard Drive using another machine, then move it back into the Tablet PC.  For Windows XP Tablet Edition, this did not work.  Perhaps due to differences in the HAL between the two machines, XP Locks Up on boot.  Based on another article I thought I would try an old version of Ubuntu, but long enough after this machine that it might include hardware support for the touchscreen.  I loaded Ubuntu version 10.04 (2010) on the machine, and it booted and runs great!  Such a relief to have something running on the machine, the touchscreen is working as is a USB Ethernet dongle and other USB peripherals as well...

The Specs of this machine are:

Pentium III Mobile @ 800 MHz
512 MB RAM
60 GB HDD
USB
2x PCMCIA Card Slots

Once I got the machine running, a "loose end" was to solder up a more permanent power solution.  As is probably no surprise, the batteries are completely dead on this machine and so it will remain plugged in all the time.  Through testing I determined that the machine would run fine at 12 Volts, and so I was able to find a 12 Volt 3 Amp Power Supply in storage to solder up with the barrel jack for this machine.

So, the remaining items on this machine are:  Continued experimentation to enter the BIOS of the machine and looking for additional technical information online.  Try to load Windows XP Tablet Edition on another PIII machine and see if I can get that booting, and also to find a larger Flash Based storage solution that is recognized by this BIOS (A the current time, I had only a 2GB CF Card w/ adapter, which really isn't enough storage to do anything interesting with this machine, like load the entire contents of Wikipedia in case of a Zombie apocalypse).

Let me know if you've ever used one of these machines, or if you have any background information about the Hammerhead.

Really Old Computers - Simulation Using Kits as a Path Forward

As readers of my bLog will know one of my goals in the Retro Computing hobby has been to "move back in time", learning about earlier and earlier computer systems.  Over the last couple of years as I've built my collection and interest in the hobby has increased prices have risen.  The machines that I can afford to buy (as a hobby) are of a certain age and no older.  The machines from the 70's are becoming out of reach for the average hobbyist, including the 1977 "trinity" of pre-assembled home computers; Commodore PET, Apple II, and Radio Shack TRS-80 Model 1.  For machines that are older than that, the original kit built home computers like the Altair 8800IMSAI 8080 and more obscure machines like the ones that Brad @ Tech Time Traveller covers on YouTube, prices are also quite high.  

Prior to the Home Computer revolution, computers were purchased by companies in smaller numbers and tended to be quite large, so hardware from IBM and the Seven Dwarves isn't a practical target for an individual to buy and tinker with.  Even early "Mini Computers", systems from Data General or Digital Equipment are beyond the limit for most hobbyists in terms of cost, size, and power requirements.

But, there is an option that I've recently become aware of that I've become convinced is a good way to go for those of us who are just learning and aren't yet certain if we are willing (or able) to make the commitments required.  Emulation has proliferated as one of the many benefits of the Open Source software movement, and Hardware Simulation has become easier since only the User Interface needs to be Simulated with the rest of the functionality easily emulated in Software.  There are some really lovely simulators out there now with front panels like; Adwater & Stir's AltairDuino,  High Nibble's IMSAI replica, and Oscar Vermuelen's PiDP-8 replica.

As Oscar explains on his web page one of the many advantages of pursuing the hobby in this way is that these systems are more stable and reliable than the retro computers themselves.  Learning these systems is complicated when running on actual hardware because the hardware is often breaking down due to component age.  Along withe lower cost and no risk of damaging an actual antique, I find that a quite a compelling list of arguments, so I took the plunge and got in an order for the PiDP8 project.  Based on the instructions on the website I was able to get the Pi setup and running before the hardware arrived, and I had that running as shown in my last bLog article about building what looks like a Retro terminal.

While I was waiting for the kit to arrive a friend of mine reached out about a Terminal that he had acquired as a part of a large lot of vintage gear that he had purchased.  He offered to sell it to me at a great price, an offer I couldn't refuse, so now I am the proud owner of a Digital Equipment Corporation VT-520 from 1996.  This was the last Terminal that DEC made and I believe based on the date code that this may have been one of the last of the DEC branded terminals.  I'm quite happy to have gotten it, and because it is compatible with PC keyboards that also lowers the cost of entry.  I've paired it with a very nice clicky Unicomp from 2001...


Shortly after I got the Terminal online with the Raspberry Pi computer, the PiDP8 kit hardware arrived.  The build was time consuming but very well documented. My son helped me start the build, so that was fun.  It's a great looking build as expected...

I couldn't be more pleased with the build, and I'm going to move other computers around to keep this machine easily accessible so that my learning about the operation of the machine and the software can continue.

Building a "Terminal" out of Retro Parts

As I work my way back in time in my Retro Computing journey, it's time for me to get a Terminal.  Ideally I'd like to get a VT-320 as this is the interface that I remember using most frequently during my college years to access the DEC Vax systems in the computer labs.  These labs were filled with 30-40 terminals each and were large enough for lab classes to meet with everyone logged into the Vax at the same time, or to use for programming assignment when classes were not in session.

As interest in retro computing has risen, so have the prices of these terminals, with these "newer" 20 year old terminals selling on eBay around $300, sometimes without keyboards that could cost another $50 to $100.

What is a retro computing hobbyist to do?  I encountered a suggestion on a kit building website about directly attaching a display and keyboard to a Raspberry Pi and remembered that I still had a few RPi's in storage from projects that I'm not using any more.  What followed is this:


This "Terminal" consists of an early VGA Monitor (640x480 only, not multi-sync), and a nice Omnikey 101 keyboard which I have previously covered on the bLog.  Here's what I did to get the retro monitor and keyboard working with the Pi...

I started with the current base image of Raspberry Pi OS (32-bit, lite version).  I'm running this on an RPi 2, since that's what I had around, but I did want WiFi connectivity so there's a dongle plugged into a USB port.

I plugged the Pi in with a modern USB Keyboard and HDMI Monitor to start, and used raspi-config to setup the networking, enable ssh, change the password, and get the display configured.  Using the information from this article, I set the display resolution to DMT 640x480@60Hz.  After restarting the Pi, I double checked the image resolution and it was indeed lowered to the required resolution.

After checking that, I was able to connect the Keyboard with a PS/2 to USB adapter that I had laying around.  I don't have a model number but if you use a Northgate Keyboard I'd recommend reaching out to Bob @ Northgate Keyboard Repair as I've heard that these keyboards can be somewhat picky about which adapters work well.  Once the keyboard was tested and working with the Pi I moved on to the Retro Monitor.

In order to plug the VGA monitor into the Pi, we need an HDMI to VGA adapter, these are commonly used to connect laptops with old projectors so they are still available.  I used an Inland brand I had around, but I've also ordered a couple of replacements on Amazon here that I will test when they arrive.  Plugging this in, it worked right away.  It's so fun to see the colorful Raspberry Pi Boot menu on this late 80s / early 90s combination of hardware!

Here's a list of the hardware in the build:
    5 Volt Power Adapter (not shown)
    Raspberry Pi 2 w/ Case
    WiFi Dongle for RPi
    Inland HDMI to VGA Adapter Dongle
    PS/2 to USB Keyboard Adapter Dongle
    VGA Monitor w/ Cords
    PS/2 Keyboard w/ Cord

And a picture of what the connections look like at the back.

Longer term, I might add a Serial Port for attaching to other Retro Computers, but my immediate use case is for a kit that I've ordered with emulation running directly on the RPi, so this Pi will be removed from its case and transplanted into that kit when it arrives.  I'm sure I'll be blogging about that when the time comes, so stay tuned!

Do you have an old terminal system, or good memories of using these systems back in the day?  Let me know in a comment, or feel free to drop me an email.


NeXT Megapixel Display N4000A Repairs

 As you may have seen previously on my blog, I'm fortunate to be the custodian of a NeXTStation setup that I purchased at last year's Vintage Computer Festival - Midwest.

Since blogging about that machine, I've recapped the mainboard, added an External SCSI CD-ROM so I can load software the old fashioned way, and upgraded the Hard Drive to a 2GB Quantum Fireball (Fingers crossed, it's still working!).  One outstanding issue with the machine has been that the audio on the monitor has not worked since I owned the machine.

According to this article, on the nextcomputers.org forum, it was likely that a circuit board in the monitor need to be recapped.  I finally got the time to tear into the monitor and have a look.  What I found surprised me, and so I thought I'd put this out here for the community so you can potentially avoid these pitfalls.

First let me start with the obligatory warning about working inside of CRTs.  I recommend you not do what I've done. If you do decide to go ahead, then watch a video or three about how to properly discharge a CRT before you work on it.  OK now that that's over with...

First, it was pretty easy to tear down the monitor, but I did make a mistake along the way removing the stand from the bottom of the monitor.   You don't need to do that, and if you do release the tension on the monitor stand's hinge, it's difficult to get that back in adjustment, so I'd recommend that you not remove the stand or mess with the hinge.

The back comes off with four Allen screws...


This exposes the old school RF shielding.  I'd recommend putting this back on when you are done (I'm looking at you Adrian Black).  The shielding is held on by four screws on one side and five screws on the other, they are all the same length.   When they are off, the housing comes back just a bit to release from some tabs, then can go straight up off the monitor...


This exposes the entire CRT and both boards.  Now would be the time to discharge the CRT if you were following along, which of course you are not because this is dangerous...


The main circuit board cover the back of the monitor, but the sound board is on the bottom of the enclosure.  It cannot be removed without taking the electronics off the chassis, but this is pretty easy to do.  

On the bottom of the monitor, there are two large screws that hold the electronics portion of the chassis onto the sub-frame that holds the tube and the stand.  Removed these two screws...


Disconnect all the cables from the tube, including the high voltage, the yoke, and the tube socket at the end of the tube.  Once they are disconnected, the rear of the chassis with the electronics on it can be pulled straight back.  It may be easier to pull it back just an inch to get your hand in to remove the socket from the end of the CRT.  Once all the wires are de-routed the electronics are more accessible...


The large circuit board must come off the back first before the connector board with the sound circuit can be removed.  There are two connectors going from the large board on the back to the small board on the bottom, remove those.  There are five screws holding it in.  Remove the screws and set the large board aside.  Note:  I did a careful inspection and some cleaning on this board, but I did not see any of the small electrolytic capacitors on this board, so I didn't do any recapping on this board at this time.

The small circuit board is held in by two screws inside, and two nuts on the outside of the enclosure where the cable attaches, remove those...


The circuit board has a Dozen (12) Electrolytic Capacitors. They are 47uF, 16 V rated caps...


Remove and replace the caps.  In this case the monitor was from 1991 and so it was suffering from capacitor leakage and needed some minor rework on a couple of the traces.  I'm glad I caught this in time.

But, there was one more twist in the story.  When I tested the monitor, the audio was not restored to function.  After measuring resistance on the speaker, it was open circuit.  I was able to source a replacement speaker from Rob at Black Hole, Inc, and the monitor and speaker are now functioning normally.

The final hardware upgrade I'm planning for this machine is to replace the Spinning HDD with a Solid State device, but in the meantime I've got alot of learning to do about how this machine works and what its capabilities are.