Showing posts with label Microsoft. Show all posts

Tandy 2000 Computer Lot - Repaired in 2024

My most recent project has been too repair a large lot of Tandy 2000 computers.  A friend of mine has been collecting these machines for several years and had parts from nine different machines...

We made an agreement that I would work on repairing these machines and we would split the working computers coming out of the repairs but before discussing the repair let's review a bit of history about this machine.  These machines were designed and built by Tandy in 1984.  They run MS-DOS but they are not compatible with the IBM PC like a Compaq computer from that time period.  Tandy had been successful in the computer business since the beginning of the Home Computer era and compatibility had not been a major concern up till that point so they planned to (and succeeded at) building a more powerful computer.  These Tandy machines are unique because they have an 80186 processor and many other differences from IBM PCs and Compatibles.  Here's an ad from the time showing Bill Gates touting the benefits of this machine...
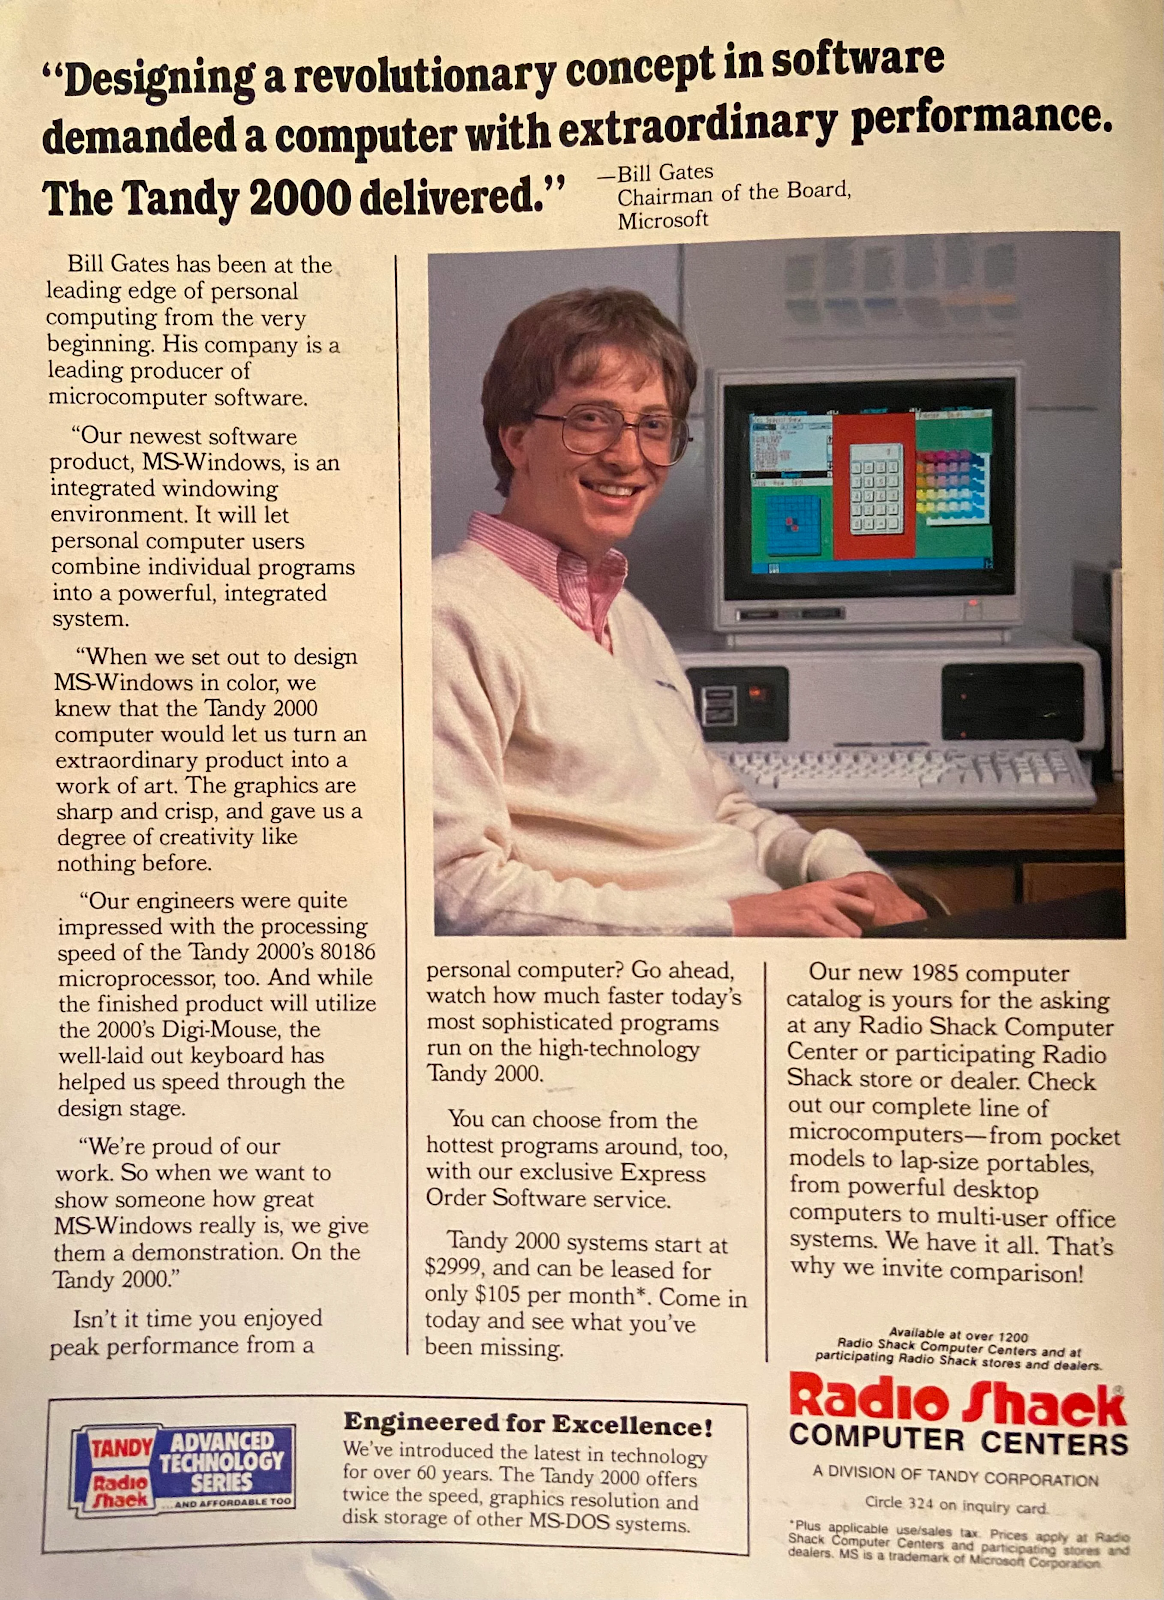
I'm interested in this period of MS-DOS compatible machines that are NOT IBM PC compatible because I think this is a fascinating period between the end of the 8-Bit CP/M machines and the rise of the PC compatible.

Now onto the repair, as you will see these machines were in rough shape.  It turns out that many of the power supplies are no longer working.  I created the following pinout table for the power supply connector going into the motherboard:

Nominal Voltages of Tandy 2000 Power Supply
Pin            Voltage
Orange      +12 V
Grey          5V
Red            5V
Red            5V
Black         Gnd
Black         Gnd
White        -12 V
Blank

Having the pinout and nominal voltages allowed me to go through and sort out the working power supplies.  I think some recapping will be required in the future but for now I do have enough working power supplies to get 3 working computers.

Next, I tested the motherboards.  Many of the logic boards were showing no signs of life with a known good power supply.  The motherboards have 128K RAM soldered on board (4164 DRAMs), and there was a 128K RAM daughtercard that plugged in on the main board itself.  I went through and separated these and tested and got a known good 128K RAM board and cycled through the motherboards, reseating and swapping chips that were socketed and eventually getting about half of the boards working but without doing any board level repair.

The lot also included expansion cards for High Resolution Color Graphics.  These boards require 256K RAM on the motherboard, and they were needed because the only working monitors we had for this lot were the CM-1 Color Monitor.  A couple of the Graphics boards had corrupt video in the color modes, so those were set aside.

The lot also included memory expansion cards that can hold either 128K or 256K on the board.  In the base configuration these machines could have up to 512K total, although later modifications could take them higher.  Thankfully the RAM chips are socketed on these boards, so I was able to take all the RAM off and cycle the 4164 DRAMs through my RAM tester.  After this there was enough working RAM expansion boards to bring the working computers up to 512K.

Next up for repair was the keyboards.  I had one working keyboard which had gotten damaged and had a couple of the keycaps broken off it turns out that was just mechanical damage and I was able to re-assemble and glue plastic parts back together.  The next repairs required me to take the keyboards apart.  One of the symptoms I noticed was that the lights on the Shift and Num Lock keys would come on, indicating that the keyboard had power but then none of the keypresses would work (indicating maybe a bad matrix).  Other keyboards had no power on them at all (which may indicate a bad cable).  I moved the cables around and I was able to get 3 more working keyboards out of the lot.  If needed, the cables can be transplanted into a Tandy 1000 keyboard, but those are getting hard to find, too.

The next order of business was the Floppy Disk drives.  The non-hard drive machines had two drives each and surprisingly most of the drives were in good working order.  I only had to swap around a couple of the drives and I was able to clean them with a normal floppy cleaning disk.  I didn't need to take them apart and lubricate them, although I should.  I was able to prove that both the A and B drives were working by using the disk duplication program called compdupe to create copies of the MS-DOS boot disk.  This machine can be difficult to create disks for because it's a Double Sided / Quad Density drive that can hold 720K.  It works with normal DS/DD media, which I have plenty of, but I still haven't found a way to create disk images, although I understand there are instructions online.

So, this wraps up the repairs, at least for now.  My friend and I split up the machines and we are both very happy to have Tandy 2000s in our collection, here's mine...


There's still a bit of extra material coming out of the repair, hopefully enough to make another working machine.  This material been offered to another Vintage Computer collector so perhaps the repair project will continue.  In the future, I have a couple of upgrades I'd like to do on the Tandy 2000s.  I'd like to figure out how to get the Hard Drive working again on the Hard Drive machine or get it working with an MFM Emulator.  I'd also like to see if I can replace one of the physical floppy drives with a Go-Tek.  This would make it much easier to work with the odd floppy format as there is quite abit of software avaliable for the machine online.  But for now I'm glad to have the project completed and move on to to the next Vintage Computer project.

Do you have memories of the Tandy 2000?  If so please feel free to reach out in the comments or send me an email, my address is posted in my Blogger profile.

Documentary / Storytelling Videos and Primary Source Videos on the Web in the 2020's

For me a large part of the appeal of the Retro and Vintage Computing hobby is learning about how to the machines work and how they would have been used.  These aspects of retro computing are best experienced hands-on.  But I'm also super interested in the historical context and the teams that built them both because these are amazing stories, and because those who cannot remember the past are condemned to repeat it.

One of the things I'm realizing is that for the documentary / storytelling YouTube creators (channels like the 8-Bit Guy, LGR, RMC Retro, 65ScribeTech Time Traveller and Nostalgia Nerd) they spend alot of time searching through archival material and viewing old photos and video.  Hats off to them for bringing awareness and attention back to these machines and the stories of the teams who created them.

During the VCF Midwest 2022 YouTube Panel Discussion one of the questions was about how much more effort it takes for the creators to make this type of content.  It is a very time consuming activity with some videos taking weeks of effort.  I would like to say that my own interest in Retro Computing has a great deal to do with these stories and I would like to salute these creators for their hard work.

There is another class of channels and websites that are dedicated to presenting primary source material in its original form.  There is more and more historical footage being uploaded to YouTube and other platforms like Archive.org.   For the retro computer enthusiast there is an overwhelming amount of original source material out on the web.  Here's a quick overview of some of these sources that I've been enjoying recently:

"The Computer Chronicles" and special events like recordings of MacWorld events are only a search away either at Archive.org or YouTube.com.

The Computer History Museum has been uploading a ton of oral history interviews from their archives.  

Both the Vintage Computer Federation and VCF Midwest have been uploading the talks from their events.  Sometimes these talks are given by primary sources, the people who were there when the machines were created and many of them are quite good storytellers.

The Computer History Archives Project has also been uploading a great deal of interesting historical footage.  

Dave's Garage is interesting for Microsoft users because for some of the topics that he discusses he's a primary source (and he's also very transparent about when he was "in the room" and when he wasn't).  

The Centre for Computing History has also published some good video interviews of historical importance, and is a good source for many of the parallel developments that happened in Britain in the early days of computing.

Here's a fun screenshot from one of these historical movies, Bill Gates in the computer lab at Microsoft.


In the background from Left to Right we see an IBM PC 5150, a Compaq Portable I, and a Macintosh Plus, so this must have been 1986 or later.

What are your favorite sources of primary material on the web?  Please leave a comment or send me an email if you have other sources that I should have included here.  Thanks!

Digital Equipment Corporation - AlphaServer 300 4/266

This year I missed VCF Midwest in Chicago.  I had a really great time last year and I was disappointed to miss out.  One of the retro collectors I know from Free Geek Twin Cities was willing to set aside several of the machines that he was planning to sell there.  You'll be hearing more about these computers on my bLog as I work my way down the stack.  The first in the series is a Digital Equipment Corporation Alpha Server 300 4/266.  This line was released in 1995 and this particular machine dates from 1996 or 1997.  It's one of the lower end from the Alpha Server line, but given the desktop form factor it should perform nicely as a workstation.

I've always wanted a RISC Windows NT machine ever since they were new.  When I bought this machine I was thinking that it may have been limited to run VMS or True64 Unix, but I was willing to purchase it anyway because VMS is also quite nostalgic for me, as that was the OS that was running on our VAX cluster back in my college days at MSOE.

As usual I started my intake process with some cleaning and inspection.  I was surprised when I opened the case and found a Matrox Millennium II PCI card and a Sound Blaster 32 ISA Sound Card in the machine, I didn't know that these were supported.  The machine was really clean inside.  I was happy to find an enterprise grade SCSI HDD (hopefully less likely to die soon) and fully populated RAM slots (which ended up being 256MB of RAM).  The HDD had a sticker on it indicating that the drive had been wiped at Free Geek at some point.  The machine also needed a new clock battery, but this machine uses a standard CR2032 so that was an easy fix.  After that the machine was clean and there were no loose parts and connections, so it was ready for a first boot.  

The machine booted for me, and just as I had been told it was coming up to a prompt:
>>>>
After some reading I learned that this is the Alpha's ROM prompt. 

I started googling around and reading about this machine.  As you may know Alpha was a short lived platform and it was sold off (killed) after Compaq acquired DEC.  The main software architect of Windows NT, Dave Cutler, was previously a Digital employee who was a member of the Vax / VMS software team.  I think there's a pretty convincing argument to be made that Alpha was the primary target platform for Windows NT during it's early development at Microsoft with x86 being a runner up.  It's interesting to think about how things might have turned out differently if Digital would have been able to reinvent itself.

But back to this machine.  One of the first items I encountered was this document, a procedure for installing Windows NT.  I was anxious to try it out since I didn't know if this would work or not.  I found a Windows NT 4.0 disk image on WinWorld and got to work.  In hindsight, if you are doing this, you will want to also download the full ISO CD version of Service Pack 6.  It has additional files that are not available in the self extracting EXE version of the last Service Pack and it's helpful when looking for drivers to be able to have both the entire Windows NT installer and the entire uncompressed SP6 on the local hard drive.

I struggled getting a driver installed for the Matrox Millennium graphics card.  After reading a bit on the forums, I planed another trip to Free Geek.  My contact at Free Geek set me up with an S3 video card from 1995.  I was concerned that this was not "specialized' hardware, but in hindsight this machine does not require specialized hardware, as it came right up at boot time.  Windows NT Plug and Play recognized the S3 video card on boot and I had 256 colors for the first time since working on the machine!

Getting Audio working was also a bit of a pain with lots of trial and error, but I think having both the NT installer files and the SP6 files on the hard drive would have avoided most of the difficulty.  The key enabler for getting this card to work was that ISA cards don't have Plug and Play out of the box.  On the NT install CD ROM Extras there is an installer for ISA PnP. After installing this and restarting the machine the ISA sound card is found at startup.  I ended up having to move the card to the bottom ISA slot and to manually assign resources (Default Resources 0000) too the card, but after a couple of restarts the sound card is working in Windows NT!

So, in hindsight, I think the trick is to use only hardware that is on the Windows NT 4.0 Hardware Compatibility List.  I had trouble finding a readable version of this document on the web, so I'm including a link here to an Archive.  Perhaps it's good that I didn't find this doucment till later as the AlphaServer 300 is not on the HCL.  Still, after many hours of runtime the machine is stable and running well with zero hangs or bluescreens.

I'm quite pleased with how this machine turned out paired with a large CRT monitor.  Being that these machines were so expensive at the time and were often used for art or engineering they were often paired with larger CRTs...

The entire appeal of these machines at the time was that they were faster than the x86 machines of the time.  How much faster is I suppose a matter of debate but loading this up with period correct software like MS Office, VB 6.0, Visual C++ 4.0, and other tools, it does seem quite a bit faster than Pentium PCs of the era, although I'm sure a good part of that is the benefit of a fast wide SCSI bus vs. IDE.

Compaq Deskpro XL 590 - Pentium Workhorse

I recently acquired two Compaq Deskpro XL 590 computers from Free Geek Twin Cities, the pair were labelled as a Project PC, and sold at an enticingly low price.  I was pretty excited to see this because I'd recently damaged my Epson Pentium 75 machine, which was a favorite in my Retro Computer collection, and one of the first that I'd acquired.

The Compaq PCs were in pretty rough shape, as you can see here...

This is an interesting system, it's got a processor on a slot but it's not a passive backplane computer.  There's quite a bit of logic on the mainboard, including; audio, SCSI, IDE, and Ethernet.  The CPU and RAM are on the processor slot, which is almost a full length card.  Modern Classic on YouTube recently did a series of vides on this hardware which you can find here, here, and here.  He started out with a 486 and upgraded to a Pentium 100.

My systems are a Pentium 90 with 16 MB of Built in RAM, these systems have two PCI cards slots, and the rest are EISA slots.  I've never had an EISA system before, so that was an interesting aspect of this build. My goal for this machine is to get Windows 95B running and have a boot menu configuration for DOS gaming or for starting up the Windows 95 GUI.

I had quite a few interesting challenges getting this computer going.  The first was the BIOS setup program.  The BIOS setup program for this computer shipped on Floppy Disks, and can be installed into a small partition on the hard drive, but as with most recycled computers, these machines shipped without a Hard Drive or any floppy disks or documentation.  So,  I started Googling around and used the Wayback machine to figure out what the last set of drivers for this board were.  Having this information was only the start of the struggle, since HP has turned off the FTP site where they had been hosting the old Compaq Softpaqs for many decades.  I asked for and received some good advice about locating these files on the Vintage Computer Forums.

One of my goals for the system is to use it as a Disk Imaging system with a Go-Tek floppy drive emulator with FlashFloppy firmware loaded on it.  I have a couple of these, one lives permanently in my pentium, and the other is a "floater" Go-Tek that's used for building and testing systems.  Using the Go-Tek, I was able to convert the odd Compaq Softpaq Executable files into the more useful IMG Disk Image file format.

I have collected up the drivers I needed to build a Windows 95B machine, and I will link the file here, this includes:
System Diagnostics SP16085
System Configuration Disk 1 - 4 SP6144
Firmware Update (Final 4/7/1997) SP3642
Matrox Millennium PCI Video Card Drivers for Windows95 SP2754
Onboard Ethernet Driver SP1649
Onboard SCSI Driver SP1664

Once I had the disks needed, it was time to start the build.  I wanted to use Compact Flash media for the Hard Disk Drive, but I had no end of problems with a couple of off brand devices that I tried, so for now I've defaulted back too a 6GB Quantum Fireball IDE drive that I had in the parts bin.  The System Configuration utility was able to recognize the drive and startup without error.  Once the System Configuration utility is able to start without error, if there's a blank drive it will offer to install the System Configuration into a partition on the Hard Drive, which I did for convenience.  At that point you can Fdisk the rest of the drive and setup your partition for Windows 95.  This part of the install was normal and painless.

I've moved all the goodies from my Epson computer over to this one.  I've added 128MB RAM, a 52X CD-ROM, a Go-Tek, a newer ISA SoundBlaster 16, a 3Com 3C905C Fast Ethernet card, and a Parallel port Zip drive to use for "Sneakernet".  The case cleaned up pretty good, although it did have some paint missing on the corners...


I'm quite happy with how this machine has turned out.  I still have quite a bit of tweaking left to do to get all my DOS games back up and running, but that is a big part of the fun.  It's great to have a running Pentium class machine back in the stable!

Here's the machine running Internet Explorer 4.0 and using the excellent new FrogFind.com search engine for Retro Computers from Sean at Action Retro...


Next, I need to get the Boot Configuration Menu going, I'll probably copy something from Phil's Computer Lab's MS-DOS Starter Pack.  Also, I've ordered some Industrial CF cards to try again too move the Hard Drive over to Solid State media, but in the meantime, this machine should be tons of fun.

My First 486 Build

I’ve always had a soft spot for the 486 since this was the generation of the first PC I ever owned. Getting a 486 has been on the short list of computers I’ve been wanting for quite some time, but I've been holding off because of the price.  I'd love to buy my original 486, a slimline Gateway product from 1993/94, but they have become both rare and expensive.  The next best thing would be to do a build from the era which would be a great learning experience since I wasn't doing builds at the time.  Frankly, at the time, I didn’t know enough about computers to do a build, but thanks to the Internet and the willingness of the Vintage and Retro Computing community share their knowledge, this is no longer the barrier than it once was.

One of my retro computing friends had a board from an old build that he wasn't using, and he sold it too me at a good price, along with a Cyrix 486DX2-66 Processor and some RAM.  This is a 386/486 board with VLB.  It was an offer I couldn't refuse, even though I didn’t know where I’d find a case.  Within a few days a case popped up on Craigslist from a trusted seller, so at that point I knew I had to start the project.

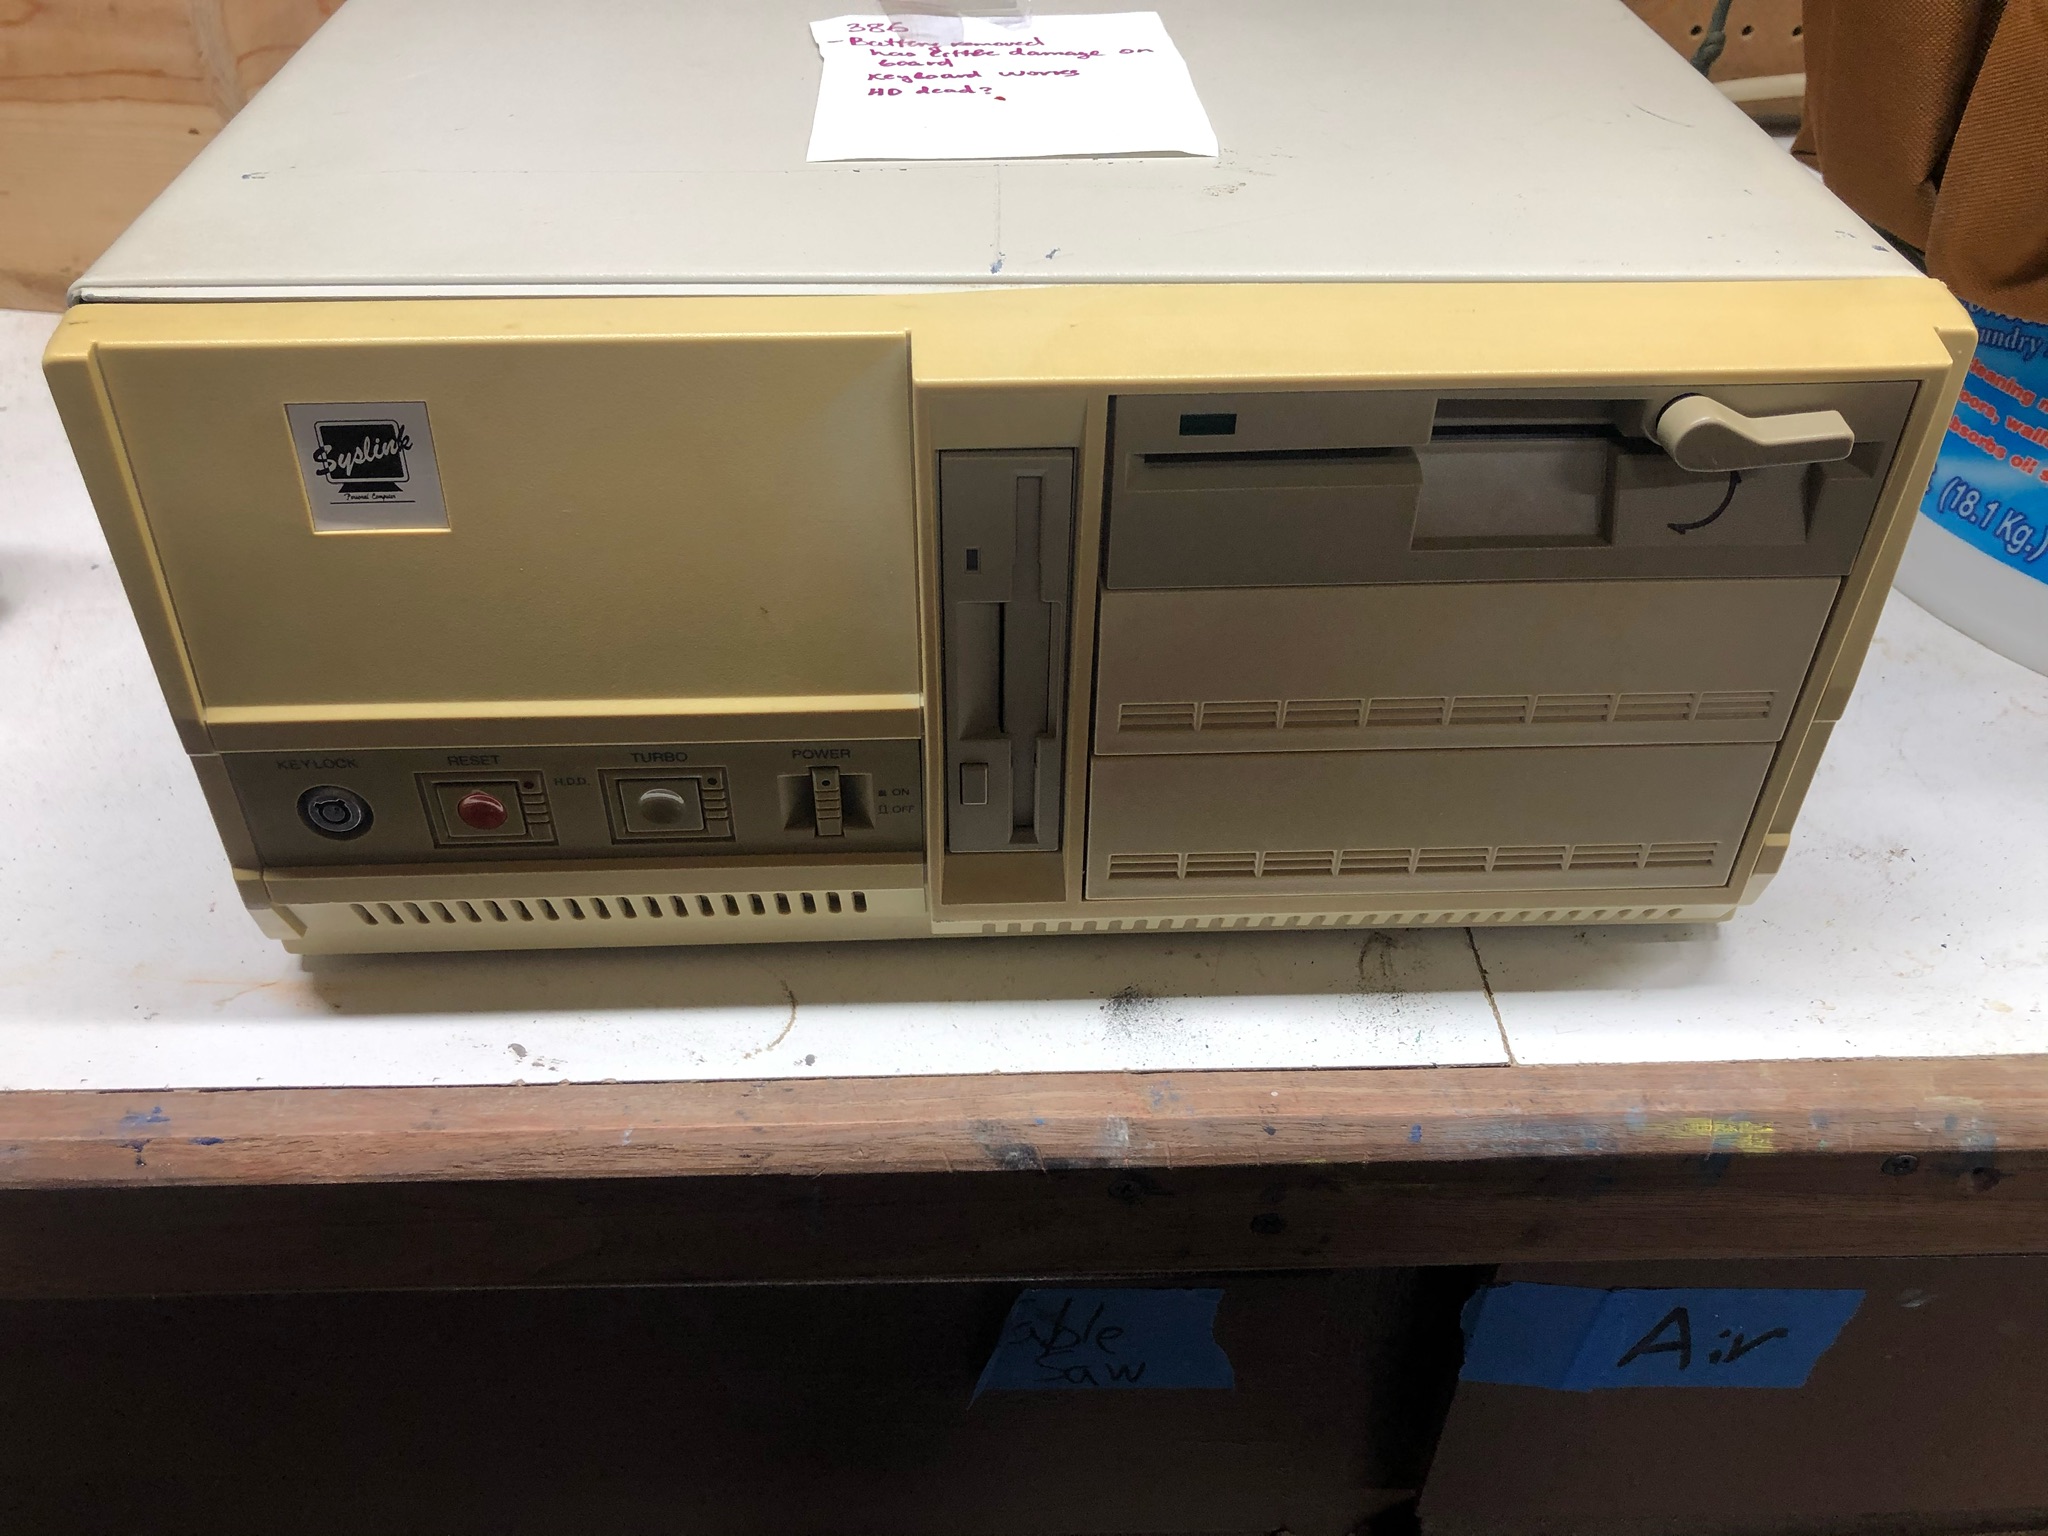
I was able to gather the parts and start into the build.  The case was a donor from a PC with an older 386 Motherboard that had an exploded battery.  It had been cleaned up some years back, but the board has an A20 Gate Error on boot.  I did some preliminary troubleshooting on this, but as the seller had already warned me, there was nothing obviously wrong with the board.  I may come back and make another attempt at repair later but I set the older 386 board aside for now and turned to cleaning the case.  This was a system from 1990.  It was dirty and the plastics had yellowed, as you can see here...


I took the case apart, and took the LEDs and switches out, just as you will see many of the smaller YouTube channels doing like Necroware and RetroSpector78.  I really enjoy the process of cleaning this old gear up and getting it looking better again.  Sometimes it's not possible for me to get it back to complete like new appearance, but I know I got the case front looking significantly better...

The plastic front still doesn't quite match the painted metal, but I don't have a very powerful UV light on my retrobright tank, so it took a couple of days to get too this point.  I may need to think about an upgrade at some point on the UV LEDs in the tank.

Once the case was cleaned up it was time to start the build.  The 486 motherboard I already mentioned has a BIOS on it from 1994, so I decided that the timeframe for the build was going to be a system  thats started out in 1990 (with the case) and had gotten upgraded over the years up until the mid 90s, I didn't want to use any gear in the build later than that.  Also, I didn't want to spend an arm and a leg, so that meant (mostly) making do with parts I had on hand.

One of the first things I needed to deal with was cooling of the 486DX2/66.  I had a heatsink from a Dell machine, but the heatsink alone wasn't enough.  Since there isn't much airflow in this case, I added a fan inside to blow air directly over the top of the processor while the machine is on.  This keeps the CPU cool to the touch even after hours long periods of use.

The specs of the build at the start were:

486DX2/66

5MB RAM

Cirrus Logic ISA VGA Video Card w/ 512 KB RAM

16 Bit ISA Disk Controller Card w/ IDE2SD Adapter, and 1X Sony IDE CD ROM

Super IO Card for Serial / Parallel ports

Opti 82C929A Sound Blaster Compatible

Being the first project of this kind that I've tackled, there was quite a learning curve.  The early PC stuff that I've worked on really doesn't have that many options and frankly you just can't get that much performance out of them,  This 486 system is pretty different.  I was easily able to get the system up and running, but the performance was horrible when I ran the tools in Phil's DOS Benchmark Pack.  (3 fps in SuperScape) And probably more important, it didn't perform anywhere near what I remembered from my 486 in games like Star Wars X-Wing, Wolfenstein 3D, Doom, etc.  I got discouraged and put the build on hold for a couple of weeks because of this.

I tried quite a few things to remedy this situation.  First, I did a RAM upgrade, bringing this machine up to 20 MB RAM, which would have been a shocking amount of RAM back in the day.  My PC had either 4 or 8MB at that time.  Sadly, increasing the RAM did not help.

I also asked for advice from a friend at Free Geek Twin Cities about doing a VLB upgrade of the Graphics card and Disk Controller, but that was going to end up costing almost as much as the rest of the build just for those two cards so I abandoned that idea.

I ended up going through the AMI BIOS settings one at a time, googling those settings that I wasn't familiar with, and trying to understand how those affected machine performance.   What I ended up landing on was this article on the Vintage Computer Forums.  The key to unlocking the performance on this machine was the AMI Bios setting:
Advanced Chipset Setup / AT BUS Clock
The default value was CLK1/6
I changed this to CLK1/4 saved and rebooted.

The machine performance was vastly improved (27 fps in SuperScape), and more important, X-Wing runs like it should.

There were various other minor things that came up along the way during the build but after the bus speed was set correctly the machine has been running really well.  I’ve been getting a lot of enjoyment out of it.

Original Compaq Portable

It has been one of my goals in vintage computing to move “back in time” to the early days of the personal computer, I’ve been intrigued by the story behind the original IBM PC, the 5150, a fascinating story of the tension between one of the classic engineering trade offs (make vs buy), and the unforeseen consequences this can have in a product development, but I’m no longer interested in collecting IBM in particular after reading this book “IBM and the Holocaust”.  So, I’ve been on the lookout for another brand XT class machine, and I was very intrigued when a damaged Compaq Portable I popped up at my local Free Geek store.  This was one of the first IBM PC clones, but they did something really different by creating a “Portable”.  I won’t rehearse the development of the machine here as it’s been covered well elsewhere.

My Compaq is an early unit, with the plastic parts stamped 1983, and a Rev. B BIOS.  When I purchased it, there was an error code at boot, so I knew that the processor and RAM were working.  The case was in rough shape, cracked and dirty, but a carrying case was included.

Once again, the Vintage Computer Forum was one of the best sources for information.  Also, the 8-bit guy did a restoration video series  on this machine, having seen these resources gave me the confidence to give this repair a shot.  There was a long list of issues with the machine, but with knowledge of how to take the machine apart, clean and lubricate floppy drives, replace the defective foam and foil pads in the keyboard, upgrade the BIOS, install an XT-CF adapter so I could boot from Flash, and upgrade the RAM to the maximum 640K, I now have a fully functional first generation PC running at 4.7Mhz.


Not shown in the picture, I moved the CF slot up to the front of the machine in the middle of the unused floppy drive bay that was opened up by removing the non-functional drive.

Update:  March 2021

I found a Tecmar Captain card and installed that in this PC, so it has a functional Real Time Clock, a working Microsoft Serial mouse.  I've installed Windows 2.0 on this machine, and that's been alot of fun to poke around with, since that version predates my first PC ownership.

Let me know if you have any questions for me about the Compaq, or other Vintage Computing topics in the comments below.