Showing posts with label Electronics. Show all posts

My Visit to Cray Research and Paying it Forward with STEM

I'm a lifelong learner and invested in helping other people learn about technology.  It's one of my motivations for this blog.  I recently had a reminder of one of the many people who have helped me along the way.  As I was sorting and organizing some of my old letters I found this business card from an engineer at Cray Research.  This person spent an hour with me when I was job-shadowing as a High School kid.  I don't have permission to share his information, so I'll blur out his name, but in 1991 or 1992 Cray Research cards looked like this...

I grew up in a small town in rural Wisconsin called Elk Mound.  It is about 20 miles west from Chippewa Falls where Seymour Cray was from.  Cray was in Minnesota for Engineering school and the beginning of his career but after he was established he set up Cray Research back in Chippewa Falls in the 1980s.  When I was a kid my high-school guidance counselor knew that I was interested in technology and he arranged for my friend and I to spend a day at Cray Research in Chippewa Falls.  There was a general awareness in the community that Cray made super computers but I was not very informed about computing at the time so I didn't realize the importance of Seymour Cray, or what a cutting edge company Cray Research was.  The visit did make a big impression on me and helped confirm for me that I wanted to be involved in engineering of some kind.

Seymour moved to Colorado Springs in 1989 so I can not claim that I was even in the same building with him but from what I hear he was a very quiet person and would have probably avoided a tour group anyways.  But I did meet an engineer who made an impression, the same engineer whose business card I found just last year. Using LinkedIn, I was able to reconnect with that engineer.  He's retired now and he didn't remember our visit, which is understandable since it's a distant memory for me as well, but I still had the opportunity to thank him.

I pursued engineering and my first job out of college was working at one of the Control Data successor companies.  One of my favorite memories from my short stint at that company was sitting with some of the older engineers in the lunch room and hearing stories about the early days of computing.  I remember being amazed at hearing for the first time how they had memorized the Op Codes for the computers they were working on.  Again, I didn't have the context that I have now, but having built a PDP-8 replica and learned a bit more about it I realize that this was not bragging.  The machine had no boot ROM so it was mandatory to toggle in the simple loader program if the computer memory was reset.  It was so common and important that DEC had it printed on the front panel of the machine.

But, I soon moved on from the Control Data company to the field of Factory Automation which I have been working in ever since.  That first job was the last of my loose connections with Seymour Cray and the Cray companies. But I remain committed to the idea of paying it forward, and I continue to welcome opportunities to give young people tours of my workplace.  It's exciting to think about where technology will be when these younger folks are my age or retired like the engineer at Cray who spent an hour with me 30 years ago.

Do you have any memories of Cray or the Cray companies?  Please leave a comment or feel free to reach out via my email address in my complete profile.
Macintosh IIsi Power Supply Woes

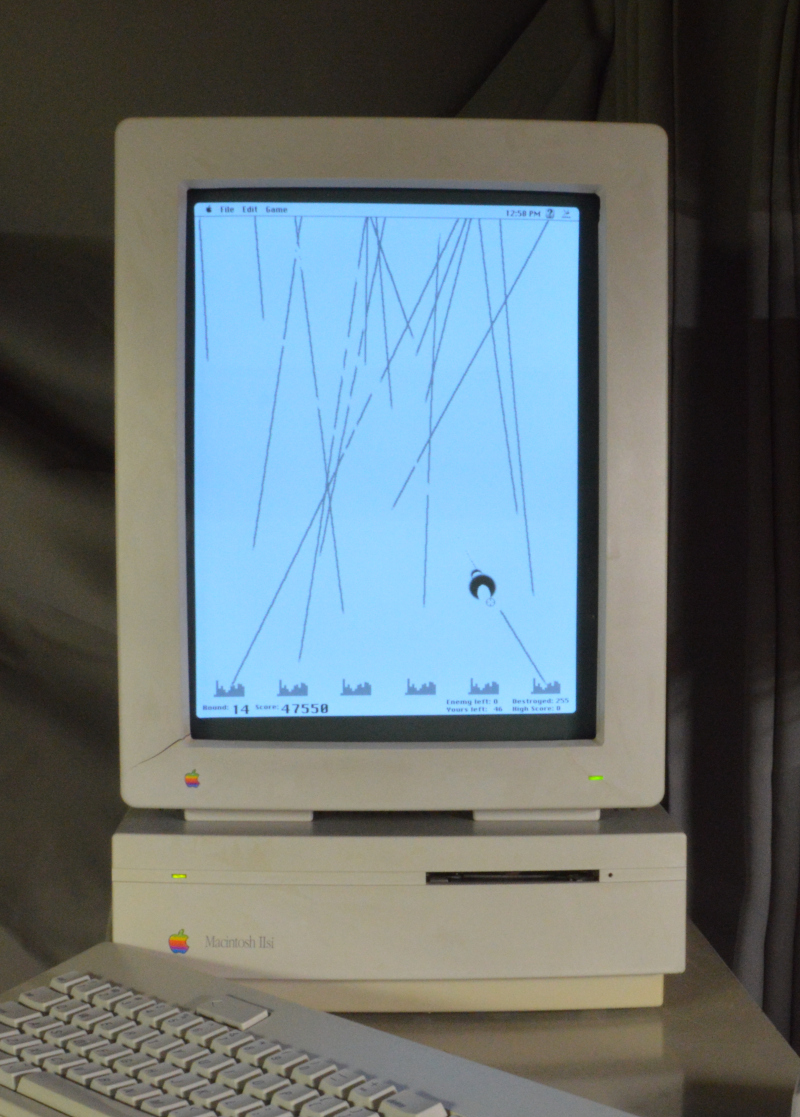
In the Fall of 2018 I was able to acquire a Macintosh IIsi machine from Facebook Marketplace.  This came out of a smokers home and I've been unable to get rid of its smell, so it's never been one of my favorites.  I've taken the machine completely apart, washed and retrobrighted the plastics and rinsed the circuit boards with Alcohol, this did help some with the smell.  Here's the current state of this machine...

When I purchased the machine, it wasn't running well so I recapped both the logic board and the power supply using the recapping guides from Recap-a-Mac.  I didn't do this well; I'll come back to some lessons learned about recapping.

What helped most with the smell was the tip I received that storing the machine with dryer sheets would help to absorb bad odors.  Since this was a machine that I didn't need to keep setup I bagged up the machine and monitor in a large garbage bag with a bunch of dryer sheets and stored it for 6 months.  This helped alot with the smell so I'll be doing this again as some odor remains.

I pulled this machine out a couple of weeks ago because it's the only machine in my collection that's capable of running Apple's Unix product,  A/UX.  I had been inspired by this video from Sean at Action Retro to try A/UX.  Unfortunately, my IIsi would not power on.  I started reading up about issues people were having with these machines and decided that it was most likely that I had not adequately cleaned the Power Supply circuit boards after the recap.  I tried alot more cleaning and I was able to get one cold start out of the old power supply.  After spending hours troubleshooting the old supply I decided to cut my losses and look for a replacement.  I'd been inspired by the idea of putting an off the shelf power supply inside of retro power supply enclosures by an attempted repair of my Tandy 1000 RL HD based on a post on Vogons.  I had saved information about a small, low cost Meanwell brand power supply that Jameco is reselling, this supply has the following specifications:

5 Volts at 5.5 Amps
+12 Volts at 2.5 Amps
-12 Volts at 0.5 Amps

The Sony Power supply inside the IIsi had the following ratings:

5 Volts at 6.8 Amps
+12 Volts at 0.8 Amps
-12 Volts at 0.3 Amps

So, the new supply is a bit short on current for 5 Volts, however if you look into the datasheet, if the other channels are running with less load, then the 5 Volt supply can peak at 7 Amps output.  I was hopeful that by taking the spinning Hard Disk out and replacing it with flash based storage I would lower the total power consumption of the computer to the point that this power supply would be adequate. (Spoiler alert, the power supply works just fine!)

Another important consideration is the physical size, I wanted the Power Supply to fit into the enclosure of the previous power supply so that the machine looks original from the outside.  Here's a picture of the finished product inside of the housing of the old supply...

One of the other challenges I faced with this project was the wiring on the old power supply.  I'd cut the old wiring harness off the power supply and tried re-soldering the old wires too the new power supply, but the old wiring is stranded wire that is very difficult to solder on.  Eventually I gave up and used Wago spring clamp type terminals to connect the old wiring harness to the new wires.

I connected the obvious wiring:

Red to 5 Volts
Black to Ground
Green to -12 Volts
Orange to +12 Volts

This left the Yellow and White wires unconnected.  Through trial and error, I discovered that the Yellow wire needs to be connected to +5 Volts in order for the IIsi logic board to power up.  I knew from reading ahead of time that I'd be sacrificing the soft power feature.  When this Mac is plugged into power, it is on all the time.  I modified the power pass through on the back so that the monitor can still be plugged in on the back, it is no longer switched, it is also on all the time.  I also modified a standard IEC power cord to put a switch inline on the cord (using a lamp cord switch), this allows me to power the computer off without unplugging it.

I know this is a bit of a hack, but it is one that is within my skill level.  I was willing to make the sacrifice in order to regain confidence in having this machine work when I turn it on.  Even with the compromise.  I have not modified the outside of the computer and so in my opinion this is an upgrade, although I realize that not everyone in the retro community will agree with me.

Another item that had failed since I last used this machine was the original Apple 40MB SCSI drive, so I've replaced that internal drive with a BlueSCSI.  This works well and speeds up the machine a fair bit.

So, after all this hassle, I was reminded that this machine has only 17 MB RAM.  Although Apple A/UX 2.0 might run just fine, 3.0 is probably not a good idea till I install a RAM upgrade.  The other challenge to getting A/UX on this machine is I'll need to find a way to simulate an Apple Brand SCSI CD-ROM drive.  I believe that I'll be able to use SCSI2SD to do this, but I have more research to do.  For now, I'm just glad to have the machine back in running order and I'll enjoy running Mac OS 7.0.1 on it.

Do you have any nostalgia around the Macintosh IIsi, or any experiences with Apple A/UX?  If so, send me an email, or drop a message in the comments below.  Thanks!

Macintosh Portable - Power Supply Recap for M5136

 I've been working on a couple of Macintosh Portable repairs for a friend.  While doing this, I've been doing alot of reading on the forums, see this excellent compilation of threads on troubleshooting the Macintosh Portable on 68KMLA.

I've been fortunate enough to get the M5136 Power Adapter with my portable.  From my understanding, it's important to use this adapter and not a replacement because the power management circuit in the Macintosh Portable relies on the 1.5 Amp current limit that this power supply has, a replacement power supply with a higher current limit may work in the short term but can damage the Portable over the long term.

So, I had two challenges to getting the recap of this power adapter done, how to get into the case without dremelling or totally destroying the power adapter housing, and the second too get the capacitor values.

Getting inside was no problem using the technique demonstrated in this video.  The video shows the PowerBook 100 series adapter, but I can confirm that the Macintosh Portable is the same, and the technique works flawlessly.

The second challenge was getting the capacitor values off the board.  I'm not aware of another resource online for getting this information, please let me know in the comments if you have another resource.  In the meantime, I hope you find this guide helpful.

Current State of the Lab Workbench

I thought I'd give a bit of an update about the current state of Steve's Digital Basement, as there have been quite a few upgrades over the last year.  Many of them inspired by Adrian's Digital Basement along with many other retro and vintage tech YouTubers out there.  I really appreciate their willingness to share the wins and the losses.  I share the belief that the more comfortable we can get with learning from failure and not being afraid to try stuff that we aren't good at, the more skilled we will become.  The perfect is truly the enemy of the good.

Since spending more time learning online about the surprisingly high quality of some of the Chinese devices out there, and since I've always wanted a Digital Storage Oscilloscope, I spent some time learning about the various low-cost brands out there.  I often shop the "Open Box" section of the online catalog at my local Microcenter.   They had this Silgent SDS 1052DL+ that sat in the store for quite a while, after the price dropped a second time, I picked it up.  I paid less for it than what I got by selling my old Tektronix analog scope.  I know that the Tek scope is likely to outlast this one, but in the meantime, I've got a really capable scope and I couldn't be any happier with this major upgrade at the bench.


I've also added a new Power Supply recently, it's a generic supply also from China, but has more current capacity than the BK Precision Model 1601.  I'll keep both for situations where I need dual voltages.

The other add from China is a component tester, it’s capable of doing ESR checks on capacitors, and that’s been very useful as I troubleshoot old devices.

The Hakko soldering station was one of my first upgrades when I started to get back into Electronics and repair, it has been a truly amazing tool.  I upgraded from a non-temperature controlled soldering pencil about 5 years back.  I no longer dread soldering, it's an absolute pleasure to use, and the results are significantly better.

In the upper left hand corner, you can see storage bins, I have a couple of sets of these with common electronic components.  I'm not stocked yet to do recaps and other repairs without ordering parts, but I do have some common components on hand, and I've been able to do some spur of the moment repairs without ordering parts, like recapping the control board on an Apple Disk II or recapping the Apple IIe card in my Mac LC.

Not shown in the picture, I have a tool box off to the side filled with hand tools.  This tool box holds; hand tools,  a Multimeter, and various magnifiers.

On the wish list, I'd love to get a really nice stereo microscope.  I previously had a powered Solder removal tool on my list, but I recently got the manual Soldapullt and this has been such a great hand tool that I'm not sure now that I need a powered desoldering gun.  If I start frequently removing ICs and connectors, I may change my mind about that.  I'd also like to get a hot air soldering gun, this would help with desoldering and resoldering Surface Mount components (at this point primarily to help with the ReCapping that I"m already doing).