Showing posts with label CP/M. Show all posts

Epson QX-10 - One of the Last CP/M Machines

The Epson QX-10 is a sleek looking design from the early 80's.  It is from the tail end of the CP/M Era and it's a really neat looking machine.  My experience with the QX-10 started when a friend was demonstrating his at a local Retro meet up hosted by Free Geek.  It turns out he had a second machine in need of repair and since he's already got a very nice one, I was able to acquire that second machine from him, thanks again, Steve!

I started working on this in the Fall of 2025 when I acquired the machine.  There was no cable included to attach the custom CRT to the base unit.  This cable brings both power and signals from the base unit to the CRT and so it's difficult to begin testing without that.  There is a replacement cable avaliable online, so I ordered one of those.  With the cable installed I could see that the machine was powering up to the "Insert Diskette" prompt.  This is a very good sign because it means that the processor is running and whatever diagnostic checks are built into the ROM are passing.

As with most CP/M machines that don't have a hard drive the A drive is used constantly to boot and run the machine, so the A drive often needs special attention.  This machine was no exception.  The floppy drives were manufactured by Epson themselves.  In order to maintain the sleek form factor of the machine they made these drives 1/3 height, not a standard 1/2 heigh drive, so these can not be easily replaced.  Knowing this I took my time removing the drives and cleaning and lubricating the mechanisms.  They were so jammed that I could not even insert or remove floppy disks from the mechanism.  With the floppy drives working, I could move on to the next phase of the repairs.

I made some floppy boot disks using my flux disk imaging setup that I've discussed before, but unfortunately my normal workflow did not work because these machines have a very unusual disk geometry so the first round of disks I created were not able to boot the machine properly.  But I did get far enough to type characters in to the screen and this is when I noticed the next challenge, the keyboard was not working.

This keyboard, the Epson Q603A, is a special one designed for the word processing software called ValDocs.  There is some good information on Deskthority about the keyboard.  This is a foam and foil keyboard, so I was not concerned because I've repaired several foam and foil boards over the years using the replacement kit from TexElec.  However, sadly, this board used a prototype switch with a much lower profile of foam and the normal replacement pads would cause the switches to remain pressed all the time.  I emailed TexElec about this and I was very happy to learn that they were already working on a low profile foam pad.  I got a set of these and installed them and the keyboard is working again as expected, one more step closer to getting this machine back on the road.

At this point because of my problems getting booted up and not have known good boot disks I stalled out on the project and set it aside.  But within a few weeks I saw a relevant post on the Vintage Computer Federation forums where I hang out, so I chimed in on there.  I received some great feedback about my disk imaging problem from one of the members there and I was able to create some new boot disks using a different starting point.  These boot disks worked and I could see that the Epson was fully booting up into an operating system.

Unfortunately, as often happens with Retro Computers, just when we think a project is ending, something else broke.  The CRT display starting rolling and I couldn't get the video to stabilize.  This CRT has only one adjustment for brightness on the outside so I took the case off to get inside.  I went through all the potentiometers on the circuit board and put Deoxit Fader Lube on them and cycled them back and forth.  I also did a careful inspection.  I was not able to identify anything wrong. After plugging everything back in it started working again.  I think there may be an intermittent connection with one of the sync signals so I'm going to try to isolate that to the Monitor side or the Computer side and maybe reflow the solder joints on those circuit boards.

But for now, the machine boots and runs, and it's time for me to explore one of the last and most modern looking of the CP/M machines.  I'm really glad to have this machine in the collection as it very much has the look of the era it came from...

Did you use CP/M back in the day?  Do you have memories of the Epson QX-10 or the Valdocs software?  If so leave a comment below, or drop me an email at my address in my profile, I'd love to hear about your experiences.

Steve's Retro Year in Review for 2025

With 2025 coming to a close it's time to reflect back on another year in Retro Computing.  Alot of great things happened in 2025, some planned and some unexpected.  This is my seventh year being involved in Retro Computing and my interest continues, there seems to always be something new to learn and the forum members of the Vintage Computer Federation and Tinker Different continue to be a source of help and inspiration for new projects.  Also this year I authored my 100th bLog aticle here on Steve's Retro Computer bLog.

In my retrospective article from last year I mentioned that I wanted to downsize the collection.  I added fewer new computers to my collection this year and I said no to quite a few eBay and local listings that were interesting.  I added about 15 machines this year instead of the 20+ machines I'd been adding over the last couple of years and more importantly I sold quite a few of those 20+ machines from previous years as well.  Half of the computers I sold this year are ones I bought to fix up and resell since I really do enjoy the repair process.  It also helps to know ahead of time that I won't be keeping the machines, it makes it easier to sell them when the time comes.

I sell complete systems whenever possible on both Craigslist and FaceBook Market Place (FBMP).  This year I sold about two computers on FBMP for every one on Craigslist, but I will still continue to use both platforms.  I think I get alot more spam from FBMP, but I know I'm getting alot of views on that platform since they show you those statistics now.  I'm still pricing below eBay prices, and I'm seeing machines sell on average after about a 2-3 week wait.

I bought three lots of computers this year, one with seven machines (mostly compact Macs), one with three Macs, and the final lot with eight machines (mostly Apple IIs).  In each of these lots I knew there were only 1 or 2 computers I'd want to keep but having these computers on hand made it easy for me to find an interesting repair project any time.  I plan to keep doing this (assuming that I can continue to find small and medium sized lots of computers in "as is" condition).  If you know anyone that is downsizing or needs help disposing of an old computer collection, please let me know, I'd be glad to buy machines in as-is condition or just even just offer advice about selling.

As I look back at acquisitions this year I made good progress on getting early Apple II hardware.  I got an early Apple II Plus machine and then an original Apple II machine.  I also got to extend my collection of Next computers, adding another NextStation Mono Slab and and an HP PA RISC machine that runs NextStep really well.  I got a new CP/M Machine that I haven't completed repairs on yet and another early MS-DOS compatible Wang PC, so I'm continuing to learn about both of these types of machines.  I added a couple of calculators to the collection, although I do not intend to become a calculator collector, since I'm trying to stay focused in my area of interest for collecting.

I also completed a couple of Unix workstation projects that were a long time coming, first getting a Y2K Era Compaq Alpha Personal Workstation up and running after a long time waiting for parts and then getting a Sun Ultra 10 machine up and running.  The Sun project was a machine I got at VCF Midwest 2024 so that one took a while.  The Apple III Computer parts that I got in the fall of the year were totally unexpected, but alot of fun to repair and learn about.

I don't have much room to display retro computers, so none of the machines I've acquired this year are on display in my office, instead I have an Original IBM PC, a Compaq Portable I, a Macintosh Portable, an Apple Macintosh Perform 550, a Gateway 2000 Slimline 486, a PDP-11 with VT-220 Terminal, and an Apple IIe as shown here...


During 2026 I need to think about focusing my interests even more and continuing to downsize the collection.  I still have more beige box PCs that I don't want in the collection and I will also consider downsizing other categories of machines.

During 2026 I should spend more time with software setup on the machines I already have.  Alternative Operating Systems has long been an interest of mine, and many of these machines support multiple OSes.  Networking is also one of my interests so I'd also like to spend time connecting more of the machines together.

What about you?  Do you have any highlights to share about fixing or using old computers in 2025 or plans for next year that you'd like to share?  Feel free to leave a comment below, or reach out to me via email at the address shown in my Blogger Profile.

Apple II Plus - Trash to Treasure - Part III - The End?

I haven't given an update on my Bell and Howell Apple II Plus machine since 2020.  I have done several little upgrades on that machine which have combined to produce an amazing looking machine.  This year at VCF Midwest I got to talk to the owner of MacEffects, thank him, and show him a picture of the machine. Later I realized that I haven't posted about this machine here on the bLog.

Since I last blogged about this machine, I asked around about which color monitor would pair with the machine.  I realize that most Apple II machines of this era would have been paired with Black and White monitors, but I was holding out for a Color monitor that existed at the time.  It turns out that the Sony PVM line does go back to the 80s.  I didn't find a period correct PVM but I was able to buy one that is the right size to sit on top with the floppy drive next too it.

I also added the Language Card to get the machine up to 64K, and a Microsoft Z80 card so I can run CP/M on this machine.  I made some wiring repairs in the backpack for the power supply so it would be more reliable.  I make a joystick adapter to go from the DIP style connector to a 9-pin connector so that I can plug in Apple IIe style peripherals to this machine.

But the most dramatic changes are cosmetic.  After having an eBay saved search running for several years an Apple II Plus Top Cover came up.  I had seen one a couple years back and I took a pass on it, but I'd been regretting that decision so I jumped on this top cover.  Since it was for an Apple II Plus, the badge and color was wrong but as I have alluded too MacEffects is producing reproduction badges.  So with a bit of paint for the top cover and a new badge, it looks like a Bell and Howell top cover.

Knowing that I would have the computer looking amazing, and seeing that MacEffects also has case badges for the Floppy Drives, I purchased one of these as well.  Taking the drive apart to repaint the housing was pretty straightforward.

After a bit of repainting my barn find Bell & Howell Apple II Plus looks better than I ever could have hoped given the state the machine was in at the start...


During VCF Midwest I talked to another owner of one of these machines and through conversation with him and with other folks I learned that mine is one of the earlier machines.  It has the sought after Backpack (although the audio section of mine is not working) and it has keyboard keys that are more smooth.  Apparently Apple switched keyboard vendors later in the product run.

I'm super happy to have this machine in the collection and grateful to the community for the help, advice, and new parts that I needed in order to get this machine back to where it is now.  It's certainly in my top ten favorite machines in my collection.

Trash to Treasure - Osbourne 1a Computer

 The Osbourne One is widely regarded as the first portable computer.  It was released in 1981, and although it didn't include a battery, it was advertized that it could fit under the seat of an airplane.  I have a soft spot for CP/M machines and so I've had the Osbourne 1 on my wish list for a couple of years.

Last year my friend Steve gave me a "fixer upper" Osbourne Executive.  That was an interesting machine, too, and this example was is really good cosmetic shape.  I spent quite a few hours restoring the machine, working on the CRT alignment, cleaning and lubricating the floppy disk drives, making boot media, and troubleshooting the main board.  But ultimately, I was not able to get it booting.  I isolated the fault to the main logic board, I think there is something wrong with the floppy disk controller because the machine can move the drive heads and step to tracks, but when it starts to boot, it reads in track zero, steps the head to the next track, then stops responding.  The machine behaves the same way with a Go-Tek drive emulator, so that's why I'm pretty sure the fault lies with the main logic board.  So I had put that repair on hold and was going to come back too it.

However, a more interesting option presented itself a couple of weeks ago.  I was shopping at Free Geek Twin Cities as I often do and they mentioned that an Osbourne had just come in.  It was in really rough shape, quite yellowed, and keys missing from the keyboard, but it appeared to be booting and asking for a boot floppy.  It wouldn't boot from the disk that had been left in the drive, but in my experience almost all of these drives from the early 80s need cleaning and lubrication before they can work correctly.  So, they offered me a good price on the Osbourne as a project machine and I purchased it...

The first order of business on a restoration like this was for me to get the machine booting.  I started by making some "known good" boot disks using my SuperCard Pro disk imaging setup.  I think I've covered this workflow before, but my current workflow for making boot disks for new to me machines is to find disk iamges on Dave Dunfield's site here.  I then use the fantastic tool HxE Floppy Emulator Software to convert the IMD disk image format to the SCP flux format used by my disk imaging hardware.  Then, I use the SuperCard Pro to write out the disks to hardware.

One hack that I've learned on the hardware side with these CP/M Machines is that since they must boot off Drive A it will have alot more wear and tear on it.  It makes sense to swap Drive A and Drive B as well as service both drives.  In this case, the drives mechanisms were from two different vendors but the control boards were the same.  The Osbourne 1 has power going to the floppy drive over the ribbon cables, this was not the case for the Osbourne Executive.  It turns out that all you need to do to tell which drive is the A drive is swap the termination resistor, there are no other jumpers on the drive controller board, after this the machine was booting!

Once I got the machine booting, it was time to swap over the external case parts from the Executive.  This article explains the differences between the very early Osbourne One computers and the 1a model that I have here.  I was quite fortunate to have purchased the 1a, not realizing at the time, but the case is exactly the same shape as the Osbourne Executive.  The front bezels are unique, so I cleaned up the front bezel of the Osbourne One with soapy water.  The Executive had a bulge under the handle in order to accommodate a fan, but many people feel the machine should have had a fan so I'm happy to have that as part of my Osbourne One even if it's a slight anachronism.

Another surprising item was that although the keyboards look identical and have the same connector they do not appear to be compatible with one another (I guess the analogy would be the XT and AT keyboards with the same connector but different scan codes). So, I removed all the yellowed keycaps from the Osbourne 1 computer and swapped the keyboard over into the Executive Housing.

The machine turned out lovely, I'm very happy with how it looks...

From the sides it is even more of a contrast as the old case was badly yellowed.

I'm glad to have the machine booting and running, but I would also like to add a Go-Tek with Flash-Floppy firmware.  I'm not quite sure how to do that with the non standard drive wiring on the Osbourne One, but that will be a project for another day.

A Kaypro II from 1982

My latested repair story is about a Kaypro II from 1982.  The Kaypro machines have such an odd numbering scheme.  They used Arabic numerals and Roman numerals to refer to different computers, it is so confusing that collectors have taken to referring to them by the year of their release.  The Kaypro II 82 is a different computer from the Kaypro 2 84 released two years later.  There is so much confusion caused by this so many articles online contain inaccuracies in describing the features and functions of the machines.

I've had a Kaypro 2 84 for several years, and acquired a Kaypro 1 from 1986 last year, but I've long wanted a Kaypro II 82 both for historical reasons, because it's the first of an iconic line of CP/M computers, and also for nostalgic reasons because my uncle who bought me my first computer bought one of these machines for my Grandpa and Grandma.  I knew from day one that Grandpa and Grandma's machine was a much more serious tool than the one that I had, and I thought it has an amazing design, it looked like a "real computer".

This Kaypro II 82 came from Free Geek Twin Cities via my friend Chris Gallaty.  Special thanks to Chris for getting this machine when he did and for passing it on to me.  The machine came with a note "Powers On - Keyboard Cable Needs Simple Repair".  One of the basic rules of troubleshooting is that you should not take other people's troubleshooting work at face value, you always want to do that work yourself, but I was hopeful that the label was correct.

The plug on the keyboard port had been smashed in and that repair did need to be done so I started out with the obvious repair first.  Chris has also given me a 4 pin modular jack from a phone handset.  Once I got inside the Kaypro the jack inside had taken a pretty hard hit and was beyond repair, so I needed the new part.  I soldered the replacement in and hot glued it on the inside to improve the support.  It feels quite solid.

I was able to drag out another working Kaypro machine and test the keyboard.  It was working as expected!

Next, I powered up the Kaypro II machine.  The CRT came up, but the normal prompt that appears on power up was not appearing, normally the machine would have a prompt that says 

*Kaypro II*
Please Insert a Disk

This message appears before booting and so a working floppy drive is not needed to get this message, just a working power supply, main board, and CRT.  I checked the power supply voltages and they were OK.  On the CRT I did not see any raster pattern when the brightness was turned up, or after adjusting the knobs.  I did some basic troubleshooting on the mainboard, and ended up moving the main board over into a different Kaypro.  I could see that it was outputting video, so that isolated the issue to the CRT analog circuit.  This was discouraging because I'm not the best at CRT repair, but I started doing some reading and found this article on Vintage Computer Forums.  I normally don't like doing "Shotgun" repairs, but I replaced as many of the caps as I could from my stock of Capacitors and that helped, now the image looked like this...

There was raster and the CRT was displaying text!  Also, I cleaned the disk drives with a floppy cleaning disk, and I made SS/DD Boot Disks for the Kaypro II.  The machine booted from the floppy!

The non-centered but visible image was evidence that I needed to complete the recap so I captured the rest of the capacitor sizes and put in an order on DigiKey.  When the caps arrived and I had time to get back to repairs on this machine I identified a large capacitor that was totally dead, so once the recap was complete, the image looked great and I completed the CRT adjustments.  I now have a fully functional Kaypro II machine...

I feel quite fortunate to have one of these systems, it's been on my wish list for quite some time.  My next project for the Kaypro II 82 will be make some more floppy disks.  I'm also thinking about swapping one of the drives for a Go-Tek as it would be really cool to be able to boot and run from Flash Storage.

The Last of the CP/M Kaypros - Kaypro 1 (1986)

Due to the generosity of a fellow member of the Vintage Computer Forum, I recently re-homed a Kaypro Model 1 computer from 1986.  Despite its numerical sequence the Kaypro 1 (1986) is the last of the line of Kaypro CP/M machines that started out with the Kaypro II in 1982.

I also have acquired and restored a Kaypro 2X (1984) machine which I've previously blogged about.  This machine is still in my collection.  That experience lead me to feel pretty comfortable tackling another Kaypro project.  The previous owner of the machine let me know ahead of time about issues with the machine, but there was really only one problem, the A drive was intermittent and the machine wouldn't boot any more.  I'd experienced this exact same symptom with the other Kaypro.

It's important to get the Kaypro back to a state where it can make bootable copies of its own floppies.  Especially since this newer Kaypro has a newer ROM that requires slightly different version of CP/M (2.2U1) and it wouldn't boot off the disks that I'd made last time for my other Kaypro (2.2G).  Step one of the repair was to get the two drives out and inspect them.  The inside of this machine was clean.  The floppy disks both looked good the heads could move freely and the direct drive spindle motors were spinning freely.  There was noting obvious wrong, so I cleaned the heads and swapped the A and B drives around.  Swapping A and B on a CP/M machine requires both changing jumpers and moving the termination resistor pack on the drives.  Now the A drive was the drive with much lower hours on it.

It worked!  The Kaypro 1 booted the first time after swapping the drives, always a good feeling to get another machine booting again.  And this enabled me to do a bit more troubleshooting on the bad drive (formerly known as the A drive).  I used the COPY utility to copy the Boot & Extra Utilities disk over to the B drive.  The copy operation is slow on these machines but it went all the way to the end and then failed when it go to the boot sector (track zero on the drive for CP/M).  I had another 360K floppy already serviced and ready to go so I decided to use that instead of doing further troubleshooting on the faulty drive.  The drive formerly known as A will go into storage for a future repair.

For now, the replacement TEAC drive is working well as the A drive and the old Kaypro drive is back as the B drive once again.  I got all the jumpers and termination setup correctly and the Kaypro 1 is able to make its own boot disks once again...

This machine came with some cool accessories including a canvas carrying bag a desktop stand and ALOT of software on floppy disks (over 100 disks).  The next order of business for me on this project is to go through and try to figure out what software I've got...

This software is quite an exciting addition to the collection since previously I've only had a handful of disks of the software I was able to find on the Internet.  Thanks again to the previous owner of this system for sending it along, I know it will bring alot more hours of enjoyment.

Kaypro - An Iconic (and Nostalgic) CP/M Machine

Kaypro computers have long been nostalgic for me.  My grandparents had a Kaypro and I remember thinking how impressive of a computer it was.  Very rugged and industrial compared with my VIC-20 connected to a color TV.  I was recently offered a Kaypro from a trusted seller whom I've done business with before and I was most happy to be the next owner of a Kaypro 2X from 1984.

The naming of the Kaypro model numbers is a bit odd, but if you are interested, this article explains the timeline quite well.  The 2X is one of the final machines, but they all looked quite similar to the rest of the line.  I think they may have used the same case dimensions through the entire run of models.  From the outside, the distinguishing characteristic of the later systems is the 1/2 height drives instead of full height.  

My repair story started with finding and reading the relevant sections of the technical manual from BitSavers.  The first problem to overcome was that the CRT display was not working.  You could see that the tube was working, but the display was rolling.  By figuring out which of the three CRTs (Toshiba) was inside, I was able to locate the adjustment Pots and get the display solid.

The next challenge was to get the Kaypro booting.  I didn't have any Kaypro media, but as readers will know I've got a SuperCard Pro flux disk imaging system.  I've recently figured out a new workflow for that which has allowed me to create bootable disk images for several different retro systems, including the DEC VT-180 Robin and now this Kaypro.  Here is that workflow at a high level:
    Find Appropriate Bootable Disk Images for the Target System
    Use HxCFloppyEmulatorSoftware from this page to convert Disk Images into Flux Image Files
    Use Flux Imaging Tool to write out Floppy Disks, in my case SuperCard Pro.

Once I had floppy disks I was ready to try booting the machine. Sadly the unique push-button floppy drives in the machine were not working. Neither drive would eject a disk.  In the short term I was able to find a working DS/DD 5 1/4" drive from my parts bin that worked with the Kaypro.  Jumpering this as Drive 0 I was able to see the machine boot into CP/M for the first time.

Next on the agenda for the Kaypro was a through cleaning.  This was a dusty and dirty machine, both inside and out, but like many of the 80s systems, it was quite easy to take apart all the way down to the board level, so I did this both for the computer and the keyboard.  I washed the housings with warm soapy water and set them aside to dry, then cleaned the circuit boards w/ Isopropyl Alcohol, including the power supply, the analog CRT board, and the logic board.  I also removed the keycaps and washed them, and spent some time cleaning up the switch deck of the keyboard.  I did not try remove any of the switches as all the keys appear to be working on this machine!  I wonder if the enclosure design keeps dust out of the keyboard?

Part of the cleanup process was to return to the two floppy drives.  These were unique mechanisms, Epson SD-521 drives.  Like so many times before, the forums have been quite helpful, and I got some good advice about the cleaning.  After cleaning and lubrication, one of the drives is working well (it was previously the B drive, so maybe had fewer hours on it?).  I was able to get the previous A drive ejecting again, but there is a problem with the drive motor which I was not able to easily troubleshoot, so I've set that aside for now.  

As I was troubleshooting, I made an interesting observation about just how small CP/M even when compared to DOS 3.  One of the floppy drives I was troubleshooting was having trouble w/ the head stepper motor but if I manually pushed the head back to Track Zero (on the outside of the disk), then when the computer would successfully boot into CP/M and even give the Directory listing (DIR).  Trying to load a program would lock up the computer since the heads were not able to move to the correct position.  So this is another drive that I've set aside for now.

The machine doesn't look perfect since the two drives are not an exact match, but I'd much rather have the second drive functional than have it look nice but not work correctly.  The final results for now are shown below...

I'm quite pleased with how it turned out.  The highlight so far as been playing a text based Pac Man clone called Catchum...

It's surprising how much fun a text based arcade game can be.  The Space Invaders clone, called Aliens also looks like it would be fun, but there's a problem with the keyboard mapping for that game, so it isn't working on the Kaypro 2X.

Do you have any memories of the Kaypro computer, or suggestions about software to run on it?  If so, please let me know in the comments below.

A New Addition to the Collection - DEC VT-180 Robin

Knowing of my interest in both Digital Equipment Corporation and CP/M Machines a friend recently offered to sell me his DEC VT-180 Computer, also known as the Robin.  I jumped at this chance and I consider myself very fortunate to be the next owner / caretaker of this survivor from 1982.

My system came with some but not all of the software that has been archived.  I was able to write out floppy disks from the images on BitSavers which are listed here. and I have converted these to the more universal IMD format (Dave Dunfield's Image Disk) and uploaded them to Archive.org.  Also, I used the KERMIT80 software which was included on one of the disks to send data over a serial link to create disks for ZORK 1, 2 & 3, as well as send three floppy disks full of Basic games.  I've uploaded disk images (In IMD format) for this "new" contribution to Archive.org if there are others that can use this.

As we all know, gaming is the "Killer App" for Retro Computers, so I've also tried finding a couple of other CP/M Games like Ladder and a text-based PacMan clone.  The only archives of these that I've found, do not appear to contain versions that will run on the DEC, although I do see one YouTube video showing these games, so I do think they are out there.  Please leave a comment below or reach out via email (address in my Profile) if you have disks you'd be willing to swap, send, or image?

The Robin has been a super interesting machine to learn about.  As many of the earlier personal computers, it has single sided double-density floppy drives, and to make up for that it supports up to four drives at a time.  The machine is hosted inside of a VT-100 terminal.  It has two serial ports, one "general purpose" that could be used for a Modem or terminal emulation, and a second to connect to a printer.  The system is not expandable beyond the ports on the back as there are no open card slots.  This machine is built like a tank, and each of the drive enclosures is also solid sheet steel and amazingly strong.

Perhaps in the future I will blog about a hands on comparison and contrast between the DEC Robin and the IBM PC, but for now I'm just going to bask in the warm glow of the VT-180 experience.  Perhaps it's finally time for me to play through Zork, that's something I never did finish back in the day?

SuperCard Pro - For Disk Imaging and Drive Repair

Disk Imaging

One of my interests in the Retro Computing hobby has been software preservation.  Trying to recover data off some of my wife's old floppy disks from her college days sent me down a path that's gotten me to the point where I own several different Macs and PCs from the 90s that I use as "Bridge Machines" to get data moved off old floppies onto modern hardware.

I'm also interested in a range of different systems and in having the ability to make and restore disks of any format.  I became aware of the Kryoflux disk imaging system when reading on Sonic Purity's blog on this article that I've referred to in several bLog articles before.  I didn't pursue the Kryoflux because this solution was expensive and because I didn't understand floppy disk technology well enough to be comfortable with flux imaging.   Thankfully this knowledge gap can be easily addressed by a great deal of information on the Web, and since then I have put more time into researching this topic.

One of the few benefits of the Pandemic has been that all the Vintage Computer Festivals have been online.  I learned about Jim Drew's SuperCard Pro from watching Craig Ernster's presentation. at VCF Midwest 2020.  This device is significantly less expensive than Kryoflux.  I didn't buy one right away, but when I got my first CP/M machine and didn't know how, or even if I'd be able to make floppy disk copies with the machine I put one on order.

I've paired the SuperCard Pro with the Asus laptop I use as my retro computer engineering PC and set up a couple of floppy drives, both a TEAC 5 1/4" DD drive as well as a newer 3 1/2" 1.44MB floppy drive.  I have stored these items together so it doesn't take long to have the disk imaging solution up and running on the bench...


So far, I have imaged and restored boot disks for my Compaq Portable (360K Floppy with DOS 3.3), and that worked well using a preset in the software.

Also I've imaged and restored boot disks for my Megatel Quark 100 CP/M computer, again, using a CP/M preset in the software.

Drive Repair

The Super Card Pro has also been helpful for drive diagnostics and repair.  It has a separate screen  for Drive / Disk Utilities.  This allows you to control the drive motor and also the track steppers that move the heads back and forth.  As you can see in some of Adrian Black's videos, having separate control over these two drive functions can help when lubricating and troubleshooting drives that haven't run for a long time.  Using these features of SCP, I've been able to troubleshoot these issues:

Drive Motor Speed Adjustment
Index Sensor Good / Bad
Track Stepper Motor Position
Track Zero Sensor Good / Bad (the Disk Media Test will fail if the Track Zero sensor is not working)

When comparing the functions of the Super Card Pro with IMD, I believe that IMD could also be used to diagnose all of these scenarios, but I find the SCP interface a bit easier to navigate.  One gap with SCP, I have not been able to adjust drive alignment with this tool.  I think the IMD program is the only (easy, non oscilloscope) way to do that.

My latest drive repair was getting a pair of Magnetic Peripherals Full Height DS/DD Drives back up and running for my IBM 5150.  Although these drives are now fully functional the alignment of these drives doesn't match up with the other 360K drives that I own.  Drive alignment is still outside of my comfort zone, but I'm hoping to learn more about that soon so I can get the various drives I own back lined up with one another.

My first CP/M Computer

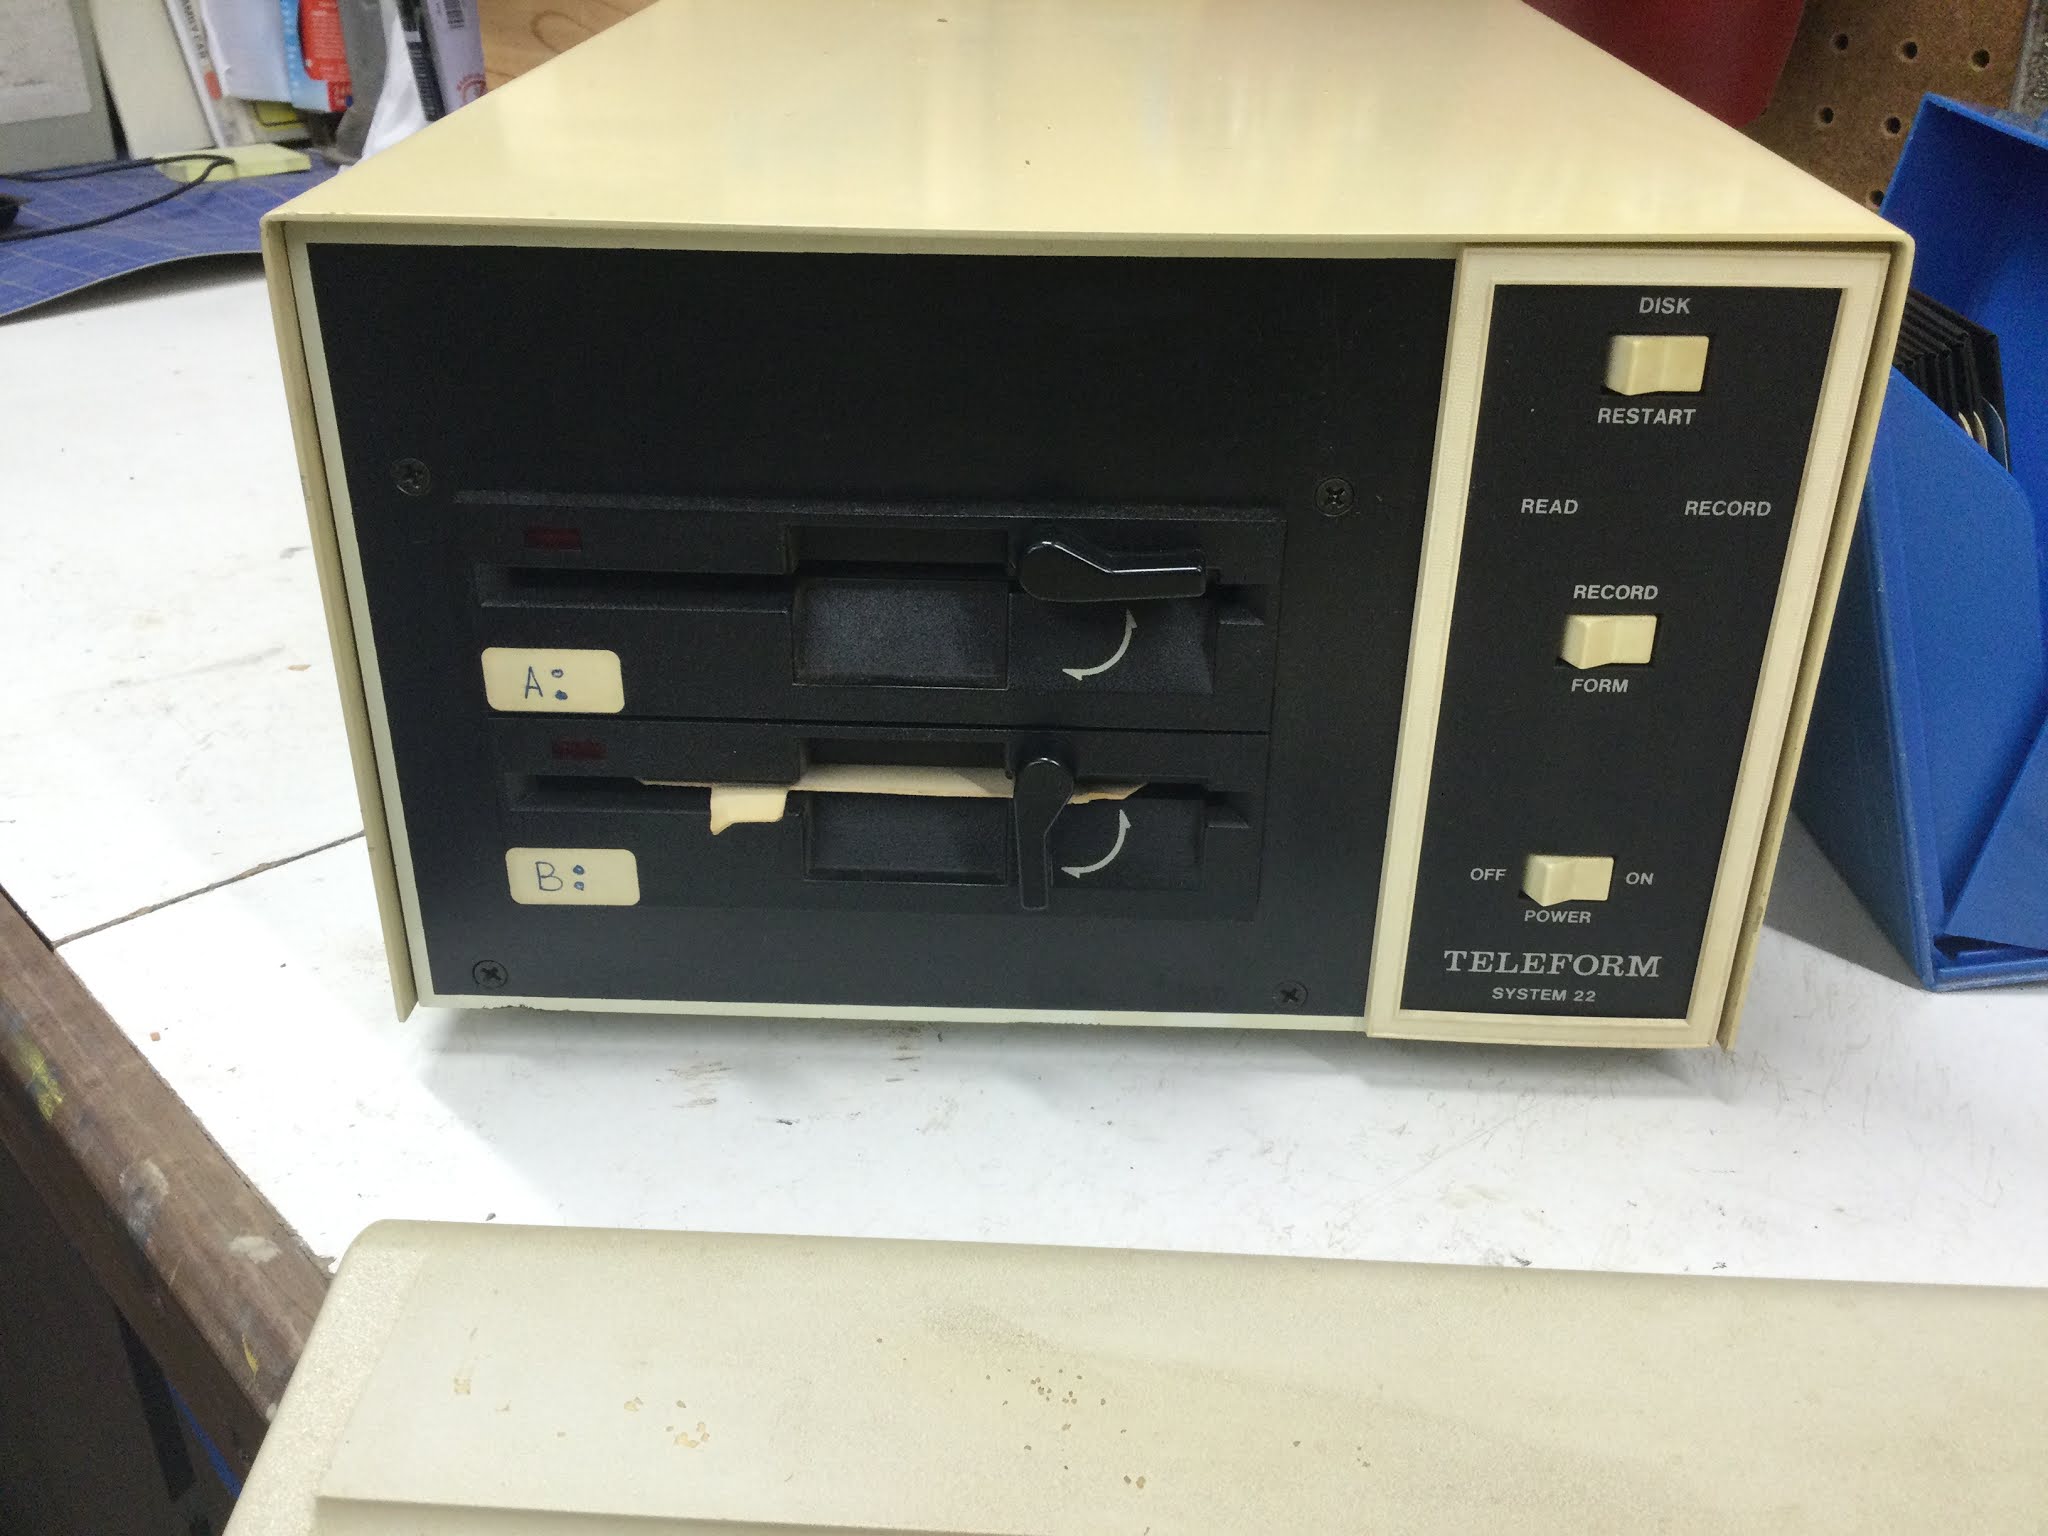
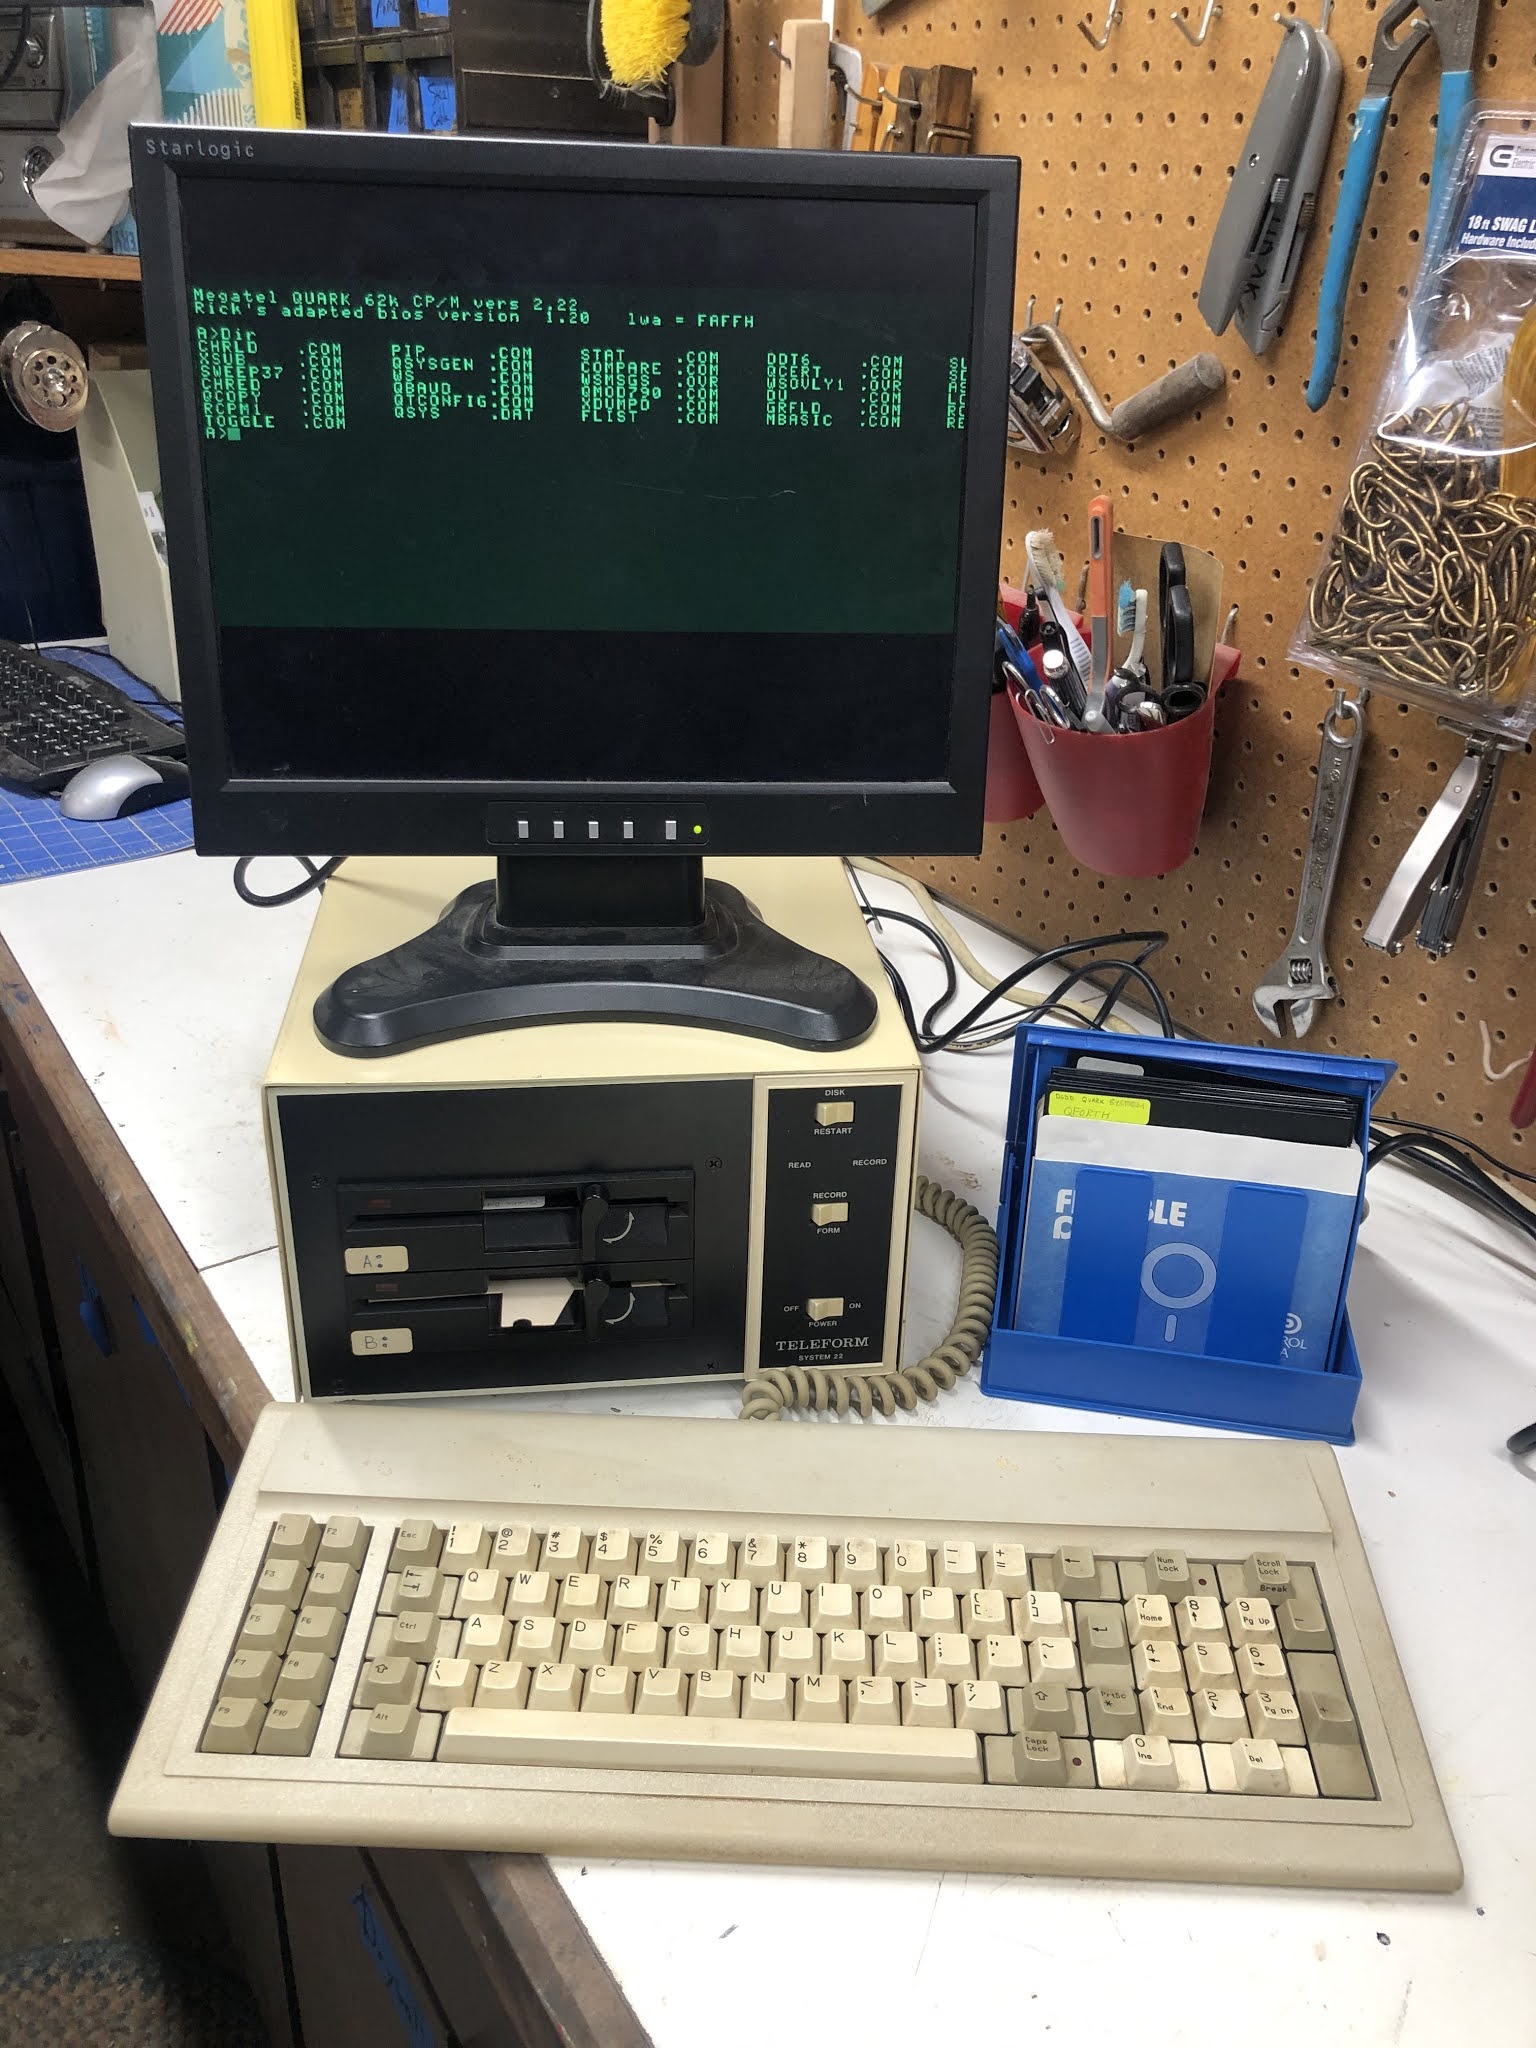
A few weeks ago an intriguing post popped up on Craigslist.  It was for a CP/M computer that someone here in the Minneapolis / St. Paul Metro area had built up from the board level in 1983.  I believe the builder re-used a piece of old test equipment as the Chassis, and perhaps the power supply that was in the Chassis as well, but the computer itself is a Megatel Quark 100 computer.  This was a Canadian firm.  The computer is a Z-80 based system with 128K of RAM (64K available to CP/M), and two Teac 360K floppy drives.  (I'm still not sure what the formatted capacity of the drives is, since I'm a CP/M newbie.)

At some point the previous owner had recycled the Monitor.  I don't have an MDA / Hercules compatible monitor in my collection, so I ordered and waited for an MCA2VGA to arrive from TexElec.

Once I got the video adapter and a 9 pin male to 9 pin male straight cable, I was able to fire the machine up and test it for the first time, it boots and runs well...


There appears to be an issue with the Horizontal Sync timing on the MCA2VGA adapter, as the last few columns of text on the right hand side are cropped.  Also the video is compressed vertically too about 1/2 of the height of the screen, so I'm not sure what's going on there.  The manuals for the Quark mention specific horizontal refresh timing, but I'll have to dig in on what the timings are supposed to be for MDA / Hercules in order to understand why this isn't working on MCE2VGA.  I'm also on the lookout for a period correct monitor.

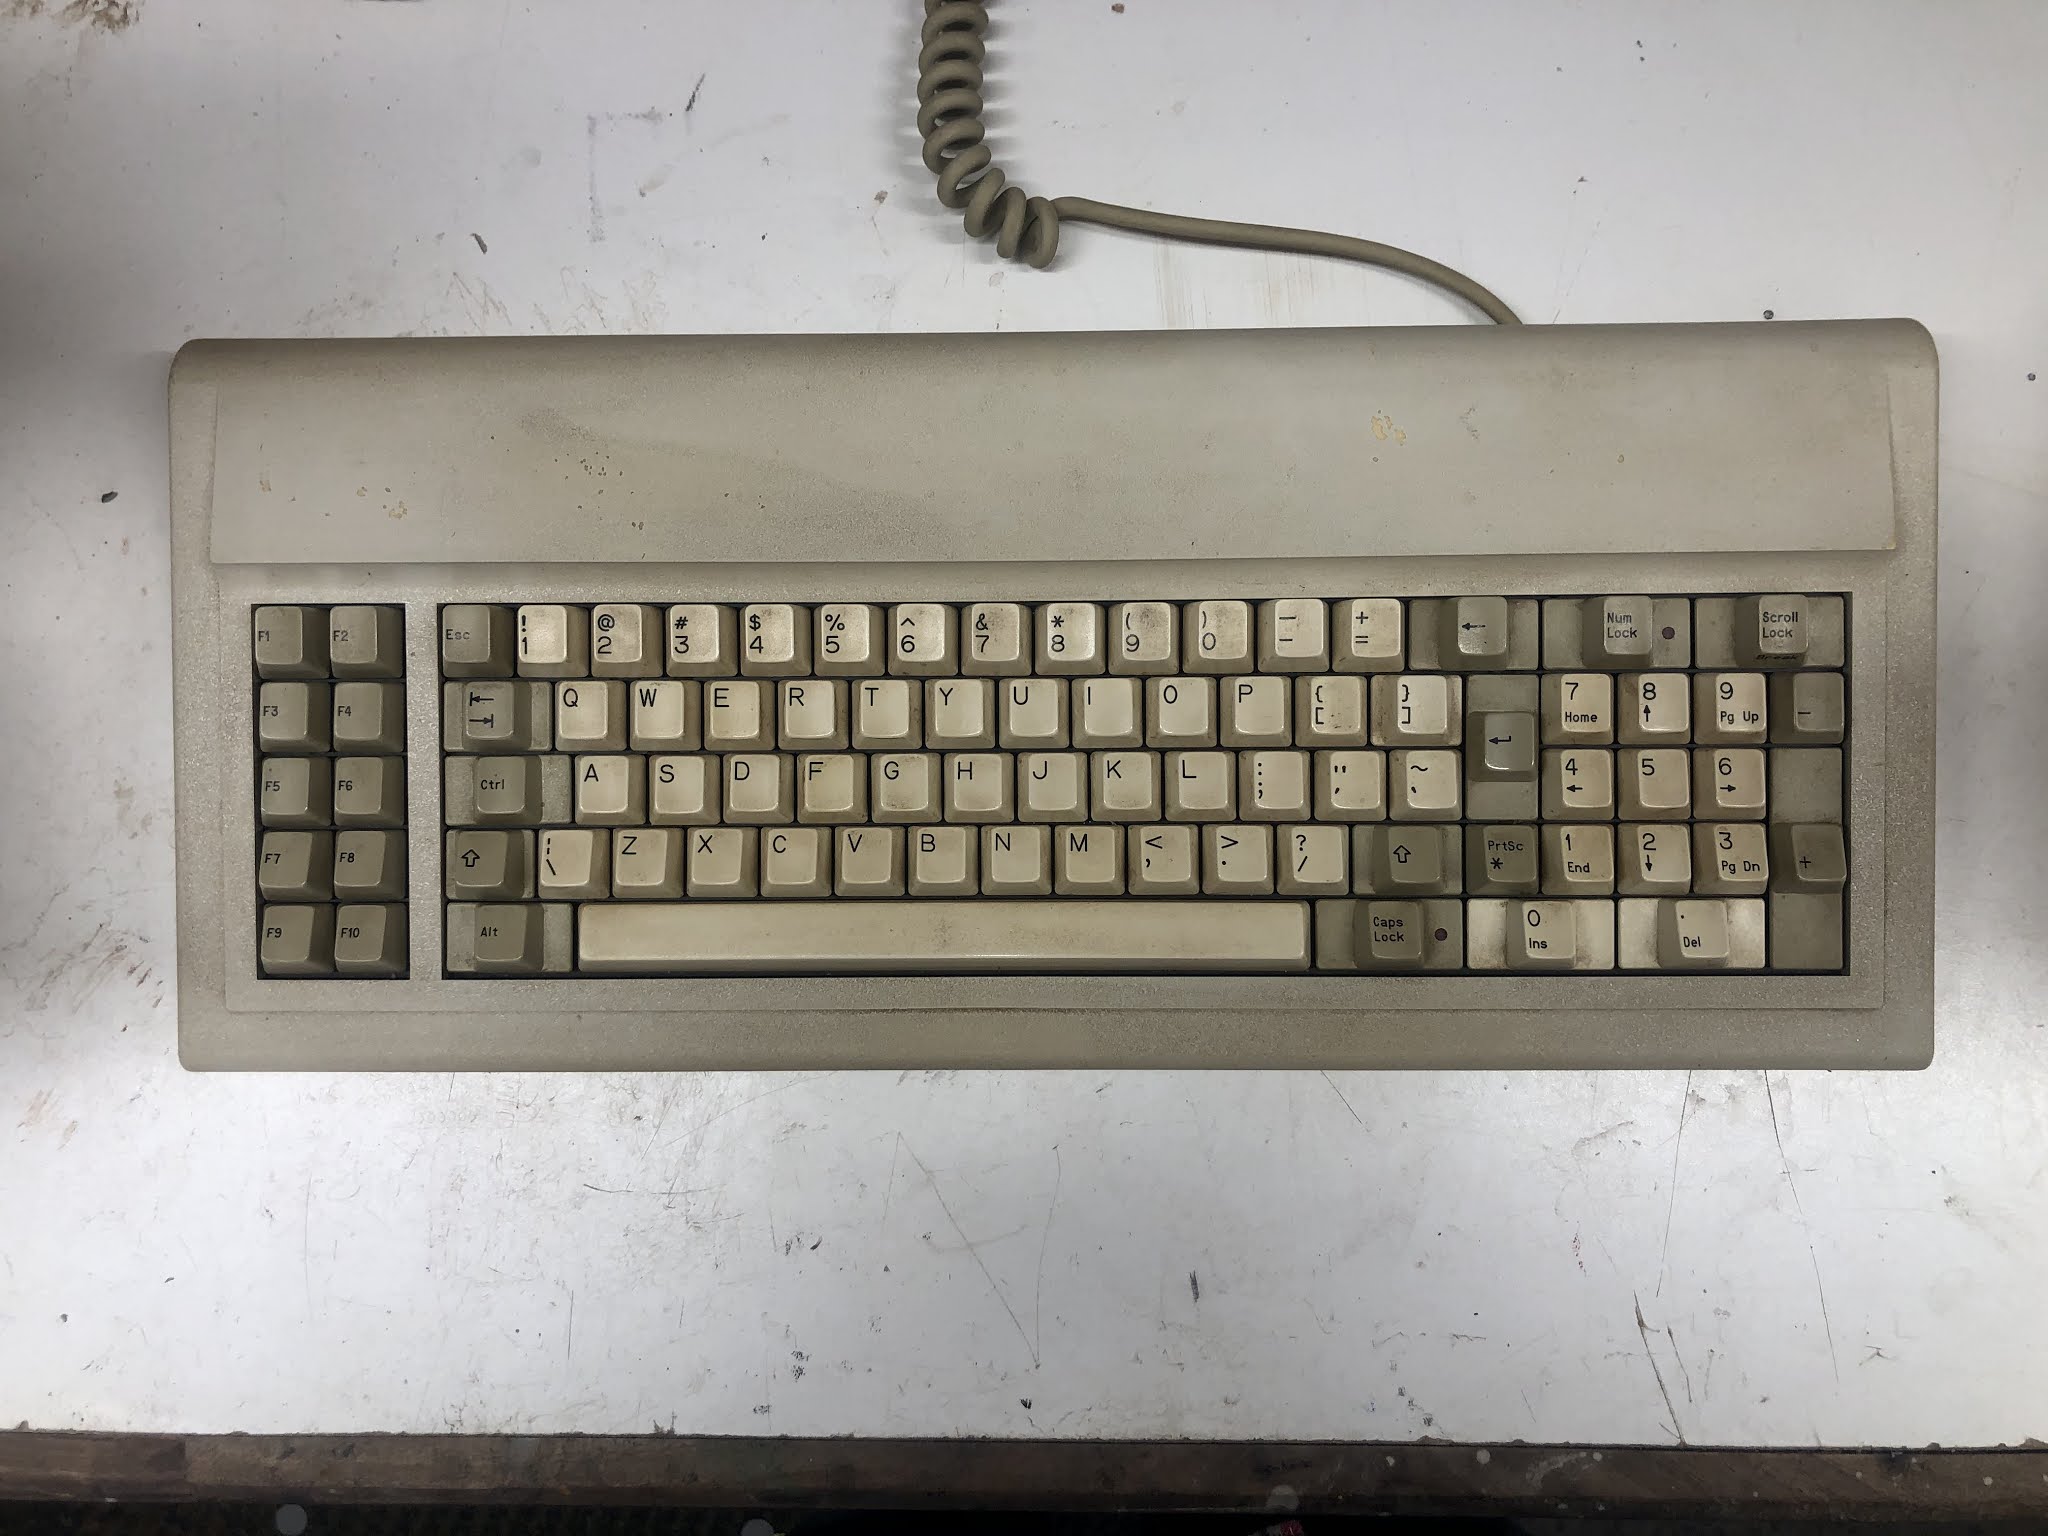
The next challenge was the Key Tronic foam and foil keyboard.  Several of the keys were not working...

I've restored a similar keyboard before on my Compaq Portable from the same year, and once again TexElec came to the rescue with their Foam and Foil replacement pads.  Waiting for the pads to come in gave me the opportunity to take the board completely apart and clean the housing and keycaps.  After replacing the pads and re-assembly, the board is working like new, although there's some wear and tear...

I'm quite happy with how this turned out given that the keyboard is over 35 years old!

The next challenge was that the builder of this system mentioned to me that the BIOS is on a Floppy Disk.  The computer won't boot at all without the customized, appropriate BIOS for the peripherals that are wired to this specific build of the Quark.  This left me with a nagging fear that as the floppy disks fail, I'd loose the use of this classic computer.  I'll write a separate bLog article about my new SuperCard Pro Disk Imaging setup, but too make a long story short, I was able to image and restore Bootable CP/M disks for this machine, and capture and archive all the disks that came with this system, so that is a relief.

That wraps up the story so far for my first CP/M computer.  It's working well enough that I can dive in and start learning about CP/M, the precursor operating system to DOS.  There's alot of good information online, and I'm planning to start with "The CP/M Handbook with MP/M" by Rodney Zaks.

On my To-Do list for this computer:
Find an appropriate monitor that can be adjusted to show all the text, or determine why MCE2VGA isn't displaying the image correctly.
Find a Go-Tek equivalent for 360K 5 1/4" drives so that I can replace one of the floppy drives with a solid state drive.

Please let me know if you have any suggestions for me about this computer, or any questions, Thanks!