The Last of the CP/M Kaypros - Kaypro 1 (1986)

Due to the generosity of a fellow member of the Vintage Computer Forum, I recently re-homed a Kaypro Model 1 computer from 1986.  Despite its numerical sequence the Kaypro 1 (1986) is the last of the line of Kaypro CP/M machines that started out with the Kaypro II in 1982.

I also have acquired and restored a Kaypro 2X (1984) machine which I've previously blogged about.  This machine is still in my collection.  That experience lead me to feel pretty comfortable tackling another Kaypro project.  The previous owner of the machine let me know ahead of time about issues with the machine, but there was really only one problem, the A drive was intermittent and the machine wouldn't boot any more.  I'd experienced this exact same symptom with the other Kaypro.

It's important to get the Kaypro back to a state where it can make bootable copies of its own floppies.  Especially since this newer Kaypro has a newer ROM that requires slightly different version of CP/M (2.2U1) and it wouldn't boot off the disks that I'd made last time for my other Kaypro (2.2G).  Step one of the repair was to get the two drives out and inspect them.  The inside of this machine was clean.  The floppy disks both looked good the heads could move freely and the direct drive spindle motors were spinning freely.  There was noting obvious wrong, so I cleaned the heads and swapped the A and B drives around.  Swapping A and B on a CP/M machine requires both changing jumpers and moving the termination resistor pack on the drives.  Now the A drive was the drive with much lower hours on it.

It worked!  The Kaypro 1 booted the first time after swapping the drives, always a good feeling to get another machine booting again.  And this enabled me to do a bit more troubleshooting on the bad drive (formerly known as the A drive).  I used the COPY utility to copy the Boot & Extra Utilities disk over to the B drive.  The copy operation is slow on these machines but it went all the way to the end and then failed when it go to the boot sector (track zero on the drive for CP/M).  I had another 360K floppy already serviced and ready to go so I decided to use that instead of doing further troubleshooting on the faulty drive.  The drive formerly known as A will go into storage for a future repair.

For now, the replacement TEAC drive is working well as the A drive and the old Kaypro drive is back as the B drive once again.  I got all the jumpers and termination setup correctly and the Kaypro 1 is able to make its own boot disks once again...

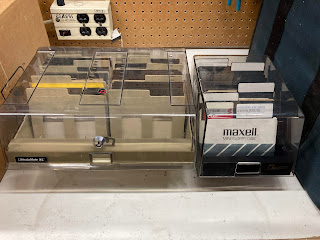
This machine came with some cool accessories including a canvas carrying bag a desktop stand and ALOT of software on floppy disks (over 100 disks).  The next order of business for me on this project is to go through and try to figure out what software I've got...

This software is quite an exciting addition to the collection since previously I've only had a handful of disks of the software I was able to find on the Internet.  Thanks again to the previous owner of this system for sending it along, I know it will bring alot more hours of enjoyment.

TRS-80 Model 1 - Trash to Treasure - Part 1

Due to the generosity of another member of the Vintage Computer Forums I was recently able to re-home a TRS-80 Model 1 (With 16K RAM and the Level II Basic Upgrade).  The machine had come from a smoking home, but it hardly had a smell any more.  Unfortunately it did have a coating of yellow sticky tar over the entire surface, so the grey pained areas look gold instead of silver...

When I first got the unit and before I even brought it in the house I did a bit of scrubbing with water and a microfiber cloth.  With a bit of effort and lots of water the tar layer came off, so I was hopeful that a more thorough submersion with dish soap warm water and scrubbing I'd be able to bring it into a condition that I wouldn't mind touching.  Since the computer is painted, I felt that using Isopropyl Alcohol for cleaning on the outside would be too risky.  I took both the keyboard and the monitor completely apart and washed all the plastic parts with water, including removing and cleaning each keycap individually.  When I had the computer apart I rinsed the circuit boards with 99% Isopropyl and did an inspection of the circuit boards.  There were no bulging caps and nothing obviously wrong.  After putting the computer back together it looks alot better...

The silver portions look silver once again but you may notice that some the paint on the black parts of the plastic has thinned out quite a bit.  I didn't use any abrasives but the textured areas seem to have been stripped a bit even with only using dish soap.  I was pretty sure this would not be a museum piece when I started so even with these defects I'm happy with how the system has turned out.  Perhaps I will come back and use some car cleaning chemicals to try to restore some of these plastics, a trick that I've seen Adrian Black using.

The next order of business was the keyboard.  I was excited to learn that the key switches were from Alps.  The amazing key feel of these retro computers is a bit part of the appeal of these machines for me.  However the Level II machines are know to have keyboard problems and this one is no exception as most of the key switches didn't work.  This mirrored a problem I'd had with my Apple II Plus restoration, and because of the film on the surface of the machine and the dust inside I was not too worried about it.  When I had the computer apart I cleaned the keyboard deck w/ 99% Isopropyl and sprayed DeOxit into every keyswitch actuating each switch about a dozen times to start.  After waiting for things to dry I tested each key and most of them were working again with only 6 or 8 requiring a second application of DeOxit and a few dozen more actuations on each switch.  After probably about 100 actuations I finally gave up on the F key.  I had Alps keyswitches in my stock because I'd purchased some spares for the Apple II Plus repair, so I was able to use those parts.  Although, the TRS-80 uses Short Stem Switches which are more expensive and rare, so it was easier for me to take the non working switch apart and swap the stems since I only needed one.  After soldering in the F key the entire keyboard is working and I was finally able to write my first 10 PRINT program on this machine, always a happy milestone in these retro computing restoration!

More to come on this project.  I don't have the cable for the Cassette player, so I can't even use the computer to play programs in over the headphone port yet, but I have one on order and I'll be bringing the machine back out for some gaming fun when that arrives.

I'm very happy to have an example of one of the original 1977 "Trinity" of home computers.  This is the first one I've had, my Apple II Plus and a Commodore PET 4016 are the closest I'd gotten so far.  Do you have memories of using the TRS-80 Model 1?  Do you have suggestions for games or programs I should triy out when I get my cassette cable?  Let me know in the comments below, or my email address is in my Bio and you can reach me via email.