Showing posts with label Classic Macintosh. Show all posts

Retro Computing at the Movies

Streaming and the wide availability of video on the Internet have made it easier than ever to find and watch material that was unavailable or just hard to find for many years. I a previous bLog article, I covered YouTube channels that are providing archival first person computer history videos.  But Hollywood entertainment is another culturally relavant source.  Here are several feature length Hollywood movies with connections to computing and computer history.

The films in this article fall into two categories.  The first set of films from before Y2K show peoples attitudes towards computing machines and their interactions with them.  The second group of films are more modern movies post Y2K which have historical computing as a theme of the movie.

Older Films (Pre Y2K)

Desk Set (1957) with Spencer Tracy and Katherine Hepburn was fun, I saw this film for the first time last year.  Two of the things that stood out to me were the uncertainties the workers had about how computer automation would affect their jobs and a repetition of the pattern where new automation solutions do not live up to the hype, at least in the short term.  An enjoyable film and one I'd recommend.

The films Twilight's Last Gleaming (1977) and Damnation Alley (1977)  both show inside of a Cold-War Atlas missile silo.  These were of interest to me since I'm a child of the cold war and the "What If" scenarios presented by these movies are definitely the main point.  But another thing caught my eye watching these films since these missile silos were controlled by a massive computer network called the SAGE Air Defense System (or its successor).  SAGE was designed and built during the cold war to try to prevent nuclear strikes from the USSR reaching the US.  If you are not familiar with the SAGE system, there's a fantastic talk from VCF 2025 that I'd recommend by Richard Thompson "The SAGE Air Defense System".  Richard points out in his talk that many of the SAGE control panels were saved and used a props in TV and film decades.  These appearance are cataloged on Mike Loewen's website here, and his catalog opens another whole world of media exploration in Film and TV shows.

What list of computer related films would be complete without a discussion of War Games (1983)?  This is the first film on my list that I remember watching at the time.  Back then I was more concerned about the threat of war but I was also interested in computers and computing.  Here's an interesting article about the tech used for making the film both on and off screen.  The main computer star of the show is the IMSAI 8080 computer, which has become quite expensive.  These pre-1977 machines didn't sell in the millions like an Apple II, but we can still have a similar experience with a modern replica kit built using a modern microcontroller.  I've got one of these kits on order, so stay tuned for a future bLog article on that topic.

Skipping ahead more than a decade, we have Hackers (1995).  I was in college at the time struggling to get an engineering degree and surrounded by computer geeks like me.  I didn't have a car in college and I didn't get out to the movies much which is just as well because we would not have found much to relate too in this film.  We weren't cool like the characters in the film.  It wasn't until studying the history of the Homebrew Computer Club and Hacker culture that I began to understand how computing was connected with the 60s counter culture on the West Coast.  This was not a significant part of my experience at a midwestern engineering school in the mid '90s.  However, rewatching the film recently was a fun opportunity for me to play the "Name that Computer" game.  Trying to figure out, is that an Apple PowerBook?  Is that a Toshiba Satellite or a Tecra? Which one?  I don't have a list from my last watch through.  Google search shows a detailed list, but I'm honestly not sure if you can tell just from shots in the film which computer is which, so I won't link that spoiler article here and let it ruin the fun of re-watching the film and playing "Name that Computer".

The only romantic comedy on todays list is You've got Mail (1998).  I recently rewatched the film as I was interested in seeing the portrayals of the early days of the Internet, but I'd forgotten (or never noticed when I was a kid) how problematic the Tom Hanks character's behavior (Joe) is.  But I watched the film so you don't have to.  Per the fantastic FAQ section on IMDB, Joe is using a "Desktop Replacment" IBM Thinkpad 770 and Kathleen is using an Apple Powerbook G3 250, the fastest of the Wallstreet machines.  I did enjoy the nostalgia remembering using the AOL free trial period and other dial up Internet experiences back in the day.

New Movies (Post Y2K)

The second category of films on this list is modern movie set back in time with computer themes.  When we look at modern films about the past sometimes we may learn more about our present attitudes than we do about the past, but these films are still interesting.

The next movie on my list is The Imitation Game (2014).  This is a film about Alan Turing and his team's work during WWII on code breaking.  I had my own doubts about the historical accuracy of this film after watching it.  One reviewer confirmed my suspicions says this is "... one of the most celebrated and most misleading historical movies ever".  I think most of us interested in computer history would be better off reading this article and skipping the film.

Silicon Cowboys (2016) was intriguing to me.  I've read and enjoyed Rod Canion's book "Open" about the founding of Compaq but I really didn't get into the TV Series "Halt and Catch Fire".  I remember one of the folks presenting about the history of Tandy computer saying "it was never that exciting" or something to that effect about that show.  But Silicon Cowboys is focused on what actually happened and that's still very exciting.

I've seeen The Social Network (2010) but it didn't make that big of an impression on me, so I'm not going to comment other than to say that I did watch it.  Hidden Figures (2016) is a feel-good movie where the underdogs overcome their challenges because of their patience and hard work.

What other films can you think of that have computing as a theme of the film?  Comment below or drop me an email, my address is in my blog Profile on the left side of the homepage.

Steve's Retro Year in Review for 2025

With 2025 coming to a close it's time to reflect back on another year in Retro Computing.  Alot of great things happened in 2025, some planned and some unexpected.  This is my seventh year being involved in Retro Computing and my interest continues, there seems to always be something new to learn and the forum members of the Vintage Computer Federation and Tinker Different continue to be a source of help and inspiration for new projects.  Also this year I authored my 100th bLog aticle here on Steve's Retro Computer bLog.

In my retrospective article from last year I mentioned that I wanted to downsize the collection.  I added fewer new computers to my collection this year and I said no to quite a few eBay and local listings that were interesting.  I added about 15 machines this year instead of the 20+ machines I'd been adding over the last couple of years and more importantly I sold quite a few of those 20+ machines from previous years as well.  Half of the computers I sold this year are ones I bought to fix up and resell since I really do enjoy the repair process.  It also helps to know ahead of time that I won't be keeping the machines, it makes it easier to sell them when the time comes.

I sell complete systems whenever possible on both Craigslist and FaceBook Market Place (FBMP).  This year I sold about two computers on FBMP for every one on Craigslist, but I will still continue to use both platforms.  I think I get alot more spam from FBMP, but I know I'm getting alot of views on that platform since they show you those statistics now.  I'm still pricing below eBay prices, and I'm seeing machines sell on average after about a 2-3 week wait.

I bought three lots of computers this year, one with seven machines (mostly compact Macs), one with three Macs, and the final lot with eight machines (mostly Apple IIs).  In each of these lots I knew there were only 1 or 2 computers I'd want to keep but having these computers on hand made it easy for me to find an interesting repair project any time.  I plan to keep doing this (assuming that I can continue to find small and medium sized lots of computers in "as is" condition).  If you know anyone that is downsizing or needs help disposing of an old computer collection, please let me know, I'd be glad to buy machines in as-is condition or just even just offer advice about selling.

As I look back at acquisitions this year I made good progress on getting early Apple II hardware.  I got an early Apple II Plus machine and then an original Apple II machine.  I also got to extend my collection of Next computers, adding another NextStation Mono Slab and and an HP PA RISC machine that runs NextStep really well.  I got a new CP/M Machine that I haven't completed repairs on yet and another early MS-DOS compatible Wang PC, so I'm continuing to learn about both of these types of machines.  I added a couple of calculators to the collection, although I do not intend to become a calculator collector, since I'm trying to stay focused in my area of interest for collecting.

I also completed a couple of Unix workstation projects that were a long time coming, first getting a Y2K Era Compaq Alpha Personal Workstation up and running after a long time waiting for parts and then getting a Sun Ultra 10 machine up and running.  The Sun project was a machine I got at VCF Midwest 2024 so that one took a while.  The Apple III Computer parts that I got in the fall of the year were totally unexpected, but alot of fun to repair and learn about.

I don't have much room to display retro computers, so none of the machines I've acquired this year are on display in my office, instead I have an Original IBM PC, a Compaq Portable I, a Macintosh Portable, an Apple Macintosh Perform 550, a Gateway 2000 Slimline 486, a PDP-11 with VT-220 Terminal, and an Apple IIe as shown here...


During 2026 I need to think about focusing my interests even more and continuing to downsize the collection.  I still have more beige box PCs that I don't want in the collection and I will also consider downsizing other categories of machines.

During 2026 I should spend more time with software setup on the machines I already have.  Alternative Operating Systems has long been an interest of mine, and many of these machines support multiple OSes.  Networking is also one of my interests so I'd also like to spend time connecting more of the machines together.

What about you?  Do you have any highlights to share about fixing or using old computers in 2025 or plans for next year that you'd like to share?  Feel free to leave a comment below, or reach out to me via email at the address shown in my Blogger Profile.

Oops I Did it Again - Another Lot of Computers Needing Repair

Recently I was browsing the retro computer forums and a for sale ad came up in my city.  A fellow Macintosh computer enthusiast had purchased a lot of Macintosh machines to restore and the project sat for a long time.  He decided to shift the project along to someone else.  The listing had a single photo and some text, the photo showed seven machines and one box full of peripherals.  The text described another box of peripherals not shown but included in the sale.  The price was low enough that I could purchase the entire lot and if my repair attempts failed I'd still have gotten some much needed peripherals for my collection.  But as readers of my blog will know, I really enjoy the repair process and so I was hoping that I'd be able to repair much of this lot and sell it on, since these were all machines that I had, and I even had some parts machines of this type.

When I got the lot home this is what I had...


The lot consisted of; 2 512K Macs, 3 Macintosh Plus machines, a Mac SE and a Mac Classic II along with the peripherals, an external 400K floppy, an HD20, and a couple of different keyboards and even a couple of random vintage PC parts.  As usual I began the intake process with some light cleaning.  It was no surprise but the equipment was quite dusty, including inside of the machines, so I think it was likely these machines spent quite a few years in a garage or basement.

On my initial checks (triage), both of the 512K macs booted to a ?.  I'm quite certain the floppy drives will need lubrication and maintenance so I've set those machines aside for now.

For the Mac Plus machines, 2 of the 3 booted right up to the ?.  The third machine was booting, but showing some odd video corruption of a kind I had not seen before.  On further inspection that machine had a 68030 accelerator board inside of it.  It's possible this accelerator board is damaged, but I need to do some research to figure that out, so I've set the accelerator board aside for now.

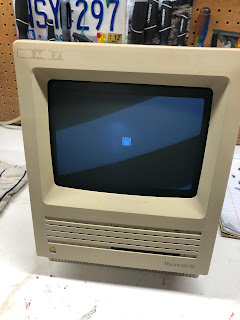
The Mac SE booted up to a ?.  This was a project I wanted to work on in the short term because I have a couple of other Mac SEs including one mostly good machine with bad Floppy Drives and one parts machine.  I was hoping to get two working Mac SEs out of these three, but more on that later.

The Mac Classic II made a normal good chime on boot up, but the video did not come up.  These machines from the early 1990s are often damaged for two reasons, the first is an exploding clock battery, and the second is the "Capacitor Plague" where Apple unknowingly used sub-standard electrolytic capacitors that slowly leak out onto the circuit board.  Both of these problems can ruin Mac Classic and Mac Classic II machines and so all of these machines should be serviced ASAP.  Fortunately for me, the clock battery had not leaked, so I removed it.  The capacitors had been leaking so I removed them immediately and got to work cleaning the board to prepare it for a recap.

I worked on the Mac SE and the Classic II at the same time.  For me, a big part of the experience with the original style Mac computers is using the Floppy Disk drives.  Servicing them can be tedious and error prone, but there are some great tutorial videos out there, and once you've done each type of drive a couple of times it starts to come easier.  But it can be tedious when there are many drives to service.  I try to keep one or two of each type of drive in my stock because often drives will require spare parts not just lubrication so I got the drives out of the Classic II and the Mac SE along with some of my spares and got started...

Having these drives ready allowed me to start the repairs in earnest.  As I've mentioned, I had a couple of other Mac SE machines and I checked on those floppy drives that were not working, and they had already been serviced.  It turns out that the reason they weren't booting was because I had some bad boot floppies, so that was one mystery solved.

The Mac SE from this lot had badly yellowed in the sun, but my parts machine was still a great looking platinum case, so I did a case swap on the Mac SE and got a lovely looking fully running machine...

I don't need 3 Macintosh SEs so I currently have this machine listed for sale locally here in the Minneapolis / St. Paul area.

The Mac Classic II repair took a bit longer because I had to order capacitors and wait for those to arrive for the recap.  Also it took a while to clean the logic board of this machine using both water and IPA and multiple manual rinse cycles.  I also had a parts machine for this repair, a Classic machine that I'd previously recapped but that machine never worked quite right after the recap it would boot and run just fine but the external SCSI and FDD ports weren't quite right.  It's possible that further board level work could bring this machine back to full function, but I was able to use the Classic to help troubleshoot the Classic II.

It turns out that not only did the Classic II need a recap on the logic board but the analog board was bad as well.  I did another swap on the analog boards and CRT boards to get a good setup into the Classic II case.  After swapping the Analog board the Classic II came back to life, and with the recap and cleaning, I'm hopeful that this machine will have a long and happy future.  Classics and Classic II machines are not my favorite from this time period, so this is another machine that is for sale here in the Minneapolis / St. Paul area...


I'm still actively working on fixing up the Macintosh Plus machines.  I have all three of them running again because I was able to borrow parts off another parts machine that I had, so the next step is servicing another set of Floppy Disk drives, the earlier 800K drives that came in the Mac Plus and Mac SE...


Since I already have a couple of nice Mac Plus machines I plan to offer these machines for sale when the Floppy Servicing is complete.  Hopefully I can complete the Plus repairs this weekend and get back to the other projects I was working on when this lot came up.  It's been alot of fun doing these repairs but I'll also be glad to move back to my "regularly scheduled programing" of Retro Computer projects.

Do you have memories of using these machine?  Let me know if you have stories you'd like to share in the comments, or my email address is in my profile.  Thanks for following along with this repair story.

Bargain Retro Computer Fixer-Uppers

It is quite common for me and my fellow retro computer collectors to complain about the high prices that Retro computer hardware gets on eBay, but there are still good deals to be had in local markets from people who are doing cleanups.  Personally I use Craigslist and Facebook Marketplace.  I find many of these deals as referrals from my network of friends who know I'm looking for these machines.  It's good to have realistic expectations going in, as most of these lower price computers will require repairs of some kind to bring them back to use.  

Recently I've been able to acquire the following small lots:

$70 for an Apple IIe and a tote full of retro PC software and hardware (Apple IIe was advertised as untested, and it had broken keys)

$50 for an Apple Macintosh Plus (Tested at the store before purchase, boots to ? icon)

$80 for an original Mac and a Macintosh Plus (advertised as not working, and without a keyboard, mouse, or other hardware)

None of these computers were advertised as working.  When I see a local ad like this, I look at the other items that this seller has listed.  If they have alot of Retro computer stuff for sale that is working then I'm less likely to believe that items are "untested", tested and not working is more likely.  But sometimes the seller will indicate that they don't have a monitor to test and I find this explanation more believable.  

The Apple IIe was listed this way, stating that the seller didn't have a monitor to test with and so it was sold untested.  Apple IIes are know to be quite reliable (unlike Commodore 64s of the era), and so when I got it home and connected to an Apple II compatible monitor, it fired right up.  I did have to replace a RIFA cap. in the power supply, and I had to remove the keyboard and replace two key switches and key caps.  This was something I knew would be needed going into the purchase from the sellers pictures and description.  I have fixed Apple keyboards before with parts I purchased from an eBay seller that specializes in Apple keyboard parts.  After the keyboard repair the machine was complete and fully functional.

The first Macintosh Plus was purchased because I have several of the early compact Macs and I wanted to have another computer of this type to use as a Parts machine.  This Mac Plus was working at the store, but I ended up spending time reflowing many of the solder joints on the Analog board to get it starting more reliable.  I also took the floppy disk drive out and lubricated and tested that.  This machine is fully working and I stored it with my other compact macs.

The original Mac and Mac Plus lot was not a purchase I had intended to make, but a friend tipped me off and since original Macs don't come up very often at a good price I gave the listing a good look.  The case was clearly in rough condition but I could see from looking at the ports on the back that the logic board was still inside.  So I made an appointment to buy the systems,  They looked as advertised so I paid for them and brought them home.  

At home, I confirmed that both of the systems were not working (the same symptoms the seller had indicated) and I got to work on the original Mac.  I was hoping that there would be enough parts to make at least one working machine from the two.  It turns out that the original mac wasn't booting because it has a memory expansion board that was not properly seated.  I removed the logic board, re-seated the card, and the machine came to life!


The second Mac Plus was more difficult to troubleshoot.  I have narrowed the problem down to the Aanlog board, but there are no obvious burn marks or leaking caps.  I have put this repair on hold for now and will store the Mac Plus with my other parts machines.  Even without getting this final Mac Plus working, this purchase was still a bargain, but I am sure that I'll come back to the Mac Plus at some point.

So, if you enjoy repairing retro computers there are still many bargains to be had on these machines, it just requires patience and a willingness to accept machines that may have some damage.  For me, I very much enjoy the hands on experience with these machines and so I'd rather have a good solid functional machine with some blemishes than a cosmetically perfect machine that doesn't boot up and run.

Have you fixed any vintage tech. recently?  Let me know in the comments below, or feel free to send me an email and let me know what you are working on.

Building an Original Macintosh 128K - Failure, Learning and Eventual Success

A couple of years ago (Jan. 2021) I got a Macintosh 512K from a friend and fellow collector, Steve H, who I met through Free Geek Twin Cities.  I've bLogged about this machine and what I know of it's history before.  It's been the earliest Macintosh in my collection and I've enjoyed it quite a bit.  Also it's been popular with my guests who have nostalgia for this machine.  It has a place of honor in my limited display area and I've occasionally been asked "Is that the Original Macintosh"?  I've had to say no and explain that it's the second Mac, but that is looks identical on the outside and that it came out in the first year of the Mac, 1984.

So, I've been considering either downgrading this machine or finding another original 128K machine.  One of the main hurdles to performing this downgrade was that this machine had a (slightly) more modern 800K Double Sided Sony 3 1/2" floppy drive in it and the original Mac can only work with the original Single Sided Sony 3 1/2" drives (400K drives).  So this project stayed in the idea phase for more than a year.  Along the way I was able to acquire a 128K Logic Board, again thanks to Steve H, so that part of the puzzle fell into place.

In the middle of last year (Aug 2022), I was able to acquire another Macintosh 512K, a Craigslist find.  The seller told me that he had been trying to get it working but struggling and that he was giving up on the project.  When I got home and started to dig in on the machine it became apparent that he had tried to service the early 400K Sony Floppy Drive but it still did not work.  I also spent quite a few hours working on that drive and failed to bring it back to function.  In hindsight and after much learning and some good advice I realize that I should have spent more time cleaning and lubricating the drive.  I mistakenly thought that the drive needed a recap but when I performed the recap the drive head movements became erratic and the drive could not read a disk any more so I set the drive aside for the time being.

As a next step, I purchased a "lower cost" non-tested 400K External drive from eBay.  After spending time cleaning and getting the Mechanism somewhat functional the drive would still not read pre-formatted disks.  I made another bad assumption and mistakenly thought that this was a symptom of a drive alignment problem.  I broke the threadlocker from the Track 0 position sensor and moved that in an attempt to realign the drives.  After spending quite a few hours struggling, I also set this 400K Floppy Drive aside and the project went on hold again.

The next chapter of this repair saga begins at VCF Midwest this year (Sept 2023).  I was reluctant to buy more 400K drives because of how much time I'd spent and how little progress I'd made on the first ones but I had a very informative conversation with Steve H. at the show.  He has repaired many of these drives and he let me know that he's never had to recap one and never had drive alignment problems.  At this point, I realized that not only was I "barking up the wrong tree" but also that I would probably need another drive mechanism in order to move forward with the project.  On the final day of VCF when people had started packing up there was a person selling a large number of old Macs and they were willing to take offers.  I got a great deal on a lot of items from this seller that included a 400K drive mechanism that had not sold earlier in the weekend.  As a bonus they included a second 400K mechanism, so I had two more drives to try to service and repair!

Back at home after VCF I was better educated about what to do (and what not to do) with Sony 400K drive mechanisms.  I spent more time cleaning alot more and I thought I'd share some of my lessons learned about the drive cleaning process.  Cleaning for these drives has two phases, the first is cleaning the drive inject / eject mechanism.  The grease on these drives that I've serviced has all been dried up so hard that the mechanism won't move at all.  I used alot of Isopropyl Alcohol to try to remove as much grease as possible then start lubricating the mechanism with 3 in 1 oil.  Getting the mechanism loose starts with the small flipper mechanism half way down the right hand side of the drive as you face the front of the drive.  Once the manual inject / eject works smoothly the drives can be powered up and run.  Phase two of the cleaning is focused on the leadscrew that moves the read / write head, none of these drives worked until I had carefully cleaned and put some lithium grease on to that.  I now had 400K drive mechanisms that I needed to move forward with the project!

So, by replacing the drive and swapping the logic board, I have my Original 128K Macintosh from 1984 up and running, along with an External 400K floppy drive...

It's cool to be able to boot the original Mac Demo disk as this is the only computer I have which can run this software.

Do you have any memories of working with the original Mac?  Do you have an original Mac?  Let me know in the comments below, or send me an email, my email address is in my Profile on the right side of the screen.

Macintosh Quadra 800 Restoration

I was recently able to add a Macintosh Quadra 800 computer to my collection.  This computer came from another collection that my friend John and I helped clean out.  I'd been on the lookout for a 68040 based computer that was on the A/UX Compatibility list, but I knew that the Quadra 700 would be out of reach for me price wise due to its popularity.

As I have previously blogged about, I've already restored a Macintosh IIci System that I run A/UX on.  This was a fun project and I learned a ton about classic Mac hardware, but it's not the fastest Apple Unix experience, so I've had an '040 machine on my wish list since that project ended.

My Quadra 800 has had a hard life, there's some light rust on the shielding inside the case, but it's nothing as bad as two of its sister machines which had been stored on the ground in a shed for many years.  But despite the poor storage conditions this machine still boots up and runs.  For some reason the machine had three video cards installed, so with the built in video this machine from 1993 would have been able to have four monitors attached.  The hard drive had died, so I was not sure what the machine had been used for, but a four monitor setup would have been interesting and unusual!

The restore process on this machine was pretty straightforward.  I was able to find the Apple Service Source manual online and used that information to take the machine apart.  While it's not at all easy to take apart compared to the Macintosh II series, it's really not that bad compared to PCs of the time.  After I had the machine all apart I cleaned the case with warm soapy water and dusted the main logic board.  The logic board on this machine doesn't have any Electrolytic caps so I didn't have to recap this machine.  I replaced the Tadiran Clock Battery w/ the same brand, so this computer should be good for another 30 years.  A couple of the drive bay covers were loose so I used Hot Glue to attach them from the inside of the case, it looks really nice on the outside and they drive bay covers are secure.

The floppy drive in this unit needs attention but I had another manual inject drive ready to go so I swapped that in.  I will service this drive at a later time.  This machine came without a hard drive.  I decided to use the ZuluSCSI Hard Drive replacement in this machine as I had one on hand, but also I like the mounting options on ZuluSCSI better than the options for BlueSCSI V2.  I can attach Standoffs and zip tie the ZuluSCSI down on the bottom of the machine with the SD card facing out the back of the computer.  Perhaps if I had a 3D printer this wouldn't be as big of a deal.  But as things are now, this makes it alot easier for me to experiment with alternate OSes, swapping SD cards for MacOS and Apple A/UX.

One other upgrade was to go through my supply of RAM and see if I could find matching pairs of FPM RAM, I was able to find another pair and bring the machine up to a total of 104 MB of RAM.  The memory check at power up takes quite a while about 30 seconds from power up to the chime, but it's a worthwhile compromise to have this machine near its max capacity.

One quirk with this machine is the strange Ethernet connector on the back.  It requires an Apple AAUI Media Adapter so I installed that with this machine and got Internet going with MacOS 7.6...


Getting Apple's Unix A/UX to boot was almost too easy with the Zulu SCSI, as I had a backup of the Disk Image from the BlueSCSI on my Macintosh IIci.  I was able to copy that onto another SD card, install that into this machine and it booted the first time.  There was a warning message from A/UX about the hardware change, but it made those changes automatically and after a single reboot the machine came right up and ran.

Remaining tasks that I have for this build are to configure networking in Unix.  This should enable me to transfer program files or build new tools on this Unix as it is missing alot of the "quality of life" tools that I've gotten used to with modern Linux distributions.

It's a Unix System, I Know This.

The title of this article may be a bit misleading as the young lady in Jurassic Park probably knew more about A/UX than I did when I started this project, but it's been a fantastic learning experience and I thought I'd share some of the ups and downs along the way in case other beginners experience similar struggles getting A/UX installed on actual hardware.

I became aware of Apple's first foray into the world of Unix within the last few years.  I was not a Macintosh user at that time, or a Unix user, as I had a PC and my college had DEC VAX systems.  As usual with my experiences in Retro Tech, I started by watched several YouTube videos about the process of installing A/UX.  The Penelope A/UX site has also been an extremely useful resource.  The idea of exploring an earlier *NIX than any I'd ever used before sounds intriguing to me as I learn about computer history.

After reading the hardware compatibility pages from this site I started thinking about which of my Beige 68K macs were compatible.  When I started the project I had only one option from the list, a Macintosh IIsi.  As the project progressed I came into enough parts to build a IIci system.  The site does warn that a IIci is underpowered for the final version of A/UX but as I didn't have a compatible '040 system at this time I decided to forge ahead with the best hardware I have and version 3.x.

The IIci I am using has been built up from one machine that was saved from recycling by my friend John, and two machines I bought from another friend.  The case parts were cleaned and the logic board was recapped.  I won't go into too much detail about my restoration process because it was rather routine, although I must say that I have not yet been able to get the Motherboard from John's machine working, as there was quite a bit of corrosion on the board.

The Specs of the machine are:

IIci w/ Cache Card
32MB RAM
Asante MacCon PDS Ethernet Card
Blue SCSI HDD Replacement

Another requirement for installing A/UX is an Apple Compatible CD-ROM drive from a short list of compatible hardware on the list at Penelope A/UX.  This was something I had to wait and watch for a while.  I was able to harvest an internal 12x Apple CD-ROM out of a PowerMac that was headed for recycling and I also came across a TASCAM branded External CD-ROM drive w/ a TEAC drive in it.  I drive swap placing the Apple drive into this enclosure and get a working "Apple" External CD ROM.  It doesn't look authentic and the SCSI ID and termination are fixed inside the drive, but the price was right!

Once I had the hardware collected getting the software burned to CD was a challenge.  Most of that struggle was due to user error on my part.  I downloaded the CD disk image and burned it multiple times from multiple sources before realizing that I needed to rename the toast image file extension to .ISO before Mac OS would burn it to CD properly.  Once I had a working Boot Floppy and correctly burned A/UX CD, I was off to the races getting this installed.

One interesting quirk I noticed with my setup is that the CD was not being recognized on the initial boot from floppy.  I inserted the CD into the machine before it booted up and when the A/UX boot floppy completed booting, it would not recognize the CD.  I had to eject and re-insert the CD after the Floppy had fully booted, then press the retry button before the installation process would recognize the CD.

I read that the maximum partition size for a bootable A/UX partition was 2GB, so I used the standard 2000MB blank drive image from RaSCSI that is recommended for Blue SCSI, however, using this partition size resulted in some drive write errors and a corrupted partition.  After that failure I moved back to using the 1000MB blank drive image which seemed to install just fine.  I can add additional space on other SCSI IDs afterwards if 1 GB is not enough for the tools I'd like to install.

After installing the Base OS and all the Extras off the 3.0.1 CD, I then moved on to the 3.1 updates.  The A/UX system is now up and running on my Macintosh IIci...

In the future, I'd like to get TCP/IP running on this machine, but I"m waiting for a part for that, as the AUI is too thick to reach inside the narrow slot openings on the IIci, I'll have to build an adapter with a male and female DB-15 connector to extend the AUI port from the card further out of the Mac's case.

This is currently my oldest *NIX system, so I'll have to go back and brush up on System V.  Time to pull UNIX in a Nutshell and Essential System Administration down off the shelf, I don't think I've looked at these since the early 2000s!

Are you, or were you an A/UX user?  Let me know what your favorite things to do with an A/UX system are in the comments, or find my email address in my profile.

Macintosh SE - Trash to Treasure

I recently spent some time restoring a Macintosh SE.  I got this project after someone had stalled out on it, and the machine came to me "complete" but disassembled in a cardboard box...

There was a note from the previous owner that stated "works, needs caps.  Bong, but with thin vertical line on screen", so I skipped troubleshooting and started in with the cleaning.  The machine was filthy, not as bad as the "barn find" Apple II+, but dirty enough that it would have been disgusting to work on without some major cleaning.  I took all the metal parts of the chassis off from the plastic parts and washed everything that would fit in the dishwasher, including the Logic Board.  I haven't ever tried dishwashing the analog or power supply boards as I think bad things might happen to the transformers.  As would be expected the parts came out looking much better.  As a side note after a particularly nasty job like this I run an additional cycle on the dishwasher with it empty to make sure all the "computer water" is flushed down the drain before we put stuff that we eat off back into the dishwasher again.

I manually cleaned the CRT and the analog board with paper towel toothbrushes and lots of IPA, avoiding the deflection coils which I clean using compressed air.  I reflowed the flyback connections on the Analog Board and many of the other joints on the board as well, and repaired a few broken items (loose molex connector, problems with the fan).

During this repair, I had the luxury of having another SE machine at hand as I was recapping it for a friend.  This machine needed only to have the Logic Board recapped and it was in much better condition than my machine and so I was able to swap known good parts onto my machine.  I determined that the Tube itself was still good and that my Logic board was working as expected, so it was good to eliminate at least a few components from the troubleshooting.  But the Power Supply / Analog Board combo was not working.

The next item on the list to address was the Power Supply.  I measured the supply, and the +12 Volt rails were at about 9 Volts, which I guess is typical for these when they need a recap.  I did the recap, but as I was doing it, I noticed dark brown marks (burns?) on the Power Supply circuit board.  After the Recap, the voltages on the Power Supply didn't come back.  I checked and rechecked capacitor orientation and other things, but decided that with the burn marks, my confidence would not be high in any repairs that I could carry out, so I decided to replace the supply with a modern supply that would fit inside the housing.  In hindsight, I should have gone out in the forums to ask but I did check in afterwords and discovered some interesting insights.  With my cheaper, but possibly sub-optimal Power Supply replacement in place, I was ready to pivot back to some testing.  I connected up all my parts and on power up, observed this screen...

The white line seems to indicate that the Horizontal Deflection isn't working correctly.  This of course is on the Analog Board, so I decided it was time to recap that.  I made an attempt to find a capacitor list for the Analog Board online, but I was not able to find one and had to make my own.  I had trouble finding a couple of the specific values and didn't realize that one of the critical ones (C15) is a Non-Polarized type Electrolytic Capacitor, so that put the project on hold for a week waiting for two different batches of parts to arrive from Digikey.  Once I got the Analog Board recapped and put the system back together, I was greeted with this very gratifying sight...


The machine was coming back to life!

The next order of business was to work on the Floppy Disk drive.  At the beginning I'd done a very quick service on this drive, but the mechanism was still not moving smoothly on eject, so I went back and watched this video from JDW and followed the steps more closely.  I did end up having to borrow the eject motor from another drive to get this one working, but I'll order some of those gears that JDW mentions to get this other drive back in order.

So, now the Mac SE has a floppy to boot from. I also installed an internal storage device, plugged in a SCSI Zip Drive on the back and started copying files into the machine.  All was not well, thought.  I didn't know it, but I don't think I'd found the root cause of the burn marks on the Analog Board and the reason for the overheating in the original power supply.  The screen went black during a file copy operation, and I discovered afterward that Transistor Q2, part of the Horizontal Deflection had gotten very, very hot.  I tried replacing this transistor, but alas, that was not the root cause and I was quite frustrated and put the project aside for a while.

I mentioned the struggle I was having to a friend in the retro community and he offered an SE analog board that had a damaged POT on it.  I jumped at the chance to be done with the old Analog board, swapped that, and the SE was back to life again.  Long may it live...

So, in hindsight, not the smoothest repair I've ever completed!  The Power Supply recap was a failure, but I learned that multiple modern alternatives exist.  The Analog board recap was also a failure as I was not able to discover the root cause of the burn marks and cascading failures, but sometimes we learn more from failures than we do from easy wins.

This is the first of the SE generation of Mac that I have (I have several of the previous original generation, and one Classic II), I upgraded the SE to the maximum 4 MB RAM and put a 100MB HDD in it.  I'm glad to have one of these in the fleet and it will be both fun to play with as well as a helpful troubleshooting tool should I come across machines of this type that need service in the future.

My (Current) Favorite Retro Computers

It's been a while since I took a picture of my basement shelf where I store my most frequently used Retro / Vintage Computers.  The ones that are out and get used are my de facto "favorite" retro computers, and there's been a fair amount of change on the wire rack since my last update.  I thought I'd outline which computers are out, and why:

From Top to Bottom, Left to Right, on the file cabinet is the NeXTstation Mono Slab (1990).  This is one of my newer acquisitions from Vintage Computer Festival Midwest 2021.  I've still got alot to learn about this machine, and I also have some hardware on order for the machine so I'll be leaving it out for a while.

Next is an original Compaq Portable I (1983).  This was a "project" machine from Free Geek Twin Cities and my first XT class machine.  As one of my first Retro computer "rescues", I really enjoyed the process of getting it working again.  I also really like the design of it and I've used it for disk imaging and a few games that look really cool on the Green Screen. (it has a really long persistence phosphor.)

Next to that in the top right corner is the original non-backlit Macintosh Portable (1989).  Yes, the screen is on, this just shows how you need the lighting just right to see the screen.  I'm fortunate to have one of these that is working as many of them have problems.  Mine has a few dead lines on the screen, but I'll just keep enjoying this while I can. It's probably just a matter of time till the screen dies.  This computer is out on display because I enjoy the fact that it's so different than the laptops of today, a design idea that failed.

On the middle row at the left we have an un-enhanced Apple IIe computer (1983).  I was able to buy this computer monitor and disk drive as a set from a retired school teacher who had bought it new.  It needed quite a bit of repair but since completing those repairs it's been super reliable and super fun.  Total Replay anyone?

To the right of that I have a Power Macintosh 8600 / 200 (1997).  This is a "Bridge Machine" that I have blogged about before.  The main reason this machine is still on the wire rack is utility.  It's easy for me to move files off and on this machine from my modern machine and I have three SD cards setup for Mac OS 7.5.5, 8.6, and 9.1, so it can run the first version that is supported by the hardware all the way up to the last version.  The latest upgrades for this machine include a new Logic board and Processor Card (Still 200 MHz), additional RAM, (288 MB Total), and an ATI Rage 129 video card from 1999.  This machine is running better than it's ever run before.

On the bottom row at the left we have a Macintosh 512K (1984).  Like so many of these machines it started out life as an original Mac 128K but got upgraded fairly early in life.  It has been continuously upgraded to keep it going since then.  It's possible that the only original thing on it is the chassis but I feel very fortunate to have this machine and I enjoy playing some of the classic games and booting Mac OS 1.  It's an absolutely iconic design, and the only system in the display that boots and runs exclusively from floppies.

Last but not least on the wire rack in the bottom right corner is my latest PC Build.  This is a PCI based 486 DX2-80 (1995).  I built this with parts and pieces from a friend and other items I had around.  This is both a Retro Gaming rig with a Sound Blaster in it and a Disk Imaging machine with a 5 1/4" 360 K Floppy drive.  It works great so far, but I just built it, so I'll need to keep it out where I can power it up and keep using it to work out any kinks in the build.

Honorable mention, I also have a Tandy Model 102 (1983) slab top machine that I keep out on display in a different part of my office.  I really appreciate the unique design of this machine.  Another form factor that really didn't last into the modern computer era.  I've recently got a flash based storage solution for this machine, so I'm looking forward to digging in more on this machine, including loading some of the BASIC games onto the machine.

I have more machines but they are all stored in a much less convenient location.  Some of those machines are plugged in and can be run, too, but they get significantly less use than these ones that are out.

Macintosh IIsi Power Supply Woes

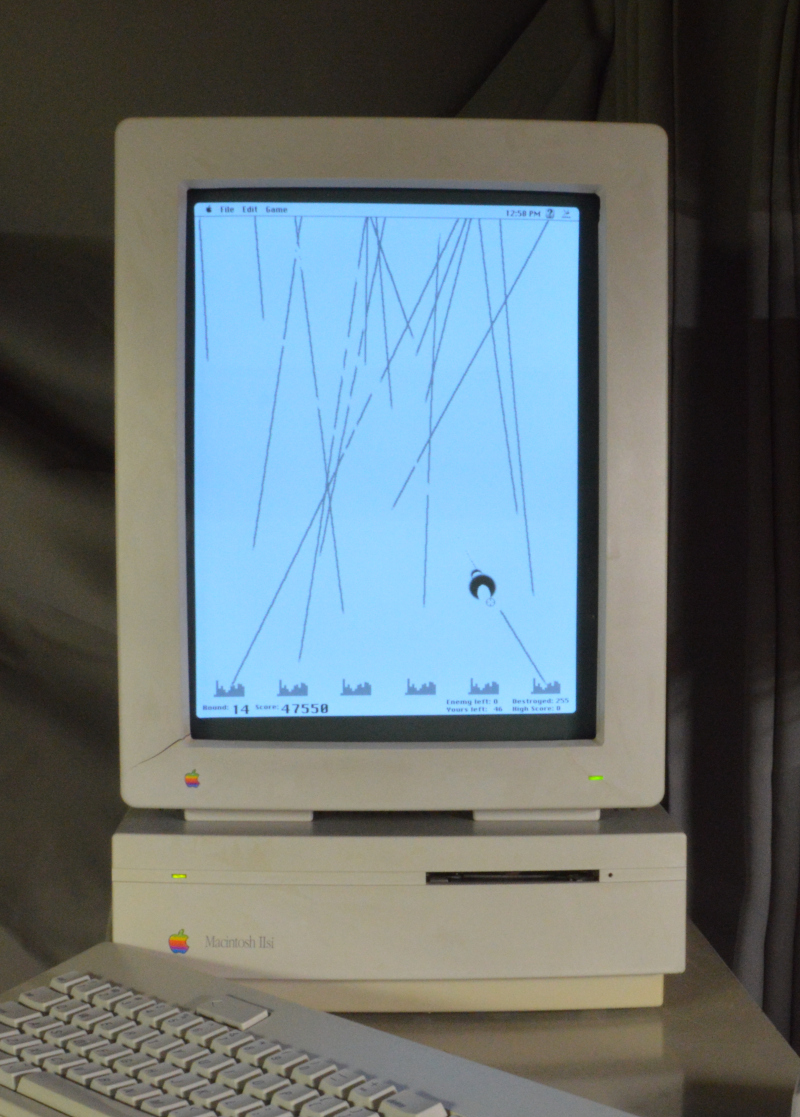
In the Fall of 2018 I was able to acquire a Macintosh IIsi machine from Facebook Marketplace.  This came out of a smokers home and I've been unable to get rid of its smell, so it's never been one of my favorites.  I've taken the machine completely apart, washed and retrobrighted the plastics and rinsed the circuit boards with Alcohol, this did help some with the smell.  Here's the current state of this machine...

When I purchased the machine, it wasn't running well so I recapped both the logic board and the power supply using the recapping guides from Recap-a-Mac.  I didn't do this well; I'll come back to some lessons learned about recapping.

What helped most with the smell was the tip I received that storing the machine with dryer sheets would help to absorb bad odors.  Since this was a machine that I didn't need to keep setup I bagged up the machine and monitor in a large garbage bag with a bunch of dryer sheets and stored it for 6 months.  This helped alot with the smell so I'll be doing this again as some odor remains.

I pulled this machine out a couple of weeks ago because it's the only machine in my collection that's capable of running Apple's Unix product,  A/UX.  I had been inspired by this video from Sean at Action Retro to try A/UX.  Unfortunately, my IIsi would not power on.  I started reading up about issues people were having with these machines and decided that it was most likely that I had not adequately cleaned the Power Supply circuit boards after the recap.  I tried alot more cleaning and I was able to get one cold start out of the old power supply.  After spending hours troubleshooting the old supply I decided to cut my losses and look for a replacement.  I'd been inspired by the idea of putting an off the shelf power supply inside of retro power supply enclosures by an attempted repair of my Tandy 1000 RL HD based on a post on Vogons.  I had saved information about a small, low cost Meanwell brand power supply that Jameco is reselling, this supply has the following specifications:

5 Volts at 5.5 Amps
+12 Volts at 2.5 Amps
-12 Volts at 0.5 Amps

The Sony Power supply inside the IIsi had the following ratings:

5 Volts at 6.8 Amps
+12 Volts at 0.8 Amps
-12 Volts at 0.3 Amps

So, the new supply is a bit short on current for 5 Volts, however if you look into the datasheet, if the other channels are running with less load, then the 5 Volt supply can peak at 7 Amps output.  I was hopeful that by taking the spinning Hard Disk out and replacing it with flash based storage I would lower the total power consumption of the computer to the point that this power supply would be adequate. (Spoiler alert, the power supply works just fine!)

Another important consideration is the physical size, I wanted the Power Supply to fit into the enclosure of the previous power supply so that the machine looks original from the outside.  Here's a picture of the finished product inside of the housing of the old supply...

One of the other challenges I faced with this project was the wiring on the old power supply.  I'd cut the old wiring harness off the power supply and tried re-soldering the old wires too the new power supply, but the old wiring is stranded wire that is very difficult to solder on.  Eventually I gave up and used Wago spring clamp type terminals to connect the old wiring harness to the new wires.

I connected the obvious wiring:

Red to 5 Volts
Black to Ground
Green to -12 Volts
Orange to +12 Volts

This left the Yellow and White wires unconnected.  Through trial and error, I discovered that the Yellow wire needs to be connected to +5 Volts in order for the IIsi logic board to power up.  I knew from reading ahead of time that I'd be sacrificing the soft power feature.  When this Mac is plugged into power, it is on all the time.  I modified the power pass through on the back so that the monitor can still be plugged in on the back, it is no longer switched, it is also on all the time.  I also modified a standard IEC power cord to put a switch inline on the cord (using a lamp cord switch), this allows me to power the computer off without unplugging it.

I know this is a bit of a hack, but it is one that is within my skill level.  I was willing to make the sacrifice in order to regain confidence in having this machine work when I turn it on.  Even with the compromise.  I have not modified the outside of the computer and so in my opinion this is an upgrade, although I realize that not everyone in the retro community will agree with me.

Another item that had failed since I last used this machine was the original Apple 40MB SCSI drive, so I've replaced that internal drive with a BlueSCSI.  This works well and speeds up the machine a fair bit.

So, after all this hassle, I was reminded that this machine has only 17 MB RAM.  Although Apple A/UX 2.0 might run just fine, 3.0 is probably not a good idea till I install a RAM upgrade.  The other challenge to getting A/UX on this machine is I'll need to find a way to simulate an Apple Brand SCSI CD-ROM drive.  I believe that I'll be able to use SCSI2SD to do this, but I have more research to do.  For now, I'm just glad to have the machine back in running order and I'll enjoy running Mac OS 7.0.1 on it.

Do you have any nostalgia around the Macintosh IIsi, or any experiences with Apple A/UX?  If so, send me an email, or drop a message in the comments below.  Thanks!

Cheap, Fast Bootable IDE Solutions for Retro PCs and Macintosh

I've been working on a series of articles about the things I love about Retro Computing.  The keyboards in general were good, and some were shockingly good.  CRTs appeal to me.  I really enjoy the entire Floppy Disk experience, as that's what we used when I first learned about computers in grade school.  The older Double Density floppies actually tend to be quite long-lived when stored properly, I have 20 and 30 year old disks that still work as expected!

For me, Hard Drives fall into the "not worth the worry" category.  Flash based storage solutions are faster and they make better sense from a preservation point of view because they will keep the machine operating for a longer period of time into the future.  So, one of my ongoing goals has been to figure out what the cheapest method of providing flash based storage to these old machines is.  I'll use this article to catalog a list of solutions that I've tried.  I'm going to cover, total cost per unit (regardless of capacity), cost per GB, Speed, and other considerations.

I've used a couple of different options for IDE machines.  First is using a CF card in place of an IDE drive inside of PCs. For tower and desktop machines, I like to keep the drive accessible from the back, so I prefer these simple passive circuit boards on a Slot cover bracket.  The circuit boards cost about $10, and the price of the CF card is based on the size, w/ 4GB cards costing about $15 each on FleaBay on April 2021 (for used, Industrial rated, name brand cards).  This give a total installed cost of $25.  Depending on the Compact Flash card itself, these can be capable of quite fast transfer rates, with the proper CF card, your computer should be limited by the speed of the IDE interface in the machine.  Here's a picture of my 486 build showing the CF card bracket on the back...

For IDE based Laptops, these CF to 2.5" 44 pin IDE drive adapters cost just a bit more on Amazon, these were about $18 delivered putting the total cost for a 4GB drive solution at about $33.  Again speed is dependent on the CF card itself,  I have one of these in a PowerBook 3400c and that's worked well.

Here's a cheaper solution that I will mention with a caveat.  There is an SD to IDE solution sold on Amazon, but I have tried this solution in several different computers and it's hit or miss.  Sometimes they work and in some computers they just don't work at all.  The price is $16 plus the cost of an SD card.  As you will see in the detail they are quite slow, limited to 25 MB/s transfer rates. The limited compatibility and speed is a disappointment because as CF cards become less available and more expensive this could become the cheapest option on the list.  It's already close to the least expensive at $26 in 2021.

I recently learned about another option from Sean at Action Retro.  He's been recommending and using some low-cost mSATA to IDE drive adapters and lost cost mSATA SSDs from China that work well, are brand new, and have significantly greater storage than the options I've mentioned here.  Here's a link to a drive enclosure, I can't vouch for this seller yet, but there are many like this on Fleabay.  Here's a link too the SSD drive itself.  Note that you have to be careful to match the keying, physical length, and the communication standards for the drive and enclosure, as the enclosure will not work with PCIe based cards.  After I figured this out I was able to upgrade my Pismo with this...

The drive is the white plastic enclosure on the right, not very visually interesting, but this solution cost about $31 for both parts of a 64 GB drive so this is far and away the lowest cost per Gigabyte of the storage options and still in the middle of the pack for overall cost and at the top in terms of speed.  This will be my go-to for "bridge" systems that will see use for disk imaging or backups.

In summary, the CF card solutions still seems like the best solution for now for the older machines given the relatively high speed and lower price but for newer machines the mSATA SSDs will be my go-to solution.  Thanks again to Sean at Action Retro for highlighting this option on his YouTube channel!

Do you have any experience with Flash based storage solutions for older Macintosh or PC based machines?  What low-cost solutions would you add to this list?  Comment below, or feel free to send me an email.

PowerBook G3 Repair Marathon Report Out

Over the last weekend or so, I’ve been working on PowerBook G3s from the large lot of computers I’ve mentioned in a previous bLog article. This has been lots of fun, both a great learning experience about repairing this hardware, and after the repairs are complete an excellent opportunity to learn about using these systems, as I only used desktop Macintosh computers during this time period.

The largest number of systems that came in this lot were PowerBook G3s.  I have had this type of system on my short list for quite some time, but hadn’t got enough hands on experience with them to even know which one I’d like the best.

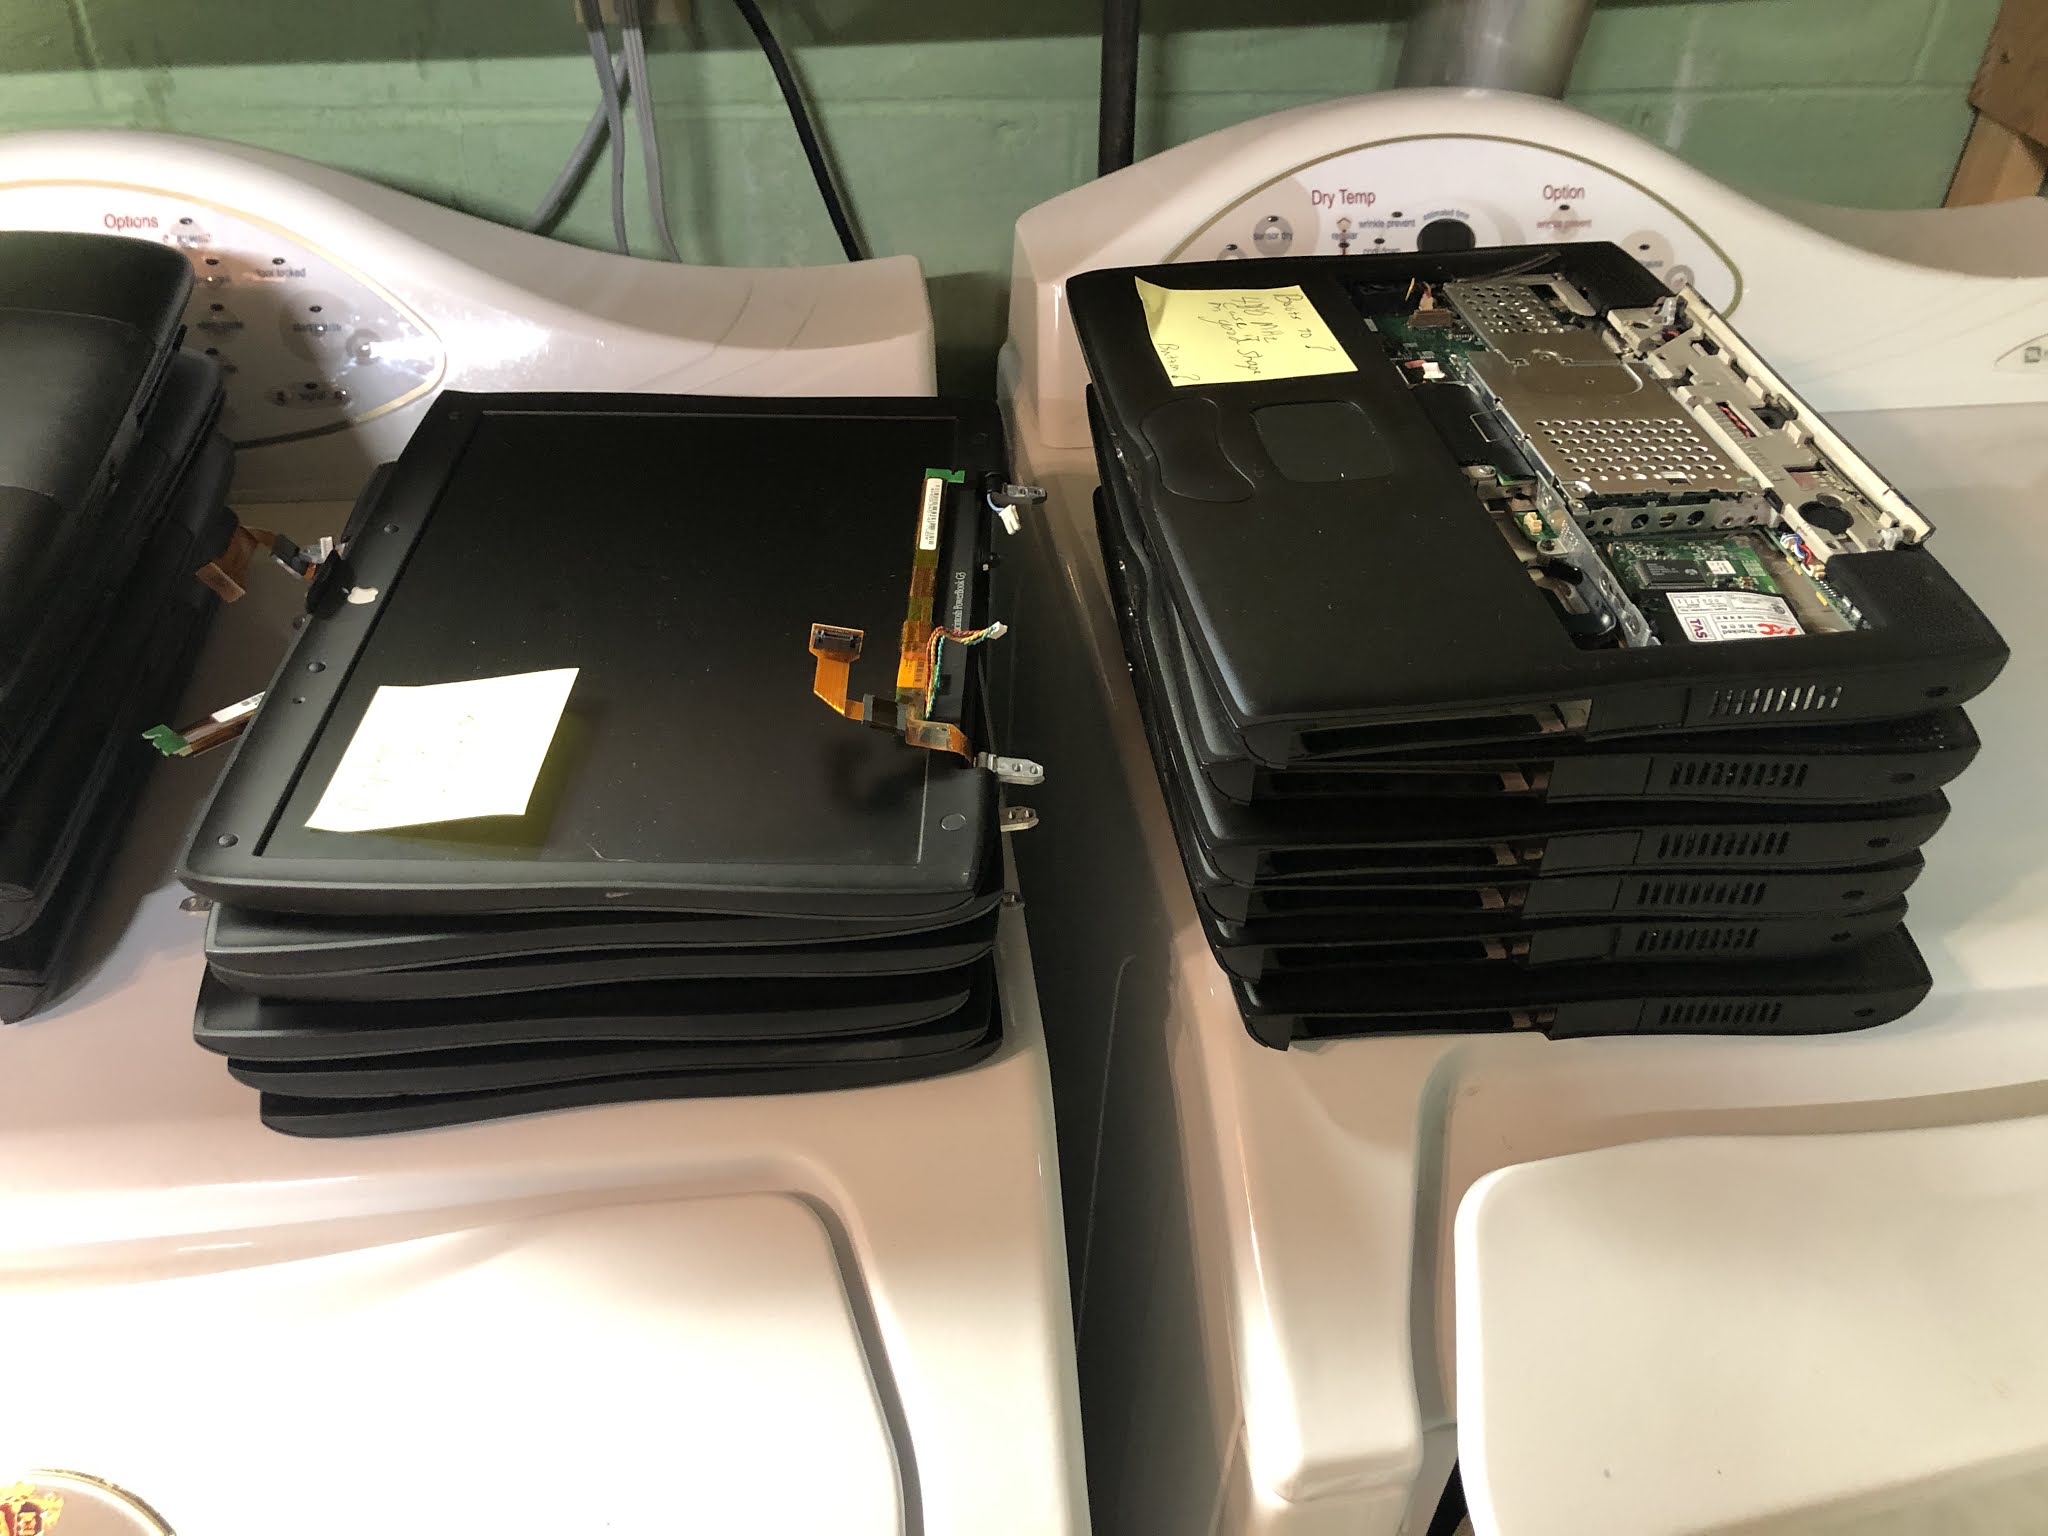
I started with the Wallstreet machines, the first of the G3 PowerBooks.  There were 10 of these systems...

It was quite a bit of work tearing them all down because they were in really rough shape, so a lot of them had to be separated from the top and bottom, and also I had to tear down and combine parts for one of the display panels.  Sometimes I had to combine parts from 3 or 4 different smashed systems to get back to one working machines, but like any challenge, it’s very gratifying to have gotten two working systems with Active Matrix screens...

These look pretty nice on the inside when they are open, but the display top covers are rough.  I'll be on the lookout for new ones.

I was also able to recover another two working Wallstreets with Passive Matrix screens...

It’s been interesting to install Mac OS on these machines (Mac OS 8.6), and see the differences between the Passive and Active Matrix screens.  I think the Passive Matrix screen on the 1400cs was superior to this G3 screen, but it may just be differences in the specific units that I have here (these backlights tend to shift colors after they get alot of hours on them.)

Moving ahead in time, there were 6 Lombard (Bronze Keyboard) G3s...

These were easier to work on, as they were in somewhat better shape.  There were only two display modules that had not been smashed, so I knew right away that I would only need to get two systems working, and here they are running side by side...

I installed Mac OS 9.1 on these after reading about a problem with the Sleep mode with earlier versions of the Mac OS.

Any last but certainly not least, the Pismos.  There were four Pismo machines...

These were in similar condition to the Lombards, much better than the Wallstreets.  But with only four machines, I was only hoping to get one "runner".  However, there were two functioning display modules in the lot, and so I was able to build two working machines, and here they are running side by side...

The display module on the right is significantly brighter and has better color than the one on the left, so I've swapped that display onto the machine that had Max Ram (1GB).  This was an almost unthinkable amount of RAM back in the day, and I've taken a page from Sean at Action Retro's book and ordered an IDE to SATA drive adapter to put some super fast flash storage in this machine.

But, to come back to which is my favorite, I do think the Wallstreets are pretty cool.  It was such an interesting and amazing time between 1998 and 2000 when the speed more than doubled.  I also have a soft spot for "last of" machines and the Pismo is the last portable with a SCSI port.  So I guess I still can't come back to which is my favorite.  I'll have to pick out the best one from each lot and spend more time trying to figure this out.

In the meantime, after repeating this process over and over again, I’ve developed a workflow for working with larger lots of machines like this.  I will share my experiences in case this could benefit others.  First, I'd read up about the model that I’m working with using both the official Apple Service Manuals and also looking through the iFixit tear downs.

Then, I’d go through and separate the display modules from the rest of the laptop, like this...

Once I'd identified one good screen and laptop pair, that could be used for troubleshooting through all the screens.

Once the screens were dispositioned, then I'd work on the bottom half.  If needed, several bottom units could be taken apart and combined together to get something that looked OK and was working.  

It’s useful during this process to understand just how little of the computer is required in order to get the Boot chime from a G3 Powerbook to check if progress is being made.  No display is required, no HDD is required and only minimal RAM, so you can test that the assembly is going OK without completely reassembling the computer.  The power board and sound card (if it is separate) are both required to get the Boot Chime.

I'll be using this system as I move into troubleshooting the Silver PowerBook G4s next.  The effort to recover these machines grows larger as the complexity (and number of fasteners) increases on the newer machines, so I am fortunate for the opportunity to start earlier in the PowerBook history and work towards the more recent machines.

PowerBook 3400c repair

Last weekend I worked on PowerBook 3400s from the large lot of computers I’ve mentioned in a previous bLog article. I’ve had one of these since last fall, I was fortunate to find it on Craigslist at a reasonable price, but that computer has been having display problems, the display gets brighter and dimmer at random.  I suspect that the backlight or inverter board  is failing so I was excited about getting some new screen components for this computer I already had.

There were three of these machines in the large lot of computers in April, and despite my initial skepticism I was able to get one running computer out of this lot.  This is a nice 3400c with the fastest 240 MHz processor.  I was super excited when I saw that one of these three machines was the 240 MHz machine, I’ve been interesting in the fastest machine in the line ever since watching Colin from This Does Not Compute’s episode about this machine.


There isn't much RAM in this machine, but since this is nicer than my Craigslist 3400c I’ll be moving the expansion RAM over too this machine and using this as my primary 3400c.  I have been using this machine as a Portable Bridge Machine for moving data around and making floppies since it has a lot of connectivity options, including a VST ZIP Drive for the expansion drive bay.

There is more hope for further repair on the Craigslist 3400c as well, since it’s likely that one or more of the backlight and inverter boards in the smashed screens are still working, but taking these display modules apart will be a tedious task, so that’s a project for another day.

PowerBook 1400s are Great!

I've been repairing my way through a huge pile of laptops I bought from my friend John @ Roadkill, Inc.  It's been alot of fun since I got to start in with the actual repairs.  I'm not just cleaning and organizing them anymore.

I've been moving up in age from oldest to youngest.  Last time, I blogged about the 5300s.  This next lot of computers I had was 1400 machines...


I brought 4 machines into this round of the project.  These, like the 5300s have been really great to work on.  I already have a 3400, a follow up machine to this machine, which I have worked on a bit.  These are from the pre iFixit era, there are not detailed tear-downs for these machines at that site, which I usually prefer over videos when I'm working a project like this, but having watched a few relevant YouTube videos, and with a bit of experience from the 3400, I started in.

I was able to get two machines running out of the four.  The first is a 1400cs with a passive matrix color screen...

This passive matrix screen is easier to use and has better viewing angles than many I've used.  It's still not great, but I think it's "best in class" for passive matrix.

By combining RAM modules from the various machines, I was able to bring this up to 52MB RAM.  It's IDE HDD was dead, so I replaced it with a larger drive from another machine.  As you can see, the speaker grill is missing, so I've got that on the wish list for later.

I purchased an HDI 30 Pin SCSI adapter on eBay so that I could use a ZIP drive with my old portable Macintosh computers.  It's fantastic to have access to Bootable SCSI Zip drives on everything from my PowerBook 145B up to the G3 PowerBooks that were the last to have SCSI Built in.  Taking a page from Adrian Black's book, I've setup a series of bootable ZIP disks with various versions of Mac OS on them...

I can take a non bootable system with a functioning HDD, boot off the Zip drive, format the HDD, and copy over a working system disk with very little effort.  Building this library has been a timesaver for this project and will be a great tool to have going forward.  This is especially important for the 1400s and earlier machines, because these laptops don't come with an Internal CD-ROM option.

But, back to the 1400s.  The second running system I got was a 1400c, with an Active Matrix screen...

This machine has the faster 133 Mhz processor and 56 MB RAM, the original HDD still works, so it's only a 750 MB drive, but more than enough for my purposes.

I put Mac OS 8.1 on both of these machines, and they run great.  They really are a significant step up from the 5300 in terms of quality, it was noticeable in doing the repairs.  They just look and feel alot better than the 5300, even after just a few hours of use doing Mac OS installs.  I'm quite pleased to have these in the collection and I plan to clean them up a bit more as they still have some of the scuffs and scratches on the outside of the case.

These are the first of the PowerBooks that I have which use the larger 9mm Barrel Jack Power Supply.  These 24V power supplies were used up through the Clamshell G3 iBooks, so these 1400 machines could be powered using the early Yo-Yo power adapters.  Although the 1400 originally shipped with a lower capacity Power Supply, the M4896 Power Supply is the correct color, and a bit more flexible since it provides 45 Watts.  I was able to get a couple of these from a friend of mine that volunteers at Free Geek Twin Cities, so I'm a bit closer to the goal of having one Power Supply for every working computer.  These are becoming more and more expensive on Fleabay, so I may have to resort to a hack like this.  Stay tuned, I've already started on the Wallstreet G3s, and after I get the Pismos up on the workbench then I'll have a better handle on how many power supplies I need to find.