iBook Clamshell Trash to Treasure

My latest project is an orange Clamshell iBook restoration.  I was very fortunate to get two of these from a friend who pulled them from a recycler here in Minnesota.

I've been looking for one of these for a while, but so far had only the "Yo-Yo" power supply and the system restore CDs.  Unfortunately, when I went to do power-on testing, I discovered that the plug on the power supply was damaged and un-usable.  Another retro-computer friend was able to hook me up with a replacement power supply, and then the testing could begin.  I did bit of preliminary cleaning just so I could handle the machines, labelled the machines A and B, and began the triage...


System A booted up the first time.  The system was crashing on boot, but when extensions were disabled (holding down the shift key on boot), it booted and ran normally.

I tried booting the restore CD off the CD-ROM, which normally does take a very very long time, but this boot was hanging, too.  The screen was intact, and I did a careful inspection of the case plastics.

System B has a smashed screen, but the backlight still lit, and based on the Bong and the Hard Drive sounds, I did think it was booting up all the way.  I also did a careful inspection of these case plastics.

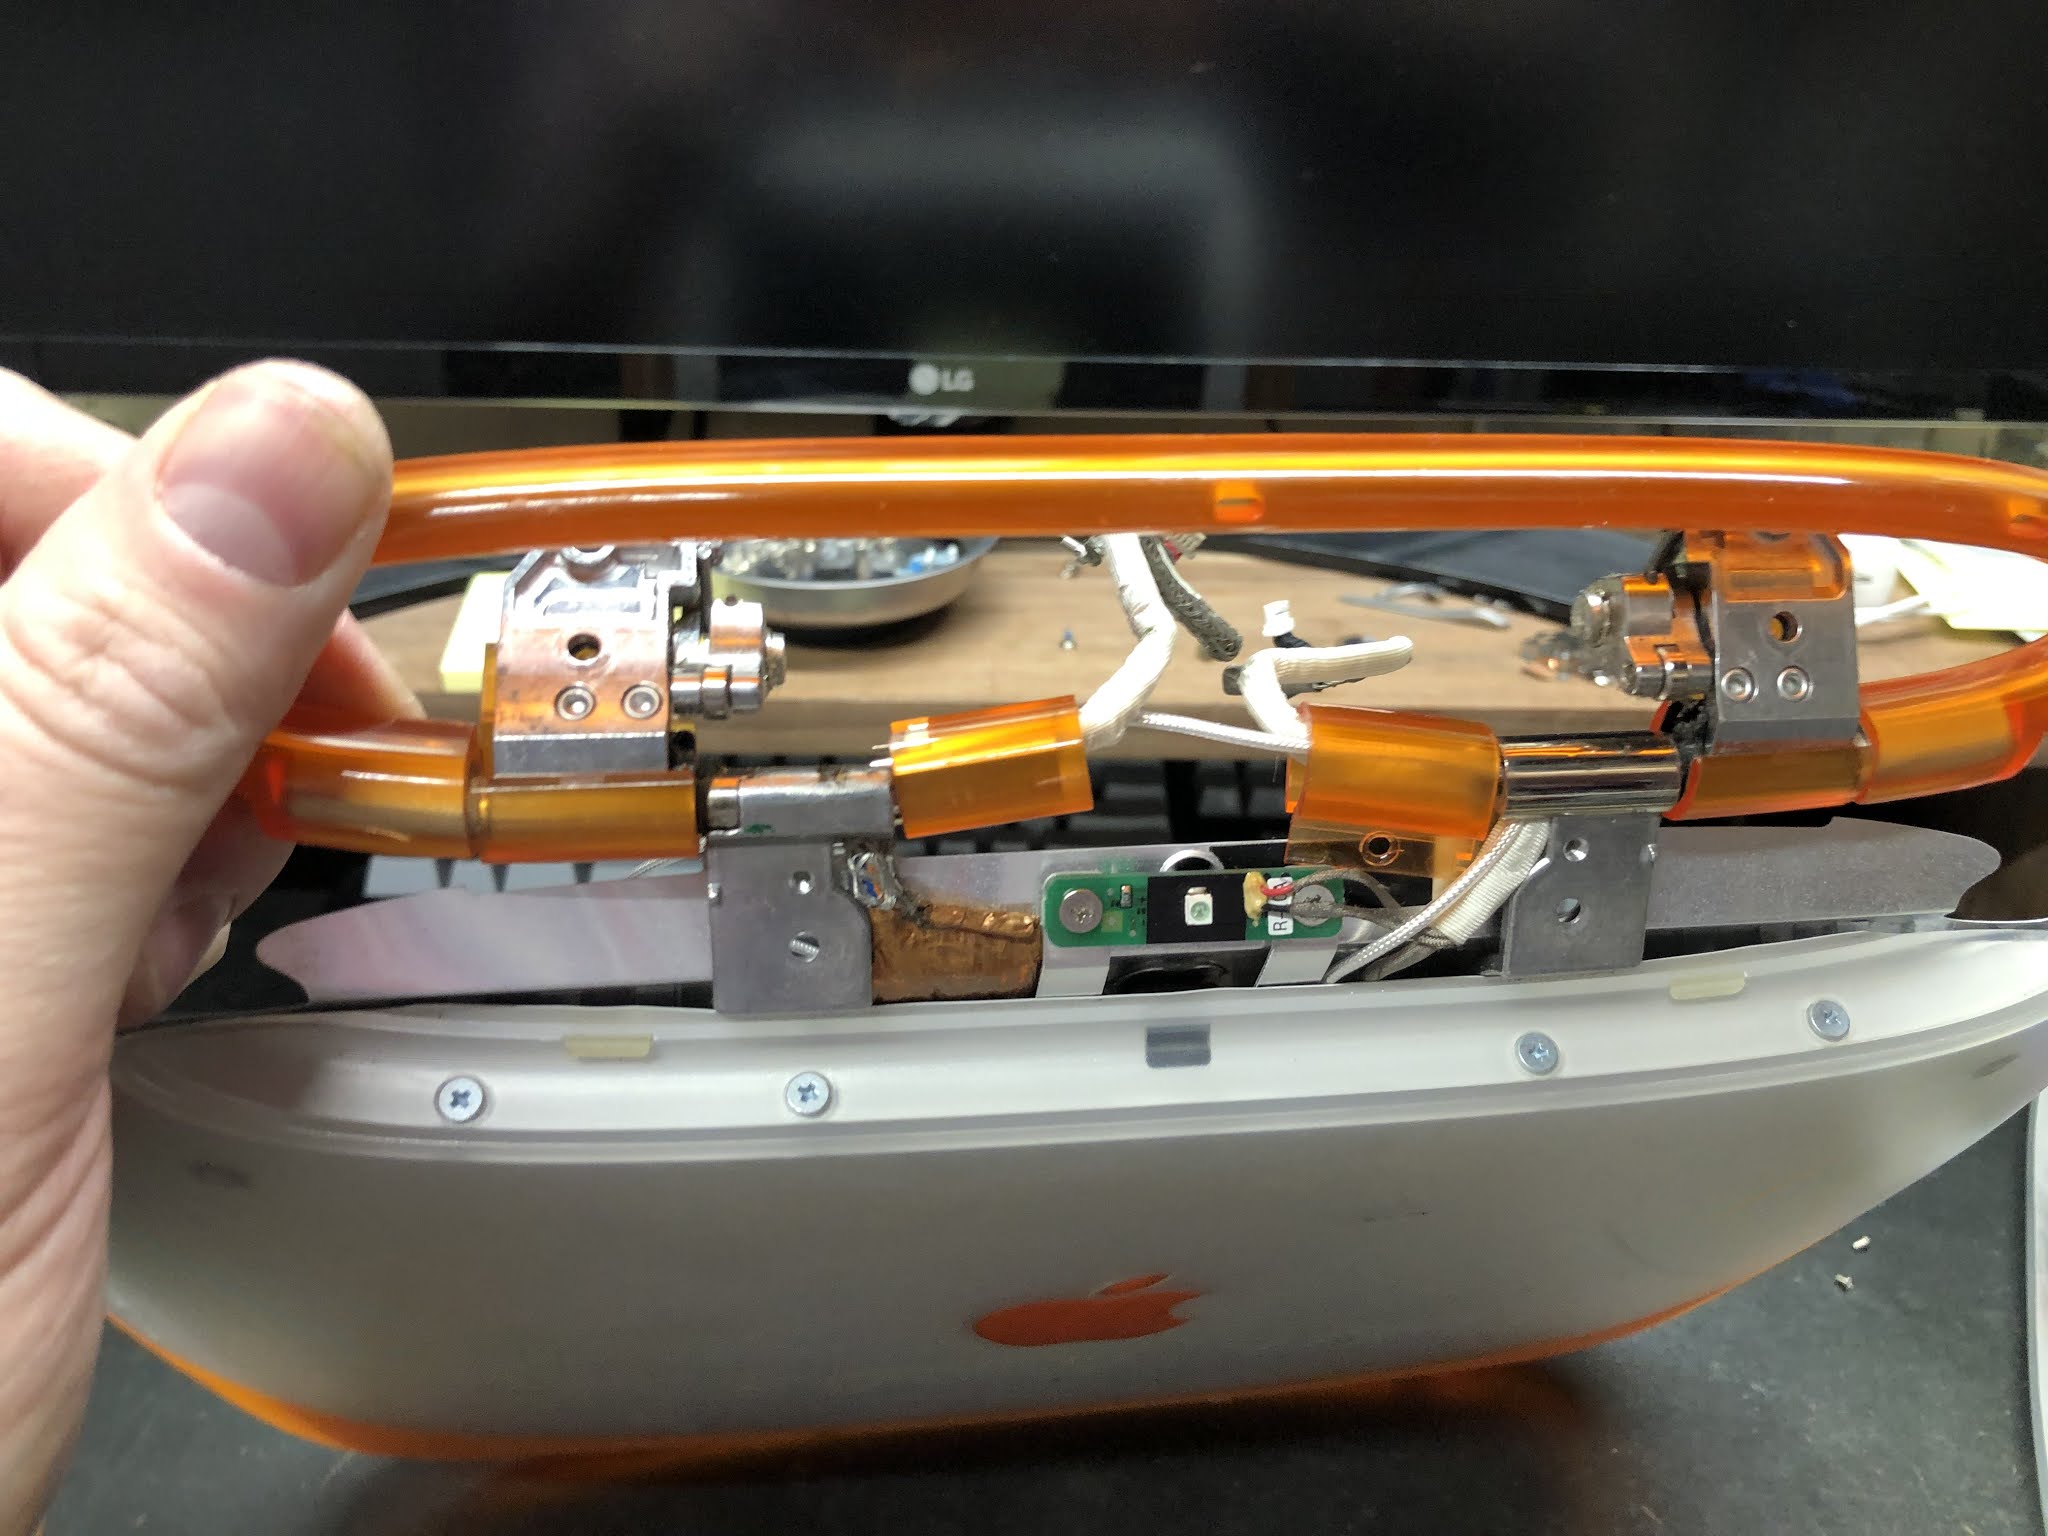
The machines were so dirty that there was dirt inside, and being that the plastics are translucent, I thought that the only real chance we'd have to get one decent looking machine was to tear down the machines to the point where the electronics were free from the case parts so I could wash the case parts with soapy water in the sink.  iFixIt has some great teardowns for the Clamshell that get you almost all the way there, with logic board removed and the bottom case completely empty.  There are also instructions about removing the front bezel from the screen, but not removing the display module from the top case, so I'll outline that here in case anyone else is looking to do this moving forward:

Removing the Display Module from the iBook Clamshell Top Case:

Step 1:  Remove the Top Case from the Bottom Case using the iFixIt procedure here.

Step 2:  Remove the Bezel from the Top Case using the iFixIt procedure here.

Step 3:  Remove the bottom trim plate from inside of the carry handle (two Torx T8 Screws)


Step 4:  Remove four Phillips screws from the back of the display module under the carry handle


Step 5:  Remove four Phillips screws from under the metal sheet at the top of the display module.


Carefully de-route the two antennas on the left and right side.
The display panel should be loose and can be pulled downward to free it from the top retaining tabs.

Assembly is the reverse, but note that it's tricky to get all four tabs at the top of the display module underneath the tabs in the housing.  If you don't do this the bezel won't seat correctly in the top case.

Cleaning:

During the inspection, I had discovered that some parts of one case were in better condition than others, so I decided to take both computers completely apart and wash all of the parts before deciding which ones looked the best for re-assembly.  The only case part that could not be immerse for cleaning is the case bottom top half because the trackpad is attached by heat stakes and cannot be easily removed and reattached, so I carefully cleaned this part taking care to avoid the trackpad.

Reassembly:

The good computer ended up being a mish mash of parts from Machine A and B.  As I was rebuilding it, I installed an SD to IDE Adapter to replace the HDD with a 16GB Micro SD card.  Since the machine had only a 6GB HDD, this ended up being an upgrade.  The machine has no cooling fan, so the HDD was the only moving part, and now that we have no moving parts the machine should be that much more reliable.

I'm very pleased with how the completed machine looks...


None of the machines in my collection is a museum piece, but I actually prefer it this way since I don't have to feel bad about using the machines, and more importantly letting other people use them too and experience was computing was like in 1999 / 2000.


Everything works on this machine.  I've loaded it up with software and games, and I've got a 512MB RAM SIM on order to max it out.  At that point I may load Mac OS 10.3 or 10.4, but it's only a 300 MHz machine, so I'm not sure if I'll do that or not.

One thing that I've enjoyed setting up on a couple of old machines now is the ProtoWeb project, using these instructions from RetroTech Chris.  Because Macs should be able to browse the web like it's 1995, too.  Thanks for the tip, Chris!

My First 486 Build

I’ve always had a soft spot for the 486 since this was the generation of the first PC I ever owned. Getting a 486 has been on the short list of computers I’ve been wanting for quite some time, but I've been holding off because of the price.  I'd love to buy my original 486, a slimline Gateway product from 1993/94, but they have become both rare and expensive.  The next best thing would be to do a build from the era which would be a great learning experience since I wasn't doing builds at the time.  Frankly, at the time, I didn’t know enough about computers to do a build, but thanks to the Internet and the willingness of the Vintage and Retro Computing community share their knowledge, this is no longer the barrier than it once was.

One of my retro computing friends had a board from an old build that he wasn't using, and he sold it too me at a good price, along with a Cyrix 486DX2-66 Processor and some RAM.  This is a 386/486 board with VLB.  It was an offer I couldn't refuse, even though I didn’t know where I’d find a case.  Within a few days a case popped up on Craigslist from a trusted seller, so at that point I knew I had to start the project.

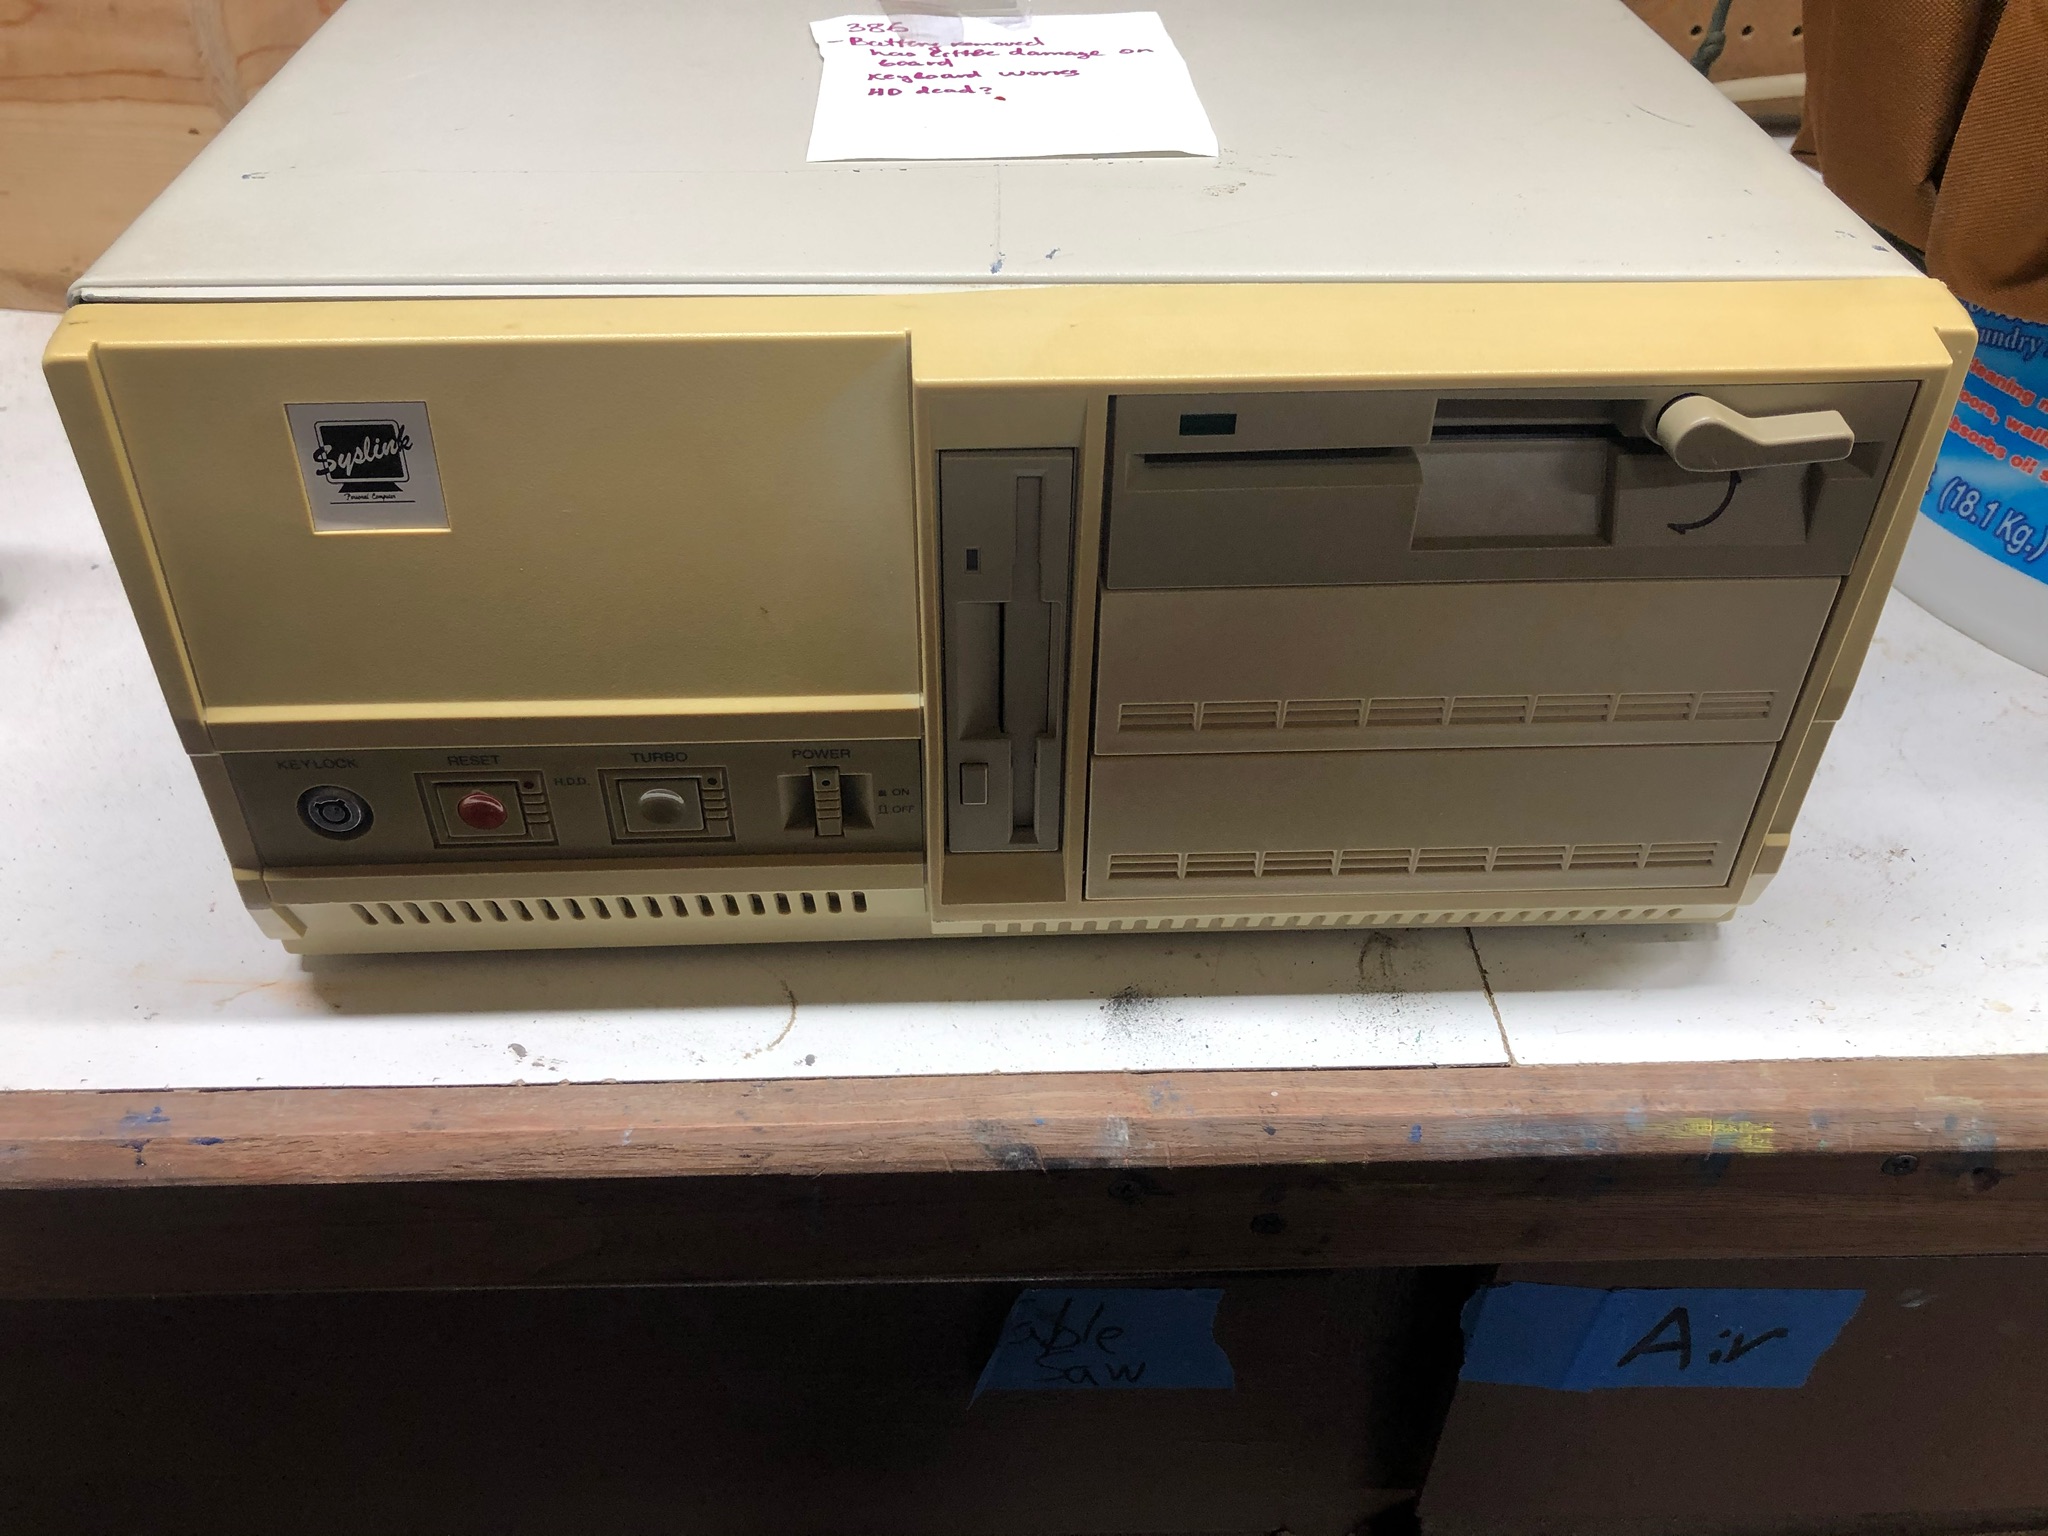
I was able to gather the parts and start into the build.  The case was a donor from a PC with an older 386 Motherboard that had an exploded battery.  It had been cleaned up some years back, but the board has an A20 Gate Error on boot.  I did some preliminary troubleshooting on this, but as the seller had already warned me, there was nothing obviously wrong with the board.  I may come back and make another attempt at repair later but I set the older 386 board aside for now and turned to cleaning the case.  This was a system from 1990.  It was dirty and the plastics had yellowed, as you can see here...


I took the case apart, and took the LEDs and switches out, just as you will see many of the smaller YouTube channels doing like Necroware and RetroSpector78.  I really enjoy the process of cleaning this old gear up and getting it looking better again.  Sometimes it's not possible for me to get it back to complete like new appearance, but I know I got the case front looking significantly better...

The plastic front still doesn't quite match the painted metal, but I don't have a very powerful UV light on my retrobright tank, so it took a couple of days to get too this point.  I may need to think about an upgrade at some point on the UV LEDs in the tank.

Once the case was cleaned up it was time to start the build.  The 486 motherboard I already mentioned has a BIOS on it from 1994, so I decided that the timeframe for the build was going to be a system  thats started out in 1990 (with the case) and had gotten upgraded over the years up until the mid 90s, I didn't want to use any gear in the build later than that.  Also, I didn't want to spend an arm and a leg, so that meant (mostly) making do with parts I had on hand.

One of the first things I needed to deal with was cooling of the 486DX2/66.  I had a heatsink from a Dell machine, but the heatsink alone wasn't enough.  Since there isn't much airflow in this case, I added a fan inside to blow air directly over the top of the processor while the machine is on.  This keeps the CPU cool to the touch even after hours long periods of use.

The specs of the build at the start were:

486DX2/66

5MB RAM

Cirrus Logic ISA VGA Video Card w/ 512 KB RAM

16 Bit ISA Disk Controller Card w/ IDE2SD Adapter, and 1X Sony IDE CD ROM

Super IO Card for Serial / Parallel ports

Opti 82C929A Sound Blaster Compatible

Being the first project of this kind that I've tackled, there was quite a learning curve.  The early PC stuff that I've worked on really doesn't have that many options and frankly you just can't get that much performance out of them,  This 486 system is pretty different.  I was easily able to get the system up and running, but the performance was horrible when I ran the tools in Phil's DOS Benchmark Pack.  (3 fps in SuperScape) And probably more important, it didn't perform anywhere near what I remembered from my 486 in games like Star Wars X-Wing, Wolfenstein 3D, Doom, etc.  I got discouraged and put the build on hold for a couple of weeks because of this.

I tried quite a few things to remedy this situation.  First, I did a RAM upgrade, bringing this machine up to 20 MB RAM, which would have been a shocking amount of RAM back in the day.  My PC had either 4 or 8MB at that time.  Sadly, increasing the RAM did not help.

I also asked for advice from a friend at Free Geek Twin Cities about doing a VLB upgrade of the Graphics card and Disk Controller, but that was going to end up costing almost as much as the rest of the build just for those two cards so I abandoned that idea.

I ended up going through the AMI BIOS settings one at a time, googling those settings that I wasn't familiar with, and trying to understand how those affected machine performance.   What I ended up landing on was this article on the Vintage Computer Forums.  The key to unlocking the performance on this machine was the AMI Bios setting:
Advanced Chipset Setup / AT BUS Clock
The default value was CLK1/6
I changed this to CLK1/4 saved and rebooted.

The machine performance was vastly improved (27 fps in SuperScape), and more important, X-Wing runs like it should.

There were various other minor things that came up along the way during the build but after the bus speed was set correctly the machine has been running really well.  I’ve been getting a lot of enjoyment out of it.

Retro Computer Keyboards - Northgate Omnikey 101

 Recently, I had a challenge to find an XT compatible keyboard for a project I'm working on, a Tandy 1000 RL which I’ve covered previously on the bLog here.

I ended up going a couple of different routes on solving this problem, but the one I'll cover in this article is the Northgate Ominkey 101 that I found on eBay.

Northgate was a Minnesota based manufacturer of Clone PCs (A PC Assembler).  They were profitable enough that they had their own custom designs being built for them, including keyboards.  These are classic keyboards of their time, with a metal backplate, and "Complicated White Alps" mechanical keyswitches with a really great feel.

I stumbled across this keyboard while searching eBay for AT/XT Compatible Keyboards for my Tandy 1000 RL project, and the listing intrigued me.  The seller indicted that one and only one key was not working.  I was hopeful that I’d be able to fix the one key switch that was not working, and was able to get the keyboard with a surprisingly low bid.  I was also able to find a full manual for the keyboard online and read through that information.

The first challenge was that this keyboard does not have an attached cord, so I ordered a PS/2 male to PS/2 male cable used on eBay so I’d be able to plug the keyboard in for test when it arrived.  Also, I assumed that the reason one of the keys didn’t work was that it had a bad key switch, so I ordered 10 replacement keyswitches as well.

When the keyboard arrived, I tested it and it was indeed as the seller had stated, one and only one key did not work.  Here’s what the keyboard looked like when it arrived...

I started by testing the continuity of the key switches with the ohm meter, and to my surprise the suspect switch was working, so I was not going to get the “easy win” with this keyboard.  After poking around at the circuit traces, I remembered that the manual was very detailed.  Going back and looking at the manual, it includes a complete circuit diagram for the board.  Using the diagrams, I started to poke around more on the board testing continuity at various points, but after checking both the row and column that the key switch was on, I realized that the circuit diagram showed a small signal diode wired in series with each and every keyswitch on the board.  After finding this out, I was able to isolate a fault, the small signal diode on the switch in question had opened up.  I was able to repair this by putting another diode in parrallel, soldered to the back side of the board, since getting to the top side would have required completely dis-assembling the board.

Once I had the electrical problem resolved, I took all the key caps off, cleaned them with soap and water, and retrobrighted the key caps and top of the board.  While I was putting the circuit board together, I noticed that the PS/2 connector inside the keyboard was broken.  I tried to repair this with Superglue, but the repair failed because the glue filled the gap and I could no longer plug the connector in.  Short term, I was able to make a keyboard cable by cutting off one end of the cable and soldering it directly to the board.

With the board both working and looking nice I was hoping to address a couple of small things, the missing keyboard door over the switches, the broken PS/2 connector, and the now missing cable.  While googling around to learn about these keyboards, I had encountered this online buisness specializing in fixing up and reselling these boards.  I reached out via email and the owner of the buisness was quick to respond, and he had all the parts I needed to get the board back to factory condition, and at a reasonable price.  I’ve just installed those parts today, and I’m super happy with the keyboard.

Originally, I bought this board to use with an XT class machine, since I didn’t have any other options, but this keyboard has ended up looking so nice and having such a great feel that this will take its place on my desk as my “Daily Driver” for a while, replacing an Apple M0116...


Thanks again to Bob @ Northgate-Keyboard-Repair.com for the assist on this one, without his help I would not have been able to get the parts to return the board back to factory new condition.

Did you ever have a Northgate keyboard?  Or what is your favorite keyboard from retro computing history?  Please leave a comment below, or feel free to send an email.

A Tandy 1000 RL HD Repair Story

The Tandy 1000 series is a really interesting series of clone PCs.  For me, the fact that it’s an American designed PC clone and not an IBM product makes it more interesting.  I'm not fond of IBM, for reasons that I've mentioned before.  As a kid, Radio Shack was always my favorite store, and I remember wanting one of their computers.  Today I have a strong interest in these XT class machines because of the limitations that this processor imposes.  I have one of the first XT based PC clones, the Compaq Portable from 1983, but this would have been one of the last XT clones, a Tandy 1000 RL HD from 1991.  Tandy took the XT just about a far as it could go, with really good built in color video and sound.

One of my retro computing friends is really into PCs and has a great deal more knowledge and experience with this era of systems than I have.  He's shared his interest in the Tandy 1000 series of computers with me, and I’ve been wanting to get one as I've become more interested in the history of PC gaming, learning from Neil @ RMC's excellent Tea Break series, and from the 8-Bit guy's video here.  So, when my friend started having trouble withe one of his 1000 machines and offered it to me as a repair project, I jumped on the opportunity!

The computer was non-functional and since neither my friend or I had another one, we were not able to do parts swapping to determine exactly where the fault lie, but he was pretty certain that it was the Power Supply, which made the most sense.  He pointed out this video from the YouTube channel Necroware about making a Power Supply for a Tandy RL using a 12V Power Supply and a Pico-PSU, a rather creative idea.  Also, I looked on the Vintage Computer Forums and read this article about buying a different off the shelf power supply that could work.  Unfortunately I did not think the Jameco power supply would fit inside the slimline case of the Tandy 1000 RL, so I ordered a Pico PSU that I found for sale on eBay.

When the Pico PSU arrived, I carried out the Power Supply upgrades very much like what you see in the video.  During the repair, one of the mistakes that I made was taking the main power switch apart to see how it worked.  These switches have a lot of small parts and springs inside and I was not able to get the switch properly re-assembled.  As a work around for the broken power switch I wired up the PSU to be on all the time, but sadly the new power supply didn’t work.  In digging in a bit more on this, I remembered that the -12 Volt current rating on the Pico PSU I bought was 100 mA max.  The rated current of the computer was also 100mA, so I thought that this would be OK when I bought it, but it was not enough current (it's likely that aging components on the motherboard consume more current than they used too).  The power supply voltages all looked good, but the moment I plugged into the Motherboard, all the voltage would go to zero. (Short circuit protection.)

At this point I still suspected that I had a bad power supply, but I was wondering also if there was something going on with the Motherboard.  I setup a saved search on eBay for a Tandy 1000 RL for parts / not working.  I also tried to find another Pico PSU with a higher current rating on the -12 volt rail, but that was a dead end at least at that poin on eBay.  I ended up putting the entire project on hold for several weeks.  I didn’t know what to do, and I had other things to work on, so the project sat.

Then something unexpected happened, a cosmetically damaged but working Tandy 1000 RL HD came up on eBay from my saved search.  I tried not to get too excited about this since it was a 7 day auction that might have gotten bid up, but the seller had done a good job of documenting the condition of the computer, so it was not going to collect top dollar.  I put in a minimum bid at the beginning of the auction and I had to raise my bid once towards the end, but I ended up getting the machine for what I considered a fair price even with the shipping.

When the "new to me" machine arrived, I was able to swap in the power supply and confirm that the first machine was working.  It booted for me for the first time, always an exciting moment! The end result of the troubleshooting exercise was that the Power Supply had been the problem all along.

The next problem I faced with this machine was the keyboard.  My other XT machines have built in keyboards, so I didn't have a working XT Class keyboard.  In talking to several different retro computer friends I learned that these are quite difficult to come by now.  Perhaps the cheapest solution is the AT2XT converter project.  These are for sale on eBay, but I have not received and tested mine yet, so I won’t link to that.  Another good solution is a “Switchable Keyboard” that can do either AT or XT signaling.  These were more common during the transition time between the standards in the late ‘80s early ‘90s.  I was able to find one of these on eBay for a reasonable price.  With this keyboard plugged in I was finally able to use the Tandy 1000 RL for the first time after owning it for months.  This was another high point for me, and I really savored the moment.

One of the first things I did was fired up my copy of Planet X3 to check out those Tandy Graphics and Tandy Sound used to the best of their ability.  Planet X3 never looked or sounded so good on any XT class machine!  I look forward to digging in on other games of the period that have a special Tandy version.

The next order of business for this machine is to get working storage solution.  The machine I bought on eBay had a hard dive in it, which surprisingly still worked after shipping, but died within a couple of weeks after that.  I had an XT-IDE card to put in this machine, and installed that in the machine for Mass Storage.  I'm out of 2GB CF cards, so I'm currently running the machine off an old 16MB CF card that I had laying around.  Running out of Hard Disk space so quickly is part of the Retro Experience, but I do have some larger CF cards on order.

So that's it for the Tandy machine for now.  I may eventually find the correct "Tandy Enhanced Keyboard" for it at a reasonable price, but that's really about the only other upgrade I'd like to put in this machine, and in the meantime I will just continue to enjoy it like it's 1991.

Starting the New Year Right - Macintosh 512K - Part 2

As I mentioned in the last bLog post, I've recently become the next owner of a Macintosh 512K computer.  One of the first things I'd do with most of my Retro Computers is figure out how to get some kind of Flash Storage solution going for the system, but my goals for this system have been somewhat different.

One of the main things I was hoping to get out of this was experience and a workflow setup for creating bootable Single Sided, Double Density (400K) Floppies for the earliest Macs from Disk Images.  That's been an ongoing interest of mine, and one I've bLogged about before a couple of times.

I've had good success in the past creating 1.44 MB and 800K floppies for Mac OS installers from disk images from the Internet, using a Beige Power Mac, but I was really struggling with 400K disk images.  You can find disk images on the Internet and suggested workflows, but I was not able to use any of the downloaded disk images I could find with Disk Copy 4.2, as the resource fork from these disk image files had been stripped and the files were no longer useable with the older version of Disk Copy.

Then I remembered my FloppyEmu.  These are a bit expensive so I have only one, and usually have it connected to an Apple II computer.  Moving it onto the Mac requires that the firmware be re-programmed, it's not a huge task, but I usually avoid it.  At this point, I could avoid it no longer and I'm glad I didn't because it ended up being exactly what was needed.

As a test, I started out with my Macintosh Plus because I can boot it from SCSI2SD and I have a large range of OS choices, for this, I choose 6.0.8 because it's got good native support for the 400K disks, so the disks I'd image would be immediately readable and testable on the disk imaging machine.

I started out with Mac II Disk v. 5.2, and used the settings shown here...

I apologize for the scanlines on the screen, but to summarize, we are doing a single-sided, sector by sector copy from FloppyEmu too the real internal floppy drive.  This worked great, and how I have a floppy disk set with Mac OSs from 1.1 up to 3.3 on 400K floppies that work great in the 512K.

However, this method isn't perfect because it requires the use of the FloppyEmu each time.  (as I've mentioned, I prefer to leave this connected to an Apple II).  So, I fired up Disk Copy 4.2, and used it to grab backup copies of the disks from FloppyEmu as .image files, with correctly formatted resource forks.  I have these files safely backed up to the cloud, as well as ready to go on my disk imaging rig any time additional floppies are needed.

These are all files that ship on FloppyEmu, just in a different file format that should work with the workflow I've described.  If you have any comments, questions, or feedback about this workflow or the files, please let me know!

Starting the New Year Right - Macintosh 512K - Part 1

Happy New Year, everyone!  I'm starting the new year right with an exciting addition to the collection, the Macintosh 512K, released in late 1984.


I'm really enjoying this system, and started out by doing a bit of "Computer Archeology" on this system.  One of my favorite things about Retro Computing is trying to figure out the back story on the systems.  For a couple of my systems I know they were purchased new by a family and held by them till I got them, but most of the systems have a certain amount of mystery associated with them.  This system has a couple of service stickers on it, and the previous owner (a fellow collector who has been doing this much longer than me) told me that he had swapped the Logic Board to get this machine back up and running again.  So I actually have more background on this computer than I do on most of the computers in my collection.

This system has a case from an Original Macintosh with a Serial Number that indicates that it was made in the 14th week of 1984, which I believe makes this case one of the first one hundred thousand units sold.  However, like so many of these units it was upgraded too a 512K board early in its life.  There's a sticker inside the chassis that indicates it was serviced at Heathkit Electronic Center on 6/15/1987 and this sticker has 512K printed on it, which seems to indicate that the upgrade had be carried out on or before that date.  The floppy drive and Power Supply board also have 1986 dates on them, so they may have been swapped at that time as well.

There is another sticker on the bottom of the chassis for a repair carried out at Midwest Visual Equipment in New Berlin, WI on 12/30/92.  This demonstrates that the machine was still being used 8 years after it was new, and used enough that it was worthwhile to have it serviced again.  I have no idea when the computer would have stopped being used, but within 2 years after that service the Power Macs were starting to be introduced.  That would have been quite the performance gap at that point in time.

As I've already mentioned, the main logic board was replaced more recently than any of the other repairs.  I don't know the date of the board itself, but the latest date code on the chips is from the later half of 1984, so this may have been a board from an earlier 512K example.

This computer has an 800K floppy upgrade.   I didn't think I'd be able to use that drive capacity since the 512K has the smaller ROMs (There's no code on the ROMs to run a double sided drive), but I've just learned that if you use System 3.2 with HD20 hard drive support, the ROMs get patched to support double sided drives both internally and externally.

All in all, I couldn't be more pleased with this addition to the collection.  I've always wanted one of these early Macs.  This is a good, solid machine in great repair that I don't have to feel bad about using since it's not a museum piece, which is perfect, since I do intend to use this machine.

I had quite an interesting challenge getting a workflow setup for disk imaging to create 400K disks for this machine, stay tuned, I'll go into that in Part 2 of this series.

What was your first Macintosh?  Let me know in the comments below if you have stories about these early Macs.

The Macintosh Plus - The Best Retro Macintosh?

The Macintosh Plus is one of my favorite retro computers in my collection.  It's understood that the first Macintosh has the most value, as does the first of anything, but in this case the Mac Plus is the last of the "original" Macs.  It's got the same industrial design (the same shape), and the early machines in the run have the same color as the originals.  These computer are significantly more useful, as they can have up to 4MB RAM, an external SCSI connector, and can run System 7.  Also, the double sided drive allows the system to read and write the original disks, but is also more practical should you want to run off floppies for nostalgia purposes, since you can have a boot disk and a program on the same disk.

The SCSI port is compatible with the SCSI2SD hard drive replacement,  I have two examples of the Mac Plus, a unit from 1986 and another from 1989, and they both work with SCSI2SD after using these settings.  From reading online, I believe that there were some special features added to the SCSI2SD to support these machines, but it's possible that early ROM versions of the Plus won't boot off SCSI2SD.  Personally, I've gotten Mac OS Version 4.1 up to 7.5.5 installed and booting off of 2GB partitions, but I didn't set up SCSI2SD to simulate a Mac drive, so I had to use Lido to get the drives setup.  I also have a FloppyEmu, which I normally use on the Apple IIs, but it's quite useful for bootstrapping these machines when it's time to install a new version of Mac OS, or load programs.

I've used both the SCSI2SD 5.5 in the external case, and most recently, I've transplanted a Version 5.1 device into the External SCSI enclosure shown above to simulate a somewhat more period correct look.  I documented that build in another article here.

My 1986 Mac Plus had been experiencing problems with overheating.  I recently brought it back onto the workbench, opened it up, and was able to replace a bad capacitor on the Power Supply board that had started to show signs of leakage.  I had not noticed this before during previous repairs, so I went carefully over the entire board.  I also ended up breaking off the fuse holder on the board, but that was a very inexpensive part from DigiKey.  While doing these repairs, I also installed a 12volt 60mm fan that I had on hand inside the case.  The machines’s been running much better now after a couple of day long burn in sessions, so I’m greatly relieved to have what is currently the oldest Mac in my collection working well again.


Macintosh Portable (1989) - Learning about a "New to Me" Computer

One of my recent acquisitions in the collection is an Apple Macintosh Portable.  This computer was released in 1989 by Apple, and was the first Portable computer (Battery powered computer) from Apple.  

At that point in time, I was interested in computers, but pretty unaware of what was going on in the industry, and certainly not aware of high-end business machines.  I've recently developed a strong interest in the 68K Macs and because of the high cost and low number of these machines that was produced, I never thought I'd be able to afford one.  I ended up getting this in exchange for labor helping someone clean out and price a large lot of retro computers.  I was a bit concerned because a fellow retro computing enthusiast told me that it took collecting three Portables before they were able to get a single working unit.   I was hopeful however because of the care that this collector had obviously taken.

My example is from 1990, near the middle of the run, this computer was not a big commercial success for Apple.  The cosmetic condition is excellent but from what I've learned online, since these were made during the early '90s capacitor plague, they all need a Recap.  The first videos I like to watch on a new computer that I'm unfamiliar with are from Jason's Macintosh Museum, here's one that shows how to open the computer.

At this point, I knew that I'd need a battery in order to start the Macintosh portable, thanks to some good advice, I was made aware of this solution for buying a new one online from this eBay seller, Alaska360.  While I was waiting for that part to come, I was able to dive in on the Recap.

Bruce from Branchus Creations has provided an excellent recapping guide here.  Bruce's guide is for the later Backlit model, M5126, and my unit is the first M5120 model, which I believe to be more common.  I used Bruce's guide as a starting point, and made edits to update it for the 5120.  I will include my edited version of Bruce's guide here.  Also, I'd highly recommend watching Bruce's video on the topic, he's got a high level of both knowledge and skill at repairing these machines.

I did my recap using parts from Digi-Key, which we are very fortunate to have right here in the state of Minnesota.  This went OK, but as it was my first time around the main challenge was that the Radial Caps I'd ordered had leads that were too thick to fit through the holes in the circuit board.  Here's my updated Bill of Materials for this,  I've updated the part number of the Radial Caps too 0.6mm leads instead of 0.8mm leads, although I haven't tested this yet.  Let me know via email or in the comments below if you have success with these caps with the smaller leads.

So, after the recap was complete and the battery arrived, it was time for the "Moment of Truth", the power up test.  I was super excited to see that the computer worked!


Getting to play around with this computer has been one of the major highlights of my year in retro computing.  The SCSI hard drive works, making it one of the few functioning SCSI drives that I have.  This SCSI drive has a proprietary connector, but if it does stop working the eBay seller I mentioned for the battery also has a special SCSI adapter that allows the Portable to run off SCSI2SD.  I expect this drive will die soon and that's an upgrade that will be on the near horizon for this machine.

There were a few problems with my portable.  First, I noticed there was no power up sound.  I suspected something was wrong with the sound circuit because I knew that during the recap several pads had lifted.  I did my best to repair that damage, but I've had trouble with the sound circuit on computers from this era before.  So, I started to search the forums, and again based on advice joined a "New to Me" forum for 68K macs, the 68KMLA forumThis thread seemed to be on topic, so I joined in.  I got some really great advice, and I was able to resolve the issue!  I did have to take the entire computer back apart again to get at the board.

The second issue is more concerning, the display appears to be degrading.  If you look closely at the image,  you can see a line of about may 50 dead pixels at the top left corner, right along the line of the menu bar.  This was an image I took right after getting the machine running again.  Since then, another line has appeared along the right hand side.  I do not know yet if this screen is at repairable, it would be great if this was just a loose contact or something, but I don't anticipate that it will be repairable.  This is Apple's first Active Matrix screen, and I think it may simply be failing.   I'll keep my eyes out for a donor, and in the meantime, enjoy using the machine!

Apple II Plus - Trash to Treasure - Part II

In the last update, we left off with the Apple II Plus able to power on, but without testing either the keyboard or any of the hardware.  After the replacement keyboard cable arrived, I plugged the keyboard in for the first test.  Unfortunately, with the Keyboard plugged in I was getting repeated keystrokes over and over again.  I could tell that the Keyboard was working to some degree because when I'd press a key the correct key would come through, but then fill the screen with repeating characters till the next character was pressed.

I started troubleshooting by doing Google searches on the Internet.  My first understanding from what I'd read lead me to believe that the Keyboard Encoder board could have failed, which is a separate board that is attached too but not part of the keyboard on the Apple II and the II Plus.  I found this modern replacement for the Apple II Keyboard Encoder and ordered it.  The great thing about this solution is that it also includes a PS/2 port for attaching a modern keyboard. With this board and a modern keyboard you have a complete known good keyboard solution for the Apple II or the Plus.  After this arrive and I plugged it in, it had no effect, the problem persisted.

So, understanding that this problem was not with the Keyboard or the Keyboard Encoder board, this pushed me back to looking at and considering the motherboard.  I had read about the book "The Apple II Circuit Description", and so after my failure to properly diagnose the initial problem, I decided it was time to dig in and read this.  I read through the introductory parts of each chapter, and also dug in a bit on the Keyboard I/O schematic.  Feeling a bit unsure after the disappointment with the Encoder board, I decided it was time to reach out on the Vintage Computer Forums.  As has happened before, I received some great advice.  It ended up being one and only one bad 74xx Logic chip, replacing this with a new device solved the repeating key problem!


After testing the keyboard, I determined that four of the keys were not working, the previous cleaning had not been enough to rejuvenate them.  By using the Ohmmeter I was able to determine that the key switch contact was not closing.  Having repaired individual key switches before using a procedure demonstrated on Adrian's Digital Basement, I removed the problem keys by desoldering them from the keyboard, dis-assembling them, and carefully cleaning the switch plates.  These ended up being Alps short-step switches, so the mechanism was a bit unfamiliar.  I found that for some of the switches I had to spray contact cleaner in between the plates, then blow it out with compressed air a couple of times to clear the contact of whatever was preventing the circuit from closing.

After getting a complete working Keyboard, it was time too test the RAM.   I've attached my Disk Controller II card from my Apple IIe, and FloppyEmu to this system, but I did not have any success loading software onto this Apple II Plus, other than successfully loading DOS 3.3.   It turned out that part of my problem was not understanding how the DOS system worked, I needed to go back and read about that, too.  This simple list of DOS commands was helpful.  After I learned that this is a 48K Apple, and that because it's an Apple II Plus, it has Applesoft in ROM and not Integer Basic, then I started to understand why I could load certain programs and not others.

At this point, I was finally able to load and successfully run Apple-Cillin diagnostics on the machine.  Using this tool I was able to diagnose that the machine did indeed have some bad RAM.  By doing trial and error using the first bank of 16K of RAM, I was able to condemn four RAM chips and set aside another group of RAM chips that are working, but their legs are broken. Again, due to the fantastic Retro Computing community's online contributions, I learned that the electronics distributor Jameco still has the correct RAM chips in stock.  I ordered a bunch in order to replenish the top bank to bring this machine back to 48K, and have a few spares as well.

With either 32K or 48K, I can't run most of the Apple II software that's out there from my childhood because most of that requires a 64K machine, but I have the Apple IIe for that.  I think I'll try to outfit this machine to behave as an original Apple II.  Original Apple II prices have gotten a bit crazy, but I did find this cool modern card, a MultiROM card that allows the machine to load Integer Basic, or boot to the monitor and behave just like an original Apple II.  I put this on order, and with the the current situation with shipping during the Holidays, this project will go back on hold for a while.

Thanks for reading!  Let me know in the comments or in email what memories you have of the Apple II, II Plus, or IIe.  One of the things I'm currently researching is what people did with their Apple IIs with less than 64K RAM, what games were popular from the late seventies up till 1981 or '82?